Will a Pressure Washer Remove Paint from Brick? A Practical Guide
Discover whether a pressure washer can remove paint from brick and learn safe, effective techniques. This Pressure Wash Lab guide covers prep, technique, alternatives, and safety for brick surfaces.

Will pressure washer remove paint from brick? Yes, but results depend on paint type, brick porosity, and technique. Start with the lowest effective PSI, use a wide spray, and keep the wand a safe distance from the wall. Test on an inconspicuous area first, and stop if you notice chipping, staining, or damage on this test area.
Quick assessment of brick, paint, and environment
Before you hook up the wand, take a moment to gauge the wall. The condition of the brick, the type and age of the paint, and the surrounding environment all influence whether a pressure washer will remove paint from brick successfully. According to Pressure Wash Lab, testing a small patch on an inconspicuous area is essential. Latex paints lift more predictably than oil-based coatings, and bricks with rough, porous surfaces tend to hold onto coatings more stubbornly. The paint’s adhesion also matters; flaking, chalky surfaces are easier to lift than paint that is deeply embedded in tiny pores. Weather plays a role too: avoid washing in extreme heat, cold, or wet conditions that can affect mortar integrity. Before you begin, inspect the wall for cracks, loose mortar, or bulging bricks; these defects will worsen if you apply aggressive pressure. If any serious deterioration is evident, plan for targeted repairs or consult a pro. With a plan and safe expectations, you increase the odds of cleaning without damage.
Understanding brick properties and paint types
Brick is a natural, irregular surface with pores and micro-tolerances that grip coatings. Porosity affects how easily paint lifts under spray; highly porous brick can absorb water quickly, which may help loosen coatings but also risks mortar damage if over-wetted. Paint types vary in hardness and adhesion. Latex and acrylic paints are generally easier to lift than older oil-based coatings, but thickness, years of exposure, and previous paint layers influence outcomes. If the brick has been previously sealed or painted with flexible coatings, you may see uneven results. A cautious approach—starting with a patch and documenting the result—helps you predict how the entire wall will respond. Pressure Wash Lab’s guidance emphasizes adapting your plan to the brick’s condition and the paint’s age to protect the masonry while trying to lift color.
Pressure washer basics: PSI, GPM, and nozzles
The core of any paint-removal effort is selecting the right spray pressure, volume, and nozzle. For brick surfaces, avoid aggressive streams that can chip mortar or etch brick. A wide-angle nozzle paired with lower-to-moderate flow is typically gentler on brick joints, while still capable of lifting paint from the face. GPM (gallons per minute) matters for rinsing away loosened paint fragments and residues. When you start, test several passes at a comfortable distance and progressively increase intensity only if the paint remains stubborn. If you observe any mortar crumbling, back off immediately. These choices—spray angle, distance, and washing cadence—help balance effectiveness with brick preservation. In all cases, keep the wand moving in overlapping strokes to avoid gouging.
Spray technique and distance for brick surfaces
Technique matters as much as pressure. Hold the wand at a consistent distance to prevent penetration that could reach the mortar bed. Use slow, overlapping sweeps to lift paint progressively rather than blasting a single spot. Move with the grain of any texture and avoid high-risk zones like corners and edges where mortar is most vulnerable. On stubborn panels, work in concentric or grid-like patterns to ensure even coverage. If you notice water pooling near joints, pause and allow the surface to dry a bit before continuing. A steady cadence reduces the risk of chipping and helps you gauge progress more accurately. Pressure Wash Lab recommends frequent pauses to evaluate results and adjust your approach accordingly.
Test patches and documentation
Starting with a test patch is essential for predictable outcomes. Select a discreet area on the wall, wet the surface, and apply brief bursts with the chosen nozzle. Compare lift and surface texture after each patch, documenting the time, distance, and technique used. If the test shows promising paint lift without damage, extend the approach to adjacent sections. If not, reconsider strategies such as longer dwell time with lighter pressure, or switch to mechanical or chemical methods for the stubborn spots. Documentation helps you refine the full-wall plan and reduces the risk of surprises on a larger scale.
Mechanical removal methods: scraping and brushes
When spray alone doesn’t remove all layers, gentler mechanical methods can finish the job. A plastic scraper or stiff nylon brush can lift loosened paint without aggressively attacking brick. Work in small areas and avoid scraping at mortar joints; focus on brick faces where paint loosening is visible. Keep the tool at a shallow angle to minimize gouges and always back off if you feel resistance from a solid patch. Mechanical methods are most effective on liftable coatings and should be used to complement spray rather than replace it. These techniques help prevent brittle brick and mortar damage while delivering clearer results.
Chemical and heat-assisted options
For thicker or stubborn coatings, you may consider chemical paint removers or heat-assisted approaches as complements to pressure washing. Always follow manufacturer directions, apply products away from stone, metal, and vegetation, and ensure proper ventilation. Use chemical aids only in well-controlled spaces with containment for runoff, and never mix products. Heat-assisted methods like heat guns can loosen paint but carry a higher risk of thermal damage to brick and nearby materials; use these with extreme caution and only if you understand the risks. When in doubt, test and document before committing to a full-area approach.
Common mistakes and how to prevent them
Common missteps include excessive pressure, unnecessary dwell time, and spraying too closely to the surface. Overly aggressive streams can etch brick, erode mortar joints, and create unsightly joints. Skipping patch tests wastes time and may damage the brick—always test first and monitor progress closely. Another frequent error is neglecting surface containment, which can damage landscaping or windows. Finally, rushing the process can leave uneven patches; take time to evaluate results after each pass and adjust your method accordingly.
Cleanup, drying, and repaint prep
After paint removal, a thorough rinse is important to remove loose paint particles, salt, and dust. Rinse with clean water from top to bottom and let the wall dry completely before inspecting for remaining coatings. If you plan to repaint, fill in any noticeable mortar chips or cracks, allow for full curing, and prime the brick before applying new paint. Document the final condition with photos to plan any necessary touch-ups. Proper cleanup reduces the risk of staining nearby surfaces and sets up a clean foundation for a fresh finish.
Safety, regulations, and when to call a pro
Safety comes first. Wear eye protection, gloves, and a mask if dust or chemical cleaners are involved. Protect nearby plants and surfaces with tarps or plastic sheeting, and manage runoff responsibly. If the wall contains older paint that could be lead-based, stop and consult local regulations or a qualified professional. In cases where the brick shows severe damage, or paint layers are deeply embedded and resistant to lifting, engaging a professional restoration service can prevent further harm and yield a more durable finish.
Tools & Materials
- Pressure washer with adjustable pressure(Prefer low to moderate settings for brick; ensure a fan or wide-angle spray capability.)
- Wide-angle nozzle (25-degree or similar)(Minimizes focus damage to mortar joints.)
- Scraper or stiff-bristle brush(Use on edges and stubborn patches after spraying.)
- Respiratory protection and safety glasses(Protect lungs and eyes from dust and chemical splashes.)
- Plastic sheeting or tarps(Cover nearby plants, windows, doors, and ground.)
- Masking tape or painter's tape(Protect adjacent surfaces when needed.)
- Biodegradable detergent or brick-cleaning solution(Use only if paint is particularly stubborn and manufacturer-compatible.)
- Garden hose or clean water supply(Rinse and manage runoff during the process.)
- Bucket and stiff brush for final rinse(Helpful for detailed cleanup after initial wash.)
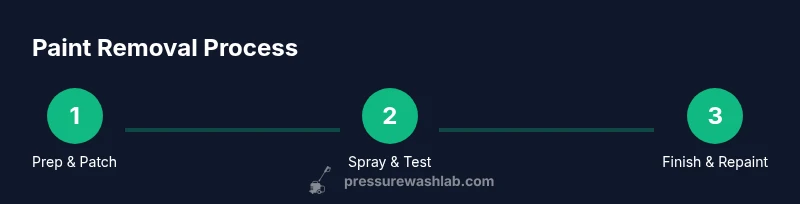
Steps
Estimated time: 2-4 hours
- 1
Prep area and gear
Clear the workspace, lay down tarps, and put on PPE. Remove outdoor furniture or cover it, and secure nearby plants. This reduces slip hazards and protects surfaces from overspray.
Tip: Always wear eye protection and gloves; setup a flat, stable stance. - 2
Test a patch
Choose a discreet area and lightly spray. Observe lift and check for mortar damage over several minutes. If there is no lift or you see damage, stop and reconsider the approach.
Tip: Document the test with photos for reference. - 3
Dampen the wall
Mist the surface with water to reduce absorption and prevent excessive suction that could damage joints. A wet surface helps paint detach more evenly.
Tip: Avoid pooling water; work in a consistent mist. - 4
Begin with wide spray and distance
Hold the wand at a safe distance and use a slow, overlapping sweep. Do not dwell on one spot; move steadily to lift paint gradually.
Tip: If you see chalky mortar, back off immediately. - 5
Work in sections
Divide the wall into panels and repeat the spray-and-patch process. Reassess every few panels to keep progress uniform.
Tip: Mark completed sections to avoid repeats. - 6
Rinse and re-evaluate
Rinse lifted sections and look for remaining paint. If necessary, repeat spray passes on stubborn spots with extra caution near joints.
Tip: Use a clean sweep pattern to prevent streaking. - 7
Address stubborn spots
For stubborn paint, switch to light scraping or a lighter chemical aid after spraying. Avoid aggressive measures that can damage brick or mortar.
Tip: Always test any chemical on a patch first. - 8
Final rinse and prep for repaint
Rinse thoroughly, dry, and inspect for any surface issues. Patch minor mortar chips and apply primer before repainting if desired.
Tip: Take a final set of photos to compare pre/post results.
Quick Answers
Can a pressure washer remove paint from brick?
A pressure washer can remove paint from brick, but success depends on the paint and brick condition. Start with a patch test and adjust your method for safe results. If paint is deeply embedded, alternatives may be needed.
Yes, it can, but test first and adjust your approach to avoid damage. If stubborn, consider alternatives.
What should I avoid when pressure washing brick?
Avoid using high pressure near mortar joints and edges. Stop if the brick or mortar shows signs of damage, and never spray into cracks or voids that could worsen structural integrity.
Don’t blast the wall up close; protect joints and check for damage as you go.
Is it safe to use chemical paint removers with a pressure washer?
Chemical aids can help lift thick coatings when used per manufacturer directions and with proper containment. Ensure runoff is controlled and compatible with brick, and avoid mixing products.
Chemicals can help, but follow directions and contain runoff.
What if the paint is lead-based?
Lead-based paint requires special handling and regulatory awareness. If you suspect lead, consult local guidelines and consider professional removal options.
Lead paint needs careful handling and may require pros.
How can I test if the brick can withstand pressure washing?
Perform a patch test and monitor the area for mortar changes over time. If you see cracking or mortar distress, stop and re-evaluate the method.
Do a patch test first and check mortar carefully.
What are alternatives if pressure washing fails?
Scraping, chemical strippers, heat-assisted approaches, or professional restoration are viable alternatives when pressure washing isn’t effective or safe.
If it fails, there are other methods and pro options.
Watch Video
Key Takeaways
- Assess brick and paint conditions before starting
- Test patches first to guide your approach
- Use a wide spray angle and keep distance to protect joints
- Balance mechanical lifting with careful technique to prevent damage
- Prepare for cleanup and repaint prep after the process