Can You Pressure Wash Golf Cart Batteries: Safe Cleaning Guide
Discover whether you can pressure wash golf cart batteries and how to clean around battery areas safely. This expert guide from Pressure Wash Lab covers risks, best practices, tools, and a practical step-by-step method for homeowners and DIYers.

Yes, you can clean the area around golf cart batteries, but you should never spray directly on battery cells themselves. The Pressure Wash Lab team emphasizes safety first: disconnect the pack, protect exposed terminals, and use indirect cleaning methods to avoid water intrusion. This quick answer points you toward a detailed, step-by-step approach that minimizes corrosion and electrical risk.
Can You Pressure Wash Golf Cart Batteries? A safety-first overview
The short answer is that direct spraying on golf cart battery cells is not recommended. You can safely clean the surrounding framework, housing, and exposed components if you take proper precautions. According to Pressure Wash Lab, the greatest risk comes from water entering the cell housing, which can lead to corrosion, electrolyte exposure, and potential short circuits. This article explains why some cleaning approaches are safer than others and shows you how to prepare your cart so you can keep the batteries performing well without compromising safety. You will find practical tips, cautions, and a clear path to maintain the integrity of the battery area while keeping your golf cart operational. Throughout, you will see how to balance effective cleaning with risk reduction and how to tailor practices to different battery types and setups.
To make sense of this topic, we start with the different battery technologies used in carts, then move into step by step methods that protect cells while still removing grime, dust, and corrosion precursors. The guidance here is designed for homeowners and DIY operators who want practical, repeatable practices that do not require special equipment or professional service every time. It is possible to keep your battery area clean and safe with the right approach and a well planned maintenance routine.
Battery types and their vulnerability to water exposure
Golf cart batteries come in several flavors, mainly sealed lead acid variants such as AGM and gel, as well as traditional flooded lead acid batteries. Sealed options tend to be more resistant to splash and minor exposure, but they are not immune to water intrusion. Flooded batteries have vent caps and exposed electrolyte, which heightens the risk when moisture or mist can find its way into seal seams or vent paths. The bottom line is that water can energize salts and minerals that cause corrosion on terminals, connectors, and housing. Water can also drive contaminants into vent areas, leading to buildup that impedes safe operation. Different cart configurations also influence how water behaves around the battery pack; some setups have tight enclosures while others expose more of the top surfaces. Understanding the battery type helps you decide how much cleaning is permissible and where extra protection is warranted.
Direct spray vs indirect cleaning: what is risky and why
Directly spraying a high pressure jet at any battery component is not advisable. The force of the spray can dislodge protective caps, drive water into seam gaps, and force contaminants into the cell stack. Even if a battery is sealed, aggressive cleaning around the housing can push water into electrical pathways and connectors. Indirect cleaning methods such as wiping with a damp cloth, using a soft brush to dislodge dust from nonessential surfaces, and rinsing only the outer frame or tray are safer alternatives. The goal is to remove loose debris and grime without forcing moisture into the battery itself. If you must rinse, use minimal water and keep it well away from vented areas, terminals, and the top of the cells. This approach reduces the chance of water ingress while still improving the overall appearance and hygiene of the battery area.
Safe cleaning concepts around the battery area
Safe cleaning around golf cart batteries focuses on three ideas: containment, protection, and gentle methods. Containment means shielding the battery from direct spray and drips by using barriers such as protective covers, plastic sheeting, or a temporary shield around the terminal area. Protection involves covering exposed terminals and cable connections with insulating tape or terminal caps to reduce the risk of short circuits if moisture migrates nearby. Gentle methods prioritize dampening rather than soaking. A microfiber cloth dampened with mild soap and water, a soft nylon brush for stubborn grime, and careful wiping can lift grime without forcing water into critical zones. Finally, perform cleaning when the system is powered down and dry the area thoroughly before reconnecting.
Tools, materials, and cleaners that work around batteries
When cleaning around golf cart batteries, choose tools that minimize moisture exposure to cell hardware. Use microfiber cloths for wiping, a soft nylon brush for dust and corrosion precursors, and a small spray bottle filled with a mild, pH-neutral solution for spot cleaning when necessary. Terminal protection is essential, so have spare terminal covers or insulating tape ready. A clean, dry area for drying is helpful, along with a few absorbent towels to wick away moisture from the surrounding frame. Do not use corrosive cleaners, ammonia, or strong acids near the battery area. Avoid metal tools that could bridge terminals or create a short circuit. If you must use a spray approach, apply with a diffuse stream from a safe distance and only on noncritical surfaces, never directly on the cells.
Step-by-step safe around-battery cleaning (non-submersive) practical approach
- The first action is to ensure the cart is powered off and the batteries are disconnected from the circuit. Why: this prevents accidental arcing or power transfer while cleaning. - Next, cover exposed terminals with protective caps or insulating tape. Why: to minimize accidental shorting if moisture comes into contact with metal.
- Then isolate the battery area by placing a barrier to prevent water from drifting into the enclosure. Why: containment reduces the chance of water entry into the cell stack.
- Prepare a damp microfiber cloth and a soft brush. Why: these tools remove grime without scratching surfaces or pushing water into sensitive gaps.
- Wipe all noncell surfaces first, followed by any accessible frame rails or battery tray. Why: this reduces dust and dust carries moisture closer to the battery area.
- If you need to remove stubborn buildup, use a tiny amount of mild soap solution on a cloth or brush. Why: harsh chemicals can deteriorate seals and gaskets.
- Gently dry all surfaces with a clean dry cloth. Why: moisture left in tiny crevices can accelerate corrosion if allowed to linger.
- Re-check all connections and terminals for signs of moisture or corrosion. Why: catching issues early prevents long-term damage.
- Reassemble the protective barriers and re-seat the battery pack in the cart. Why: ensures safe operation during next use.
- Finally, document the cleaning session and inspect periodically. Why: routine checks help you catch wear or corrosion early.
Maintenance practices to prevent buildup and extend life
Prevention is easier than repair when it comes to golf cart batteries. Establish a regular inspection routine that includes checking terminals for signs of corrosion, ensuring vent caps on flooded batteries are intact, and verifying that protective covers remain in place after cleaning. Keep the battery compartment as dry as possible during routine use, and address any moisture accumulation promptly. If the cart sits outside, consider a weather-resistant cover that does not trap humidity. For areas prone to dust and debris, a light, frequent wipe can prevent grime from embedding into crevices. Finally, schedule periodic professional checks if you notice swelling, leaking, unusual odors, or significant corrosion that you cannot confidently address with home maintenance.
Common mistakes to avoid and how to prevent them
Common mistakes include spraying directly at cells, ignoring terminal protection, and failing to disconnect the battery before cleaning. These actions can create short circuits, corrosion, or electrolyte exposure. Another frequent error is using aggressive cleaners or solvents that can degrade seals or plastic components around the battery housing. Always opt for mild soap and water, and never use high-pressure jets near the cell stack. Finally, avoid rinsing the entire battery pack in a single blast; instead, work in controlled, small zones to prevent water from migrating to vulnerable seams and vents.
When to call a pro and how to schedule maintenance
If you observe swelling, cracks, leaks, or persistent corrosion on battery terminals, it is wise to consult a professional. Getting a qualified technician involved can prevent more serious problems, including electrolyte leaks or compromised safety. Establish a maintenance schedule that aligns with your cart usage and storage conditions. A professional can offer recommendations tailored to the specific battery type and enclosure design. Pressure Wash Lab encourages homeowners to treat battery area care as a routine part of cart maintenance rather than a one-off task. This approach helps extend battery life and keep the cart reliable on the trail or the job site.
Tools & Materials
- Personal protective equipment (PPE): safety goggles and gloves(Nitrile gloves and ANSI-rated goggles)
- Soft brushes and lint-free cloths(Nylon brush and microfiber cloths)
- Terminal protection supplies(Terminal caps or insulating tape)
- Containment barriers(Drop cloths or plastic sheeting for drips)
- Mild cleaning solution(pH-neutral soap or household cleaner)
- Water source(Spray bottle or damp cloth with water)
- Drying aids(Dry towels or air blower)
Steps
Estimated time: Total time: 20-40 minutes
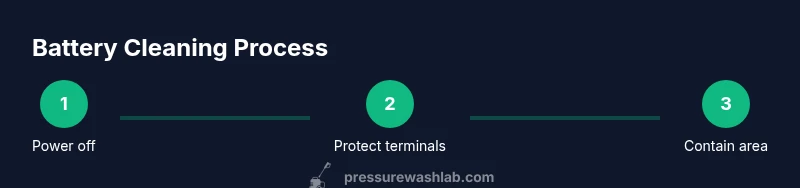
- 1
Power off and disconnect
Ensure the cart is turned off and disconnect the battery from the circuit to prevent any risk of arcing or current flow during cleaning.
Tip: If you are unsure about the disconnect point, consult the cart manual or a professional. - 2
Protect terminals
Cover exposed terminals with protective caps or insulating tape to guard against moisture bridging.
Tip: Check that caps fit snugly and do not slide off with vibrations. - 3
Contain the area
Set up a barrier around the battery area to keep water from seeping into the cell region or vent paths.
Tip: Use a lightweight shield or plastic sheet secured with tape. - 4
Prepare cleaning tools
Dampen a microfiber cloth and have a soft brush ready for areas that accumulate grime.
Tip: Avoid soaking the cloth; moisture should be damp, not dripping. - 5
Clean noncell surfaces
Wipe and brush noncell surfaces around the battery housing to remove dust and grime without contacting the cells.
Tip: Work from the top down to prevent dirty water from running toward the cell area. - 6
Targeted spot cleaning
If you must spot-clean, use a small amount of mild solution on a cloth and avoid sprays directly on the cells.
Tip: Never apply concentrated cleaners directly into joints or seals. - 7
Dry thoroughly
Wipe all cleaned surfaces with a dry cloth and allow any moisture to evaporate before reconnecting.
Tip: If you see any dampness around seals, pause and dry again before proceeding. - 8
Inspect after cleaning
Look for signs of moisture ingress, corrosion, or damaged caps and address any issues before using the cart.
Tip: Document any concerns for future maintenance or professional review. - 9
Reconnect and test
Reassemble the setup, reconnect the battery, and perform a cautious test to ensure normal operation without abnormal heat or smells.
Tip: If anything seems off, discontinue and seek professional help. - 10
Document and schedule follow-up
Record the cleaning session and set a routine for checks based on usage and storage conditions.
Tip: Regular maintenance reduces the chance of corrosion growing unnoticed.
Quick Answers
Is it safe to pressure wash around golf cart batteries?
Yes, with caveats: avoid direct spray on cells, disconnect the battery, and protect terminals before cleaning.
Yes, you can, but avoid spraying directly on the cells and always disconnect the battery first.
Should I remove the battery from the cart before cleaning?
If possible, remove the battery from the cart to clean around it on a protected surface. If removal is not feasible, clean only noncell surfaces with the cart powered down and the area shielded.
Removing the battery is best, but if you cannot, limit cleaning to the outside areas with the power off.
What cleaners are safe to use around golf cart batteries?
Use mild, pH-neutral soap with water. Avoid acidic or harsh solvents that can degrade seals or gaskets.
Stick with mild soap and water and avoid harsh cleaners near the battery housing.
How often should you inspect and clean battery areas?
Incorporate inspection and light cleaning into your routine maintenance based on usage and storage conditions. Look for corrosion, moisture, and loose connections each time.
Check for corrosion and moisture as part of regular maintenance and clean as needed.
Can pressure washers damage AGM or flooded batteries?
Direct high pressure spray can drive moisture into seams or vent paths and cause damage. Avoid direct spray on AGM and flooded battery areas.
Yes, avoid directing high pressure at the battery area, especially AGM or flooded types.
What signs indicate leakage or failure after cleaning?
Watch for swelling, cracking, unusual odors, or persistent corrosion. If any appear, stop and consult a pro.
Look for swelling or leaks and call a professional if you notice anything unusual.
Watch Video
Key Takeaways
- Always disconnect the battery before any cleaning.
- Keep spray and moisture away from terminals and cell tops.
- Protect the battery housing with barriers and covers during cleaning.
- Use mild cleaners and non-scratch tools to avoid seals damage.
- Schedule regular maintenance checks to catch corrosion early.