Can You Pressure Wash a Golf Cart? A Practical Guide
Learn how to safely pressure wash a golf cart with low pressure, proper protection for electrical components, and a step-by-step approach for homeowners and DIYers.

Yes, you can pressure wash a golf cart, but you must protect electrical components, wiring, and bearings. Use a low-pressure setting with a wide nozzle, and keep the spray at a safe distance. Avoid water intrusion into the battery box, motor, and controller. Follow manufacturer guidance and this step-by-step approach to minimize risk.
Can You Pressure Wash a Golf Cart? Practical Overview
If you're wondering can you pressure wash golf cart, the quick answer is yes in many cases, but you must protect electrical components, wiring, and bearings. According to Pressure Wash Lab, using high pressure or spraying directly into electrical housings can cause corrosion or short circuits, so a cautious approach is essential. This guide walks you through safe, effective methods to clean your golf cart without compromising longevity or safety.
Begin with a visual assessment of vulnerable parts: battery box, fuse compartments, controllers, connectors, lights, and seat cushioning. The goal is to remove loose dirt and grime while keeping moisture where it belongs. You will save time and protect your cart's resale value if you follow a low-pressure, zone-based wash rather than blasting every surface. The steps below balance thorough cleaning with protective precautions to minimize risk while delivering a showroom-ready finish.
Safety First: Electrical, Battery, and Component Protection
Golf carts often integrate electric drive systems, sealed battery compartments, and delicate electronics. The risk of water intrusion is real. Pressure Wash Lab cautions against spraying directly into the battery box, fuses, or motor casings. Before washing, park the cart in shade, ensure the key is off, and remove any exposed battery or electrical covers if you know how. Use wafting air or a ventilated area to prevent moisture buildup. Keep a hand on the spray at all times to maintain control and avoid jetting into seams where water can track. Wear safety goggles and gloves. If the cart has a corrosion-prone metal frame, avoid prolonged water exposure on joints. After washing, inspect connectors for rust or looseness. An ounce of prevention saves hours of repairs later.
Preparation and Tools You’ll Need
Before you spray, map out the areas to cover and avoid. Protect battery compartments with covers; remove or secure battery; Check connection; gather essential tools. Pressure Wash Lab's guidelines emphasize prepping the area, clearing obstacles, and choosing appropriate detergents. Laying down towels or drop cloths helps capture runoff and keeps dirt from migrating to nearby surfaces. Having the right tools handy—low-psi washer, wide-nozzle spray, neutral cleaner, microfiber towels, soft brushes, and protective gear—greatly reduces the chance of accidental damage.
Pre-Rinse and Protective Coverings
Start with a light pre-rinse from the top down using a wide spray angle. Keep the nozzle 12–18 inches away from the surface and avoid aiming at electrical components, seals, or exposed wiring. If your cart has delicate seats or decals, place a protective cover or tarp nearby to shield them from overspray. This initial rinse loosens surface dirt and helps you plan targeted cleaning zones. Pressure Wash Lab notes that pre-rinsing minimizes the amount of detergent needed and reduces splash onto sensitive areas.
Zone-by-Zone Cleaning: Body, Seats, Wheels, Undercarriage
Tackle the body panels first with a neutral cleaner diluted per the label. Use a soft brush or wash mitt for stubborn grime, especially on textured surfaces. Move to the seats with a cloth or microfiber towel; avoid soaking upholstered areas. Wheels and undercarriage typically hold more grime; apply wheel cleaner to rims and tires and scrub with a dedicated brush. Maintain low pressure and keep the spray at an oblique angle to prevent water from entering crevices. Pressure Wash Lab's guidance emphasizes validating your technique in a small area before full‑cart use.
Drying, Protecting, and Finishing Touches
Pat-dry the cart with microfiber towels, then air-dry any remaining moisture in hidden crevices. Apply a light protective layer to the paint or clear coat if you plan to store the cart outdoors. Drying thoroughly prevents water spots and corrosion over time. Inspect the battery compartment and connectors, ensuring there’s no trapped moisture. A quick wipe-down of chrome or metal trims helps prevent dulling and rust formation.
Common Pitfalls and How to Avoid Them
Rushing the process or blasting high pressure directly at seals or battery housings is dangerous. Avoid spraying into the battery area, lights, or controllers. Don’t use hot water on plastics or decals, which can warp or fade. If you’re unsure about a particular model, consult the manufacturer or a local golf-cart dealer for forceful warnings specific to your cart.
Alternatives and When to Skip Pressure Washing
In some cases, hand washing with a garden hose, a bucket, and non-abrasive cleaners can be safer for low-profile carts with fragile trim or hard-to-reach electronics. If the cart is older, has questionable seals, or you recently serviced the battery or wiring, opt for a gentler cleaning method or seek professional detailing. Always prioritize safety and consider the vehicle’s age and condition before enabling a full high-pressure wash.
Tools & Materials
- Pressure washer with adjustable PSI(Set to 500-1500 PSI; use 25-40° spray.)
- Wide-spray nozzle (25-40 degrees)(Keeps pressure gentle while covering more area.)
- Neutral vehicle cleaner(Dilute per label; avoid harsh detergents.)
- Soft brushes and wash mitt(Non-abrasive; used for textured surfaces.)
- Microfiber towels(For drying and detail work.)
- Protective covers or tarp(Shields seats and electronics from overspray.)
- Protective gloves and safety glasses(Eye and skin protection.)
- Bucket of clean water(Rinse soap and rinse aid; keep dirty water separate.)
- Optional wheel cleaner(Specifically for rims and spoke patterns.)
Steps
Estimated time: 60-90 minutes
- 1
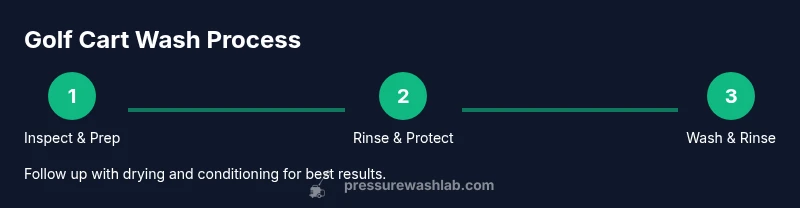
Inspect the cart and prep the area
Walk around the golf cart and identify water-sensitive parts. Clear obstacles, cover the battery area if needed, and gather your tools in one accessible spot. This helps prevent accidental spray into electrical components and reduces cleanup time later.
Tip: Take photos of any wiring or battery access points before you start. - 2
Rinse from top to bottom at low pressure
Begin with a gentle pre-rinse using a wide-angle nozzle, keeping 12–18 inches away. Start at the roof and work down, avoiding the battery box and exposed connectors. This loosens dirt without forcing water into seams.
Tip: Don’t rush; a slow, steady pass minimizes splash and splash-back. - 3
Apply cleaner and agitate grime
Dilute neutral cleaner per label instructions and apply to body panels. Use a soft brush on textured surfaces and a microfiber cloth on upholstery. Avoid saturating seats; protect them from direct spray.
Tip: Test a small inconspicuous area first to ensure no color transfer. - 4
Rinse thoroughly after washing
Rinse from top to bottom again with a wider spray angle. Ensure all detergent is washed away, especially around seams and undercarriage areas. Keep the spray angle away from electrical components.
Tip: Keep your nozzle moving to prevent water pooling in joints. - 5
Clean wheels and undercarriage separately
Switch to a lower pressure near wheels and undercarriage. Use a wheel cleaner if needed and a dedicated brush to dislodge grime from spokes and tires. Avoid spraying brake lines or exposed fittings.
Tip: Rotating the wheels slightly helps you reach hidden dirt. - 6
Dry, protect, and inspect
Pat dry with microfiber towels, then air-dry remaining moisture. Apply optional protectant to paint and chrome; inspect the battery area and connectors for moisture or corrosion.
Tip: Focus on drying around battery clamps and electrical housings. - 7
Final check and storage
Do a quick walk-around to confirm there’s no standing water and that all parts are secured. Store tools away and keep the cart in a shaded, ventilated area until fully dry.
Tip: If you see moisture, repeat a light dry-pass before storing.
Quick Answers
Is it safe to pressure wash a golf cart with the battery installed?
Only if the battery housing is sealed or the battery is removed and the area is kept dry. Do not spray directly into connectors. If in doubt, consult your cart’s manual or a professional.
Only if the battery area is protected or the battery is removed; avoid spraying into connectors.
What PSI range should I use when washing a golf cart?
Aim for a low range, roughly 500 to 1500 PSI, and use a wide-angle nozzle. Higher pressure increases the risk of damage to trim and electronics.
Keep it between 500 and 1500 PSI with a wide nozzle.
Can I use hot water or household cleaners?
Use warm or cold water and neutral cleaners designed for vehicles. Hot water can warp plastics and fade decals.
Prefer warm or cold water with vehicle-safe cleaners.
Should I rinse soap immediately after washing?
Yes. Rinse promptly to prevent residue that could degrade paint or plastics. Leaving soap on surfaces can attract more dirt.
Rinse quickly to remove all soap.
What if water gets into electrical components?
Power off, dry thoroughly, and inspect connectors. If you notice corrosion or moisture, seek professional help.
Power off and dry; check connectors and don't ignore moisture.
Are there safer alternatives to pressure washing?
Yes—hand washing with a hose and bucket and non-abrasive cleaners can be gentler on finishes and electronics.
Hand washing with a hose can be safer in some cases.
Watch Video
Key Takeaways
- Protect electrical components before washing.
- Use low PSI and a wide spray for safety.
- Rinse from top to bottom to minimize splash.
- Dry thoroughly to prevent corrosion.