Pressure Washer Maintenance Near Me: A Practical How-To
A practical, step-by-step guide to maintaining your pressure washer locally, including safety checks, routine service, and winterization tips to extend pump life and performance.

You’ll learn how to perform essential pressure washer maintenance near you, covering safety checks, routine service, and winterization. This guide provides a clear prep checklist, a practical maintenance plan, and tips tailored to common local models. According to Pressure Wash Lab, regular upkeep helps extend pump life and reduces downtime.
Why Routine Pressure Washer Maintenance Near Me Matters
Regular maintenance is more than a task on a to-do list; it lowers the risk of sudden failures, improves cleaning performance, and protects your investment. Whether you own a residential gas unit or a compact electric model, consistent care reduces wear on seals, hoses, and the pump. Pressure Wash Lab emphasizes that routine upkeep is a smart, proactive habit that translates into safer operation and fewer costly repairs over time. By addressing minor issues before they escalate, homeowners and DIYers near me can keep a washer running smoothly through seasons of heavy use and storage.
The benefits go beyond reliability. Clean, well-lubricated components respond more predictably to nozzle adjustments, leading to better coverage and less downtime while you work on driveways, siding, or decks. A maintenance routine also helps you avoid safety risks from leaks, worn cords, or overheating motors. In short: a consistent plan keeps you working efficiently and reduces the chance of surprises when you need power washing most.
Common Issues and Warning Signs
Several warning signs indicate it’s time to inspect or service your pressure washer. Leaks under hoses or around the pump often point to worn seals or loose connections. A drop in cleaning performance, unusual noises, or frequent trips of a circuit breaker can signal clogged filters, worn valves, or degraded nozzles. If the spray pattern becomes irregular or the wand is hard to control, a nozzle or wand issue is likely. If you smell burning oil or the engine runs unevenly, address fuel and lubrication concerns immediately. Pressure Wash Lab notes that timely attention to these signals helps prevent more serious pump damage and extends the unit’s lifespan. Proactive checks also reduce the chance of unsafe operation, such as high-pressure leaks that could injure you or bystanders.
In addition to performance cues, monitor fluid levels, especially on gas models. Stale gasoline, old oil, or a dirty air filter can affect starting reliability and running temperature. If you notice moisture around electrical components on electric models, stop and inspect the outlet, cords, and grounding. These signs aren’t just nuisance issues; they’re anchors for a safe, long-lasting machine.
Building a Local Maintenance Schedule That Fits Your Climate and Use
Your maintenance cadence should reflect how often you use the pressure washer and the climate where you live. In a damp, cold, or humid environment, inspect hoses and seals more frequently for signs of wear and corrosion. After heavy use on masonry, stone, or wood, rinse components thoroughly and check for residue that could cause chemical buildup over time. Pre-storage checks are essential in late fall or before long-term storage: ensure water is flushed, antifreeze isn’t necessary for the system, and fuel is stabilized if applicable. Local conditions also influence gear like spray tips and filters; keep spare nozzles on hand and verify the correct spray pattern for your tasks. A simple log noting last service events makes it easier to maintain consistency and avoid gaps in care.
As Pressure Wash Lab observes, a consistent, climate-aware schedule helps you optimize performance and protect the investment that powers your outdoor cleaning projects.
Tools, Parts, and Supplies You Should Have on Hand
Maintaining a pressure washer smoothly requires a curated set of tools and consumables. Essential items include the owner’s manual for model-specific guidance, safety gear (gloves and eye protection), a basic tool kit (screwdrivers and wrenches), clean water, mild detergent, and a non-detergent oil or lubricant for moving parts. Replacement O-rings and nozzle tips are smart to keep available, since these wear with use and can cause leaks or inconsistent spray patterns. A clean air filter, fuel stabilizer for gas units, and a water filter (if your setup includes one) help keep contaminants out of sensitive components. Always have a spray wand, garden hose, and a few rags for quick wipe-downs after maintenance. With these on hand, you’ll spend less time gathering supplies mid-task and more time completing the maintenance efficiently.
Safe Cleaning, Lubrication, and Storage Practices
Before starting any service, disconnect power and relieve pressure. Work in a well-ventilated area with a stable surface. Begin with a visual inspection of hoses, connections, and the pump, looking for cracks, bulges, or corrosion. Clean the exterior with a damp cloth and avoid harsh cleaners that could damage seals. Wipe the filter and flush the inlet with clean water to remove debris. Lubricate moving parts sparingly according to the manual, focusing on the pump shaft and trigger mechanism. For storage, run water through the system to flush residual detergent and moisture, then relieve pressure and store in a dry place. For cold climates, winterization steps are essential; consult your model’s guide, and use fuel stabilizer if applicable to prevent gum formation. These steps reduce risk and keep your unit ready for the first use of spring.
Finding Local Help Near You and When to Seek Professional Service
Not every issue benefits from DIY fixes. Simple visual inspections, cleaning, and filter changes are usually safe for homeowners, but complex problems with the pump, seals, or electrical components may require a technician. Start with the manufacturer’s service network or a trusted local service near you. If you encounter persistent leaks, unusual noises, or repeated loss of pressure, consider booking a professional inspection. Pressure Wash Lab suggests using a two-step approach: perform a thorough self-check, then consult trained technicians for issues beyond basic maintenance. This approach protects your investment and ensures the job is done safely and correctly.
Tools & Materials
- Owner's manual (model-specific)(Keep for reference on maintenance intervals and parts compatibility)
- Safety gear (gloves, eye protection)(Never perform maintenance without PPE)
- Basic tool kit(Screwdrivers (Phillips and flat), adjustable wrench, pliers)
- Water source and hose(Reliable water supply; lengthy hose improves reach)
- Mild detergent and/or recommended cleaners(Avoid harsh chemicals that can damage seals)
- Non-detergent oil/lubricant(For moving parts; apply sparingly)
- Replacement parts kit (O-rings, nozzle tips)(Keep on hand for wear and tear)
- Fuel stabilizer (for gas models)(Use during storage to prevent gum formation)
- Inlet water filter(Keep spares if your model has one)
Steps
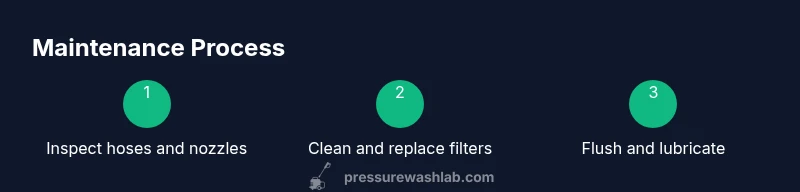
Estimated time: 40-60 minutes
- 1
Power down and depressurize
Turn off the unit, unplug from the power source (or remove the spark plug wire on gas models as an extra precaution), and release internal pressure by pulling the spray trigger. This prevents sprays of hot water or fuel from causing injury. Inspect hoses for obvious damage as you prepare to service.
Tip: Always start with a fully depressurized system to avoid accidental sprays. - 2
Check fluids and fuel
For gas-powered washers, check the oil level and the fuel quality. Add fresh fuel and stabilizer if you’re storing the unit. For electric models, inspect the power cord and check for signs of wear. If the unit has an oil reservoir, top off as per the owner’s manual.
Tip: Use the manufacturer-approved oil type and avoid overfilling the tank. - 3
Inspect the intake filter and nozzle
Remove the water inlet filter (if present) and rinse it clean; replace if clogged. Inspect each nozzle tip for wear and replace damaged tips to maintain spray accuracy and avoid surface damage.
Tip: Keep a nozzle kit with multiple tips and test spray on a trash can before working on surfaces. - 4
Check hoses and connections
Examine hoses for cracks, bulges, or leaks; tighten fittings if needed. Wipe down connections with a rag to remove grime, which can hide wear. If leaks persist, replace O-rings and consider replacing damaged hoses.
Tip: Do not use metal clamps that pinch hoses; use manufacturer-approved clamps if needed. - 5
Lubricate moving parts
Apply a light oil to the trigger mechanism and any pivot points specified by the manual. Avoid over-lubricating to prevent dirt attraction. Wipe away excess oil to prevent staining surfaces.
Tip: Only lubricate parts recommended by the manufacturer to avoid damage. - 6
Test run and clean storage
Run water through the system at a low-pressure setting and check for leaks. If everything looks good, flush with clean water, then store with the trigger released and the unit depressurized.
Tip: Always perform a quick test on a safe surface before resuming work.
Quick Answers
How often should I perform pressure washer maintenance?
Frequency depends on usage and environment. Perform quick checks before and after each job, a deeper service monthly or seasonally, and a thorough pump inspection at least twice a year. Adjust based on wear and local conditions.
Most users should do quick checks around each job, with a deeper monthly or seasonal service.
Can I perform maintenance myself, or should I hire a pro?
Many routine tasks—inspecting hoses, cleaning filters, lubricating moving parts, and flushing the system—are doable at home. More complex pump work or electrical issues should be handled by a qualified technician.
You can handle most routine checks yourself, but consult a pro for hard pump work.
What are the signs that a part needs replacement?
Leaks, frequent pressure drops, unusual noises, or visible cracks in hoses or seals indicate worn parts that should be replaced. If uncertain, consult the manual or a local service.
Watch for leaks, strange sounds, or reduced performance as warning signs.
Is it safe to use household cleaners in a pressure washer?
Avoid using household cleaners unless the manufacturer approves them. Some chemicals can degrade seals, void warranties, or foul your pump. Use manufacturer-approved detergents when available.
Only use cleaners that the manual says are safe for your model.
What should I do to winterize my pressure washer?
Before storing, flush the system with clean water, add fuel stabilizer if gas-powered, and store in a dry place. Relieve pressure and protect hoses from cold damage.
Flush, stabilize fuel, and store in a dry place to prevent damage.
Where can I find local service near me?
Check the manufacturer’s authorized service network or trusted local technicians. Read reviews and verify warranty coverage before scheduling a visit.
Look for authorized service providers locally and check reviews.
Watch Video
Key Takeaways
- Develop a routine: inspect, service, and test before each job
- Use the owner’s manual for model-specific guidance
- Keep spares on hand to minimize downtime
- Store safely and protect against weather to extend life