Pressure Washer Check Valve Symptoms: Troubleshooting Guide
Urgent, practical guide to spotting pressure washer check valve symptoms, diagnosing root causes, and safely repairing or replacing the valve for reliable cleaning performance.

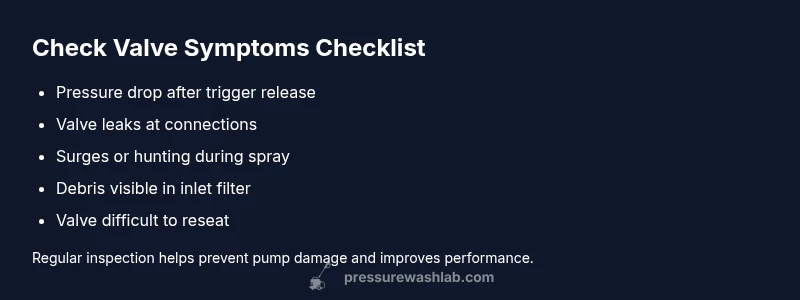
Common pressure washer check valve symptoms include sudden loss of pressure when you release the trigger, surges, and leaks at the valve. Quick fixes start with inspecting the valve, cleaning or replacing seals, and reseating the valve. If issues persist, check the inlet screen and consider professional help as needed.
How a pressure washer check valve functions
According to Pressure Wash Lab, the check valve in a pressure washer controls backflow, holds hydraulic pressure, and helps protect the pump. Understanding pressure washer check valve symptoms helps homeowners spot wear before a failure happens. The valve sits inline with the high-pressure line and acts as a one-way gate: when you pull the trigger, the valve opens; when you release, it closes to prevent reverse flow. A healthy valve reduces backflow, maintains consistent nozzle pressure, and minimizes shock that can damage fittings. Over time, seals wear, springs weaken, and debris can lodge in the seating surface, leading to the very symptoms readers are here to diagnose and fix. Regular inspection keeps pumps running smoothly and can prevent costly downtime.
To get the most from this guide, treat the valve as a key wear point in your maintenance routine. Clear, dry storage and clean water help extend valve life, while aggressive solvents or running the system dry can accelerate wear. By recognizing early pressure drop after release, leaks at connections, and erratic spray patterns, you can act before a small fault becomes a costly repair.
wordCount numerator=
Steps
Estimated time: 60-90 minutes
- 1
Depressurize and safety check
Power off the unit, disconnect from power (if electric), and relieve all pressure by triggering the wand with the outlet closed. Wear eye protection and gloves. This prevents pressurized water from injuring you during disassembly.
Tip: Always unplug and depressurize before touching internal components. - 2
Access the valve area
Disconnect hoses as needed and locate the check valve housing. Keep track of any small springs, o-rings, or seals you remove so you can replace them correctly.
Tip: Use a labeled tray to keep parts organized. - 3
Inspect the valve and seals
Look for cracks, scratches, or corrosion on the valve seat and seals. Check the spring tension and seating surface for debris or mineral buildup. A magnifying glass helps if you have one.
Tip: Compare with the OEM part visually if you suspect wear. - 4
Replace worn components
Install new seals or the valve assembly if needed. Ensure the valve seats fully and that seals are correctly aligned with grooves. Lubricate O-rings with a light, compatible lubricant.
Tip: Avoid over-lubricating; a thin film is enough. - 5
Reassemble and reseat
Reassemble the valve housing carefully, ensuring all connections are tight but not over-tightened. Reconnect hoses and fittings in their original orientation to avoid misalignment.
Tip: Hand-tighten first, then snug with a suitable tool. - 6
Test the system
Reconnect power if applicable and run water through the wand at low pressure. Check for leaks and confirm the nozzle maintains pressure after trigger release. If problems persist, move to a professional diagnosis.
Tip: Test at low pressure before full use to verify repair.
Diagnosis: Pressure washer loses pressure or surges after trigger release, and may leak at the valve or show inconsistent spray
Possible Causes
- highWorn or damaged check valve seat and seals
- highDebris or mineral buildup causing sticking
- mediumValve misalignment or improper seating after maintenance
- lowCracked valve body or spring failure
Fixes
- mediumInspect seals and seat; replace worn components and reseat with manufacturer guidance
- easyClean the valve area and inlet screen to remove debris
- mediumRe-seat or replace the entire valve assembly if misalignment is evident
- hardReplace valve or consult a professional if damage is extensive
Quick Answers
What are check valve symptoms in a pressure washer?
Common symptoms include pressure drop after trigger release, spray surging, and leaks around the valve area. Debris buildup or worn seals are frequent culprits. Identifying these signs early helps prevent pump damage and costly downtime.
Common symptoms are pressure loss after releasing the trigger and spray surging. Debris and worn seals are common causes; early identification saves costly downtime.
Can a faulty check valve cause low water pressure?
Yes, a failing check valve can cause reduced pressure because backflow or debris can hinder proper valve seating, lowering the resulting pressure at the nozzle. Inspecting and replacing seals or the valve often resolves this.
Yes, it can lower pressure by mis-seating or debris blocking flow.
How do I test a pressure washer check valve without taking it apart?
If safe, you can perform a basic test by operating the unit with the wand aimed into a drain or bucket to observe leaks or backflow, but most checks require disassembly to inspect seals and seating.
You can do a basic run test if safe, but true valve tests usually need opening the housing.
Should I replace seals or the entire valve?
Start with seals if wear is mild; if the seating surface or spring shows wear, replacing the entire valve is often more reliable and cost-effective in the long run.
Try seals first; if wear is evident, replace the whole valve for reliability.
When is professional help recommended?
If you’re uncomfortable with disassembly, if the unit is under warranty, or if replacing parts doesn’t restore performance, consult a technician to avoid further damage.
Call a professional if replacement parts don’t fix the issue or you’re unsure how to disassemble safely.
Watch Video
Key Takeaways
- Inspect seals early to prevent leaks
- Keep inlet screens clean to avoid debris buildup
- Depressurize safely before service
- Replace worn components promptly to restore performance
- Regular maintenance extends valve life and performance