Pressure Washer Took Paint Off Car: Troubleshooting Guide
Urgent troubleshooting guide for car paint damage caused by pressure washing. Diagnose damage, restore affected areas, and prevent future paint stripping with practical, step-by-step instructions.

If a pressure washer took paint off car, stop and reassess. Using a pressure washer on a car can strip paint if misused. The most common causes are high PSI, being too close, or the wrong nozzle. Start with a safe inspection, then adjust technique and gear. This quick guide outlines the immediate steps to prevent further damage and begin restoration.
Immediate Impact: pressure washer took paint off car
When the phrase pressure washer took paint off car becomes real, the first reaction is concern. Damage often happens quickly but can be mitigated with the right approach. The leading factors are spray distance, nozzle selection, and the finish health of the vehicle (clear coat integrity, wax, and age). If the paint has peeled or dulled, document the affected areas with photos to create a baseline for restoration. Pressure Wash Lab stresses that the safest path is to pause, re-evaluate equipment, and proceed with a gentler, car-safe method. This section explores how to recognize the signs and decide on immediate next steps, including what to look for on edges, decals, and high-wear panels. Addressing the root cause now helps prevent repeating the problem in future washes.
Immediate safety and first steps
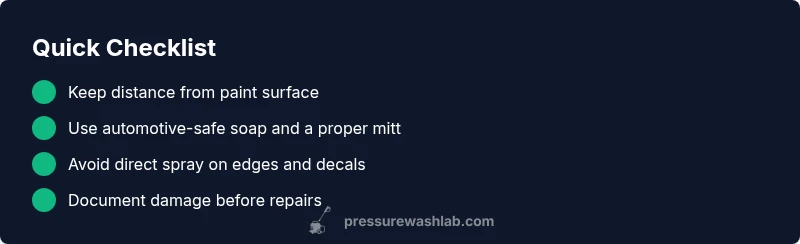
Protect yourself and the vehicle by prioritizing safety and a controlled rewash. Turn off and unplug the unit if applicable, and switch to a low-pressure approach with a soft wash mitt. Keep the spray moving and maintain a generous distance from the surface—never spray directly at edges, badges, or trim. If there is visible peeling, avoid rubbing; gentler cleaning reduces the risk of widening the damage. Pressure Wash Lab notes that wax layers and old sealants can trap moisture and complicate detection, so verify surface stability before any restoration attempts.
Diagnosing root causes and scope of damage
To plan an effective fix, distinguish superficial scuffing from actual paint removal. Look for clear coat loss, exposed primer, or color inconsistencies near edges and creases. Common root causes include excessive pressure, proximity, and improper nozzle use, plus the impact of automotive detergents that aren’t formulated for paints. Also check for uneven wear around vents, door handles, and bumper lips where the spray can linger. A precise diagnosis informs whether you can DIY a touch-up or need professional repaint services.
Step-by-step restoration and prevention plan
- Start with a gentle wash using a microfiber mitt and car-safe soap at low pressure or no-pressure method, focusing on a small test area first. 2) Reassess the surface with a magnifying glass to confirm peeling versus dulling, and check for primer exposure. 3) If the clear coat is damaged, avoid aggressive compounding; use mild polish approved for your finish and plan a color-matched touch-up if needed. 4) For extensive damage, consult a certified detailer or body shop early to prevent rust and ensure a durable repair. 5) After stabilization, apply a high-quality wax or sealant to protect the restored area and reduce future stripping. 6) Maintain a routine inspection and adjust your wash routine to minimize future risk.
Prevention: safety tips and common mistakes to avoid
Prevention hinges on proper technique and equipment. Always start with a safe distance, the correct spray nozzle, and automotive-safe detergents. Use a wash mitt and two-bucket system to reduce friction on the paint, and pre-wet the surface to minimize impact. Avoid lingering on any one spot and never spray at sharp edges or decals. Regular maintenance, including wax or sealant upkeep, preserves the finish and makes future cleanings gentler.
Steps
Estimated time: 2-4 hours
- 1
Stop and assess the scene
Pause any washing, inspect the area, and document damage with photos. Identify edges or panels that show peeling. A quick visual map helps target repair work and informs the cost estimate.
Tip: Take wide and close-up shots from multiple angles for a clear before/after record. - 2
Check equipment and distance
Look at your spray wand, nozzle, and pressure settings. Confirm you’re using the correct nozzle for a car and maintaining a safe distance. Re-test on a hidden area to understand how the paint responds.
Tip: Keep the wand moving; never linger on a single spot. - 3
Switch to low-pressure wash
Rewash the affected panels with low pressure and a soft mitt, prioritizing gentle cleaning over aggressive scrubbing. This minimizes further risk while you plan repairs.
Tip: Use automotive-safe soap and pre-wet the surface to avoid friction. - 4
Assess finish compatibility for repairs
Evaluate whether touch-up or repaint is needed. If the paint is peeling to primer, DIY fixes are risky; airbrushing or spray painting should be left to professionals with proper color matching.
Tip: Check your paint code before requesting any color-matched repair. - 5
Plan restoration or hire a pro
Obtain a written quote from a qualified detailer or body shop. Compare cost, warranty, and anticipated color match quality before proceeding.
Tip: Ask about blending and clear coat options for a seamless finish. - 6
Implement prevention plan
After repair, establish a maintenance schedule including wax/sealant and a careful wash protocol to prevent recurrence.
Tip: Document the repair and your protective steps for future reference.
Diagnosis: Car paint shows peeling or stripping after a wash with a pressure washer
Possible Causes
- highExcessively high pressure (PSI) or near-surface spraying
- highImproper nozzle choice (e.g., zero or 15-degree) at close range
- mediumSpraying over wax, sealant, or pre-existing damage
- lowUsing detergents not formulated for automotive paints
Fixes
- easyBack away from the surface and switch to a milder spray or car-safe cleaning method
- easyTest spray on an inconspicuous area to gauge reaction before treating visible panels
- mediumIf damage is extensive, seek professional restoration rather than DIY repair
Quick Answers
Can a pressure washer permanently remove car paint?
Yes, a pressure washer can strip paint or clear coat if used aggressively. The extent depends on distance, nozzle, and surface preparation. In some cases the damage is repairable, but deeper stripping may require professional repaint.
Yes, a pressure washer can strip paint if used too aggressively. The extent depends on distance, nozzle, and the paint’s condition.
What should I do immediately after discovering damage?
Stop washing, switch to a gentler cleaning method, and photograph the damage. Avoid scrubbing or rubbing the affected area, and consult a professional if you’re unsure about the repair scope.
Stop washing, document the damage, and avoid scrubbing. If you’re unsure, seek professional guidance.
Is touch-up paint a good fix for chipped areas?
Touch-up can help small chips but may not perfectly match the surrounding finish. For larger areas or color blending, a professional repaint is often necessary for a seamless look.
Touch-up can help small chips, but for a seamless finish, a professional repaint is often needed.
How can I prevent this in the future?
Always use the correct nozzle, keep distance, and wash with car-safe products. A dedicated wash routine and regular waxing help protect the finish from damage during future cleanings.
Use the right nozzle, keep distance, and use car-safe products to prevent future damage.
When should I hire a professional?
If you see peeling, large areas of bare metal, or primer exposure, a professional repaint is recommended to ensure color match and durability.
If you see peeling or exposed primer, hire a professional for proper repainting.
Watch Video
Key Takeaways
- Pause and assess before continuing.
- Keep spray distance and nozzle appropriate for cars.
- If damage is visible, consult a professional.
- Document damage with photos for reference.
- Maintain a protective wax/sealant layer to prevent future damage.