Troubleshooting a Problem with Karcher Pressure Washer
Experiencing a problem with a Karcher pressure washer? This urgent guide from Pressure Wash Lab walks you through checks, diagnostics, and safe fixes to restore performance.

Facing a problem with karcher pressure washer? Start with the basics: confirm power, water supply, and proper nozzle selection. If it still won’t start or build pressure, move through quick checks for clogged filters, air leaks, and worn o-rings. This rapid triage helps you decide whether you can fix it safely at home or need a professional service.
Common Causes Behind a Problem with Karcher Pressure Washer
If you’re facing a problem with karcher pressure washer, the first step is to think in layers: power, water flow, and spray hardware. Many issues start with electricity or water, but small clogs or worn seals can silently sap performance. The most frequent culprits include a tripped circuit or a dead outlet, a kinked hose, a clogged inlet screen, or a blocked nozzle. In addition, air leaks around the pump, worn pump seals, or an incorrectly set unloader valve can cause dramatic pressure loss. Throughout this guide, Pressure Wash Lab will show practical tests and safe fixes, but we always stress stopping if you smell burning plastic, see smoke, or hear abnormal noises. A systematic approach helps you isolate the problem without guessing.
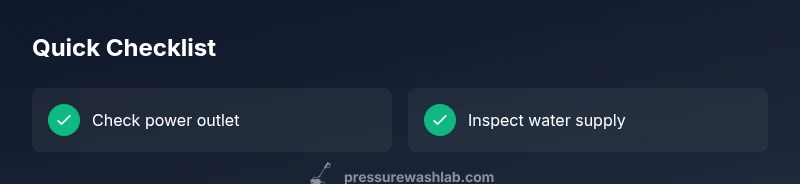
Quick Checks You Can Do Right Now
Start with the easiest fixes: verify the outlet is live and the GFCI hasn’t tripped; reseat the plug and plug into a known-good outlet. Inspect the garden hose and inlet screen for kinks or blockages, then remove the spray wand and check the nozzle for obstructions. Clean or replace filters as needed. If the unit still won’t start or shows weak spray, check for air leaks around fittings and inspect O-rings and seals. These checks often resolve a surprising share of problems without disassembly.
Diagnostic Flow Snapshot
Symptom-driven checks save time. If you observe no spray, start with the power and water supply; if you hear the motor but see no spray, inspect the spray nozzle and filters; if pressure drops under use, check for leaks around seals or an incorrect unloader valve setting. Each symptom points to a likely category of causes, helping you decide whether to clean, tighten, or replace components. Always air-test with water to avoid running dry during troubleshooting.
Deeper Fixes (Overview)
Once you identify the most probable cause, you can apply targeted fixes. For power issues, tighten connections or reset breakers; for water issues, clear blockages and ensure a steady supply; for nozzle or filter problems, clean or replace parts; for air leaks or seals, check gaskets and O-rings; for unloader valves, adjust to the correct pressure setting. This section provides the logic, not the exact steps—those appear in the STEP-BY-STEP block below.
Safety, Prevention, and Best Practices
Never operate a pressure washer with missing guards or damaged cables. Always disconnect power before opening covers or replacing parts. Use protective eyewear, gloves, and non-slip footwear when testing under pressure. To prevent future problems, perform routine maintenance: rinse and drain water after use, inspect hoses for wear, clean filters monthly, and store upright in a dry place. Regular checks reduce the chance of sudden failures on busy days.
Steps
Estimated time: 60-90 minutes
- 1
Verify power and water supply
Ensure the unit is plugged in, the outlet is live, and the GFCI has not tripped. Confirm the water source is fully open and there is adequate flow. If you’re using an adapter, remove it and test with a direct connection.
Tip: Always unplug before inspecting electrical components. - 2
Inspect inlet filter and hose
Disconnect the inlet hose and check the screen for debris. Rinse or replace the filter if clogged. Straighten the hose and remove any kinks that could restrict flow.
Tip: A dirty inlet filter can dramatically reduce output. - 3
Check nozzle and spray wand
Detach the nozzle and inspect for mineral buildup or obstructions. Soak or replace the nozzle if needed and reassemble securely.
Tip: Use the correct nozzle for your desired pressure. - 4
Test for air leaks and tighten fittings
Run the unit briefly with water to feel for air leaks around connections and fittings. Tighten or replace gaskets and O-rings where you detect leaks.
Tip: Leaky seals are a common cause of pressure loss. - 5
Check unloader valve setting
Verify the unloader valve is properly set for your model. If unsure, consult the manual or reset to the default factory setting.
Tip: Incorrect unloader settings can keep the pump from building pressure. - 6
Run a controlled test and evaluate
Reconnect everything, run the unit at a moderate setting, and observe spray quality and consistency. If power loss or leakage persists, stop and seek professional service.
Tip: Document symptoms to aid a technician if needed.
Diagnosis: Power issues, no spray, or low pressure
Possible Causes
- highPower supply problem (outlet, GFCI, circuit breaker)
- highWater supply insufficiency or kinked hose
- mediumClogged inlet filter or nozzle
- lowAir leaks in pump or loose fittings
- lowWorn pump seals or unloader valve mis-set
Fixes
- easyTest outlet with a known-good device; reset GFCI; try a different circuit
- easyInspect hose, inlet screen, and water source; remove kinks and clear blockages
- easyCheck nozzle and clean or replace; flush filter and replace if worn
- mediumCheck for air leaks around pump and tighten fittings; replace O-rings as needed
- hardIf pump seals are damaged or unloader valve is out of spec, consult service; do not run dry
Quick Answers
What is the most common cause of no pressure on a Karcher unit?
The most common causes are power or water supply issues, followed by nozzle or filter blockages. Start with power, water, and nozzle checks before diving into disassembly.
The most common causes are power or water supply issues, followed by nozzle or filter blockages. Start with power, water, and nozzle checks.
Can I fix electrical problems myself?
You can perform basic safety checks, like verifying outlets and breakers, but avoid opening sealed components or working inside live electrical parts. If in doubt, consult a professional.
You can check outlets and breakers, but avoid opening sealed parts. If unsure, call a professional.
How do I clean the nozzle and inlet filter?
Remove the nozzle and filter, rinse under running water, scrub gentle mineral buildup, and reassemble. Replace worn parts if cleaning doesn’t restore flow.
Remove and rinse the nozzle and filter, scrub, and reassemble. Replace worn parts if needed.
What should I do if there’s a leak around seals?
Turn off the unit, depressurize, and inspect O-rings and gaskets. Tighten fittings or replace seals as necessary. If leaks persist, professional service may be required.
Turn it off, check O-rings and seals, and fix or replace as needed.
Is it safe to run a Karcher with a clogged hose?
No. A clogged hose increases back pressure and can damage the pump. Clear blockages and restore normal flow before use.
No—clear blockages before using again.
How can I prevent future problems?
Perform monthly maintenance: clean filters, inspect hoses, and drain water after use. Store properly and perform checks before each job.
Maintain monthly: clean filters, inspect hoses, and store properly.
Watch Video
Key Takeaways
- Identify symptom first, then test power and water supply.
- Clean filters and nozzles before replacing parts.
- Tighten leaks and verify unloader settings.
- When in doubt, consult professional service.