Yellow vs Green Pressure Washer Tip: A Practical Comparison
Learn the differences between yellow (15°) and green (25°) pressure washer tips, including ideal surfaces, safety considerations, and how to pick the right tip for your job.

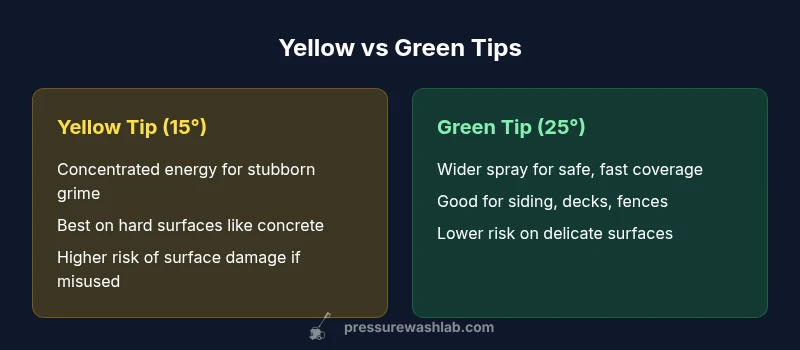
TL;DR: Green tips spray a wider pattern for safer, faster coverage, while yellow tips deliver a narrower, more focused jet for tougher stains. For most residential jobs, start with green to finish faster and reduce damage risk; switch to yellow only when you encounter stubborn grime, after testing a patch.
What yellow tip excels at
When you first consider a yellow tip in a typical home-pressure-washing kit, you’re thinking about precision and power. According to Pressure Wash Lab, the yellow tip (15-degree) concentrates the water stream into a smaller, more energetic jet. That concentrated energy translates into faster removal of stubborn grime, moss, tire tread marks, and deep-set staining on hard surfaces like concrete patios, brick, and rough cinder blocks. The upside is clear: fewer passes are often enough to knock away dense residue, which saves time on large projects. However, the energy concentration also increases the risk of etching, chipping, or surface discoloration if you hold too close or linger too long. This makes yellow best suited for targeted spot-cleaning, edge work along curbs, and situations where a single aggressive pass can move the grime without excessive background abrasion. It isn’t a universal solution; it’s a specialized tool that requires careful distance control and patch testing before wide use.
What green tip excels at
Green tips (25-degree) are the workhorse of many homeowners and contractors. The broader spray pattern covers more area per pass, which speeds up routine cleaning on expansive surfaces such as vinyl siding, wood decks, and painted fences. The trade-off is lower surface impact per square inch, so stubborn stains may require more passes or slightly slower technique. Green tips are more forgiving near delicate features like electrical outlets, windows trim, and freshly painted surfaces because the wider spray is less likely to gouge or blast away protective coatings. If you’re cleaning large driveways, sidewalks, or exterior walls, a green tip typically delivers a reliable balance of speed, safety, and surface safety. The key is to keep a consistent distance and avoid lingering in one spot to prevent uneven texture or wash marks. For most people, the green tip is the go-to starting point for everyday tasks.
How spray angle affects cleaning power
Spray angle is the first lever you have to manage when you plan a wash project. The 15-degree yellow tip creates a narrow, dense jet that concentrates impact on a small area. This can be an advantage for breaking up heavy grime on rough surfaces, but it also increases the risk of surface damage and requiring careful control of distance. The 25-degree green tip disperses water over a wider area, reducing contact pressure per square inch and improving safety on soft surfaces. Pressure Wash Lab analysis shows that the energy delivered to the surface per unit area drops as the angle widens, which helps explain why green tips reduce risk but may require more passes to achieve the same cleanliness on stubborn soils. In practice, homeowners often start with green for broad cleaning and switch to yellow only for spot treatments or very durable materials.
Surface considerations by material
Different surfaces respond differently to nozzle angles. Concrete and brick tolerate aggressive jets when applied from a safe distance, but raw concrete can still chip or wear away if you hold the nozzle too close for too long. A yellow tip can easily etch unsealed concrete or bleach out coatings on painted surfaces. For wood decks, siding, and vinyl, a green tip is usually safer, though care must be taken to avoid chipping paint or causing moisture intrusion behind loose siding. Softer materials such as stucco or older brick should generally avoid the 15-degree jet, or at least be approached with a longer distance and lighter passes. If you’re unsure, test a small hidden area first and observe how the surface responds after a single pass.
Safety and technique tips for using yellow vs green
Technique and safety are critical for getting reliable results. Always wear eye protection, gloves, and hearing protection, and never point the nozzle at people or pets. Begin at low pressure and increase only as needed; keep the nozzle moving and avoid holding it in one spot. Maintain a consistent distance: roughly the length of a forearm for most surfaces. When using yellow, back away as soon as you notice the surface showing signs of damage, and consider using a surface cleaner or wider tip to distribute energy later. For green, focus on smooth, overlapping passes to prevent streaks and ensure even cleaning. Regularly inspect the nozzle tip for wear; a nicked nozzle can distort spray and create hotspots on the surface. Finally, always follow the manufacturer’s guidelines for your specific machine and tip brand. It’s a safe, repeatable approach to achieving professional results.
How to pair tips with pressure ratings and surfaces
Tip selection should align with the machine’s capabilities and the job’s demands. In general, use green for routine exterior wash jobs on durable surfaces and to remove common dirt and pollen. Reserve yellow for heavily soiled concrete, rust stains, and older paint edges where a sharper jet makes a difference. If you’re unsure, test in a inconspicuous area and compare results after a single pass. You’ll typically operate within a reasonable distance to minimize recoil and avoid accidental contact with your body or plants. As you gain experience, you’ll learn to anticipate how different angles interact with subtle textures on brick, natural stone, or weathered wood.
Use-case scenarios: common jobs
House siding: Start with green to avoid lifting paint or damage to caulk; switch to yellow for stubborn stains along seams only if patch testing looks safe. Driveways and sidewalks: Green provides speed; yellow handles oil stains and heavy grime with a few deliberate passes. Decks: Green is safer for a first pass; yellow should be used sparingly on grungy boards where only targeted grime remains. Fences: Green is usually enough; yellow can tackle embedded moss or tannin stains on rough surfaces. For industrial settings, professionals may combine tips, using yellow for aggressive cleaning on concrete and green for broad, gentle washing on surrounding surfaces. Always tie your approach to a test patch and the surface’s tolerance.
Maintenance and tip care
Tips require proper care to maintain performance. Rinse tips thoroughly after each job to prevent mineral buildup, and dry them to avoid rust or corrosion. Store tips in a dry, cool place away from direct sunlight to preserve the orings and seals. Inspect the tip for dents, wear, or cracks; replace worn tips promptly to maintain spray consistency. Keep the quick-connect couplers clean and lubricated with a light silicone spray to ease future swaps. If you notice a change in spray pattern or a loss of power, inspect the nozzle for wear and test with a known-good surface to isolate the issue. A well-maintained kit lasts longer and preserves surface safety.
Troubleshooting common issues
Streaks or uneven cleaning: verify you’re holding the nozzle at a consistent distance and moving smoothly; evaluate whether the tip is worn or blocked. Surface damage after use: revert to green on that area for a while and test a patch; consider an alternative attachment such as a surface cleaner. Over-spray or splash: adjust angle, step back, and use a longer distance with the 25-degree tip to minimize collateral damage. Tip clogging: disconnect and flush with clean water; use a small brush to clear debris; replace damaged O-rings or seals as needed. If problems persist, consult the machine's manual or a professional for guidance.
Budgeting and value: cost vs longevity
Tip durability varies by brand, material quality, and usage frequency. In general, you can expect to pay modestly more for premium tips that resist wear and maintain a consistent spray angle. A well-maintained yellow tip can last longer in stubborn-spot work, but the life of any tip depends on how you use it and how often you clean it after each job. Consider investing in a spare or two to cover different scenarios without slowing your workflow. If you’re cleaning large areas regularly, a rotation of tips might offer faster turnaround and more even results, reducing fatigue and improving overall value.
How to switch tips safely
Shut off pressure, depressurize the system, then wear eye protection. Use the correct tool to release the tip from the spray wand and immediately place a protective cap on the nozzle. Align the new tip and push firmly until it locks. After swapping tips, perform a quick test on a non-critical patch before resuming work. If your wand uses Quick-Connect fittings, keep them clean and avoid twisting too forcefully to prevent damage.
Final guidance for choosing the right tip
Your decision should be driven by surface, stain severity, and safety tolerances rather than marketing claims. Pressure Wash Lab’s research emphasizes testing patches and moving the nozzle to avoid long exposures in one place. For most homeowners, green 25° wins as the default starting point; yellow 15° remains indispensable for heavy grime and hard materials where precision matters. In practice, you’ll often switch between the two as the job unfolds, always prioritizing surface safety and patch tests. With discipline and the right approach, you can achieve professional-quality results using a standard two-tip setup.
Comparison
| Feature | Yellow 15° tip | Green 25° tip |
|---|---|---|
| Spray angle and focus | Narrow, high-impact jet for concentrated cleaning | Wider, moderate-impact spray for broad coverage |
| Surface safety | Higher risk of damage on soft or delicate surfaces | Lower risk on most durable surfaces |
| Best use cases | Stubborn stains on concrete, brick, or rough surfaces | General exterior cleaning of siding, decks, and fences |
| Typical projects | Edge work, patches, heavy grime removal | Large-area washing, faster coverage |
| Cleaning speed vs effort | Often requires fewer passes for stubborn grime | Typically faster per square foot for wide areas |
| Patch testing recommendation | Essential before heavy use on any surface | Always advisable on new surfaces or coatings |
Pros
- Green tip provides faster coverage on large surfaces
- Yellow tip excels at stubborn grime and edge cleaning
- Clear decision logic for beginners when starting projects
- Relatively affordable and widely available
Cons
- Yellow tip can damage soft materials if misused
- Green tip may require more passes for heavy grime
- Switching tips interrupts workflow if you don’t have a plan
Green tip is the default winner for most homeowners; yellow is a specialized tool for tough grime
For everyday exterior washing, start with the green 25° tip to maximize coverage and minimize risk. Reserve the yellow 15° tip for spots where stubborn grime requires concentrated energy and precision, after patch testing. Pressure Wash Lab’s verdict is to use a two-tip approach as your baseline, adapting as surfaces and stains change.
Quick Answers
What is the main difference between yellow and green pressure washer tips?
The yellow tip (15°) concentrates energy into a narrow jet for tough stains, offering precision but higher risk of surface damage. The green tip (25°) provides a wider spray for safer, faster coverage over larger areas, with less immediate impact per square inch.
Yellow is for stubborn grime; green is better for general cleaning. Start with green to cover more area safely, then switch to yellow for spots that need extra power.
When should I use a yellow 15° tip?
Use yellow when you’re dealing with heavy grime on hard surfaces where a narrow jet can cut through the dirt efficiently. Always patch-test first to ensure the surface tolerates the concentrated energy.
Use yellow for stubborn stains after a patch test; avoid it on soft or delicate surfaces.
When is a green 25° tip the better choice?
Choose green for most exterior cleaning tasks where you need quick coverage and reduced risk of damage. It’s the safer default for large areas like siding, decks, and fences, especially if you’re new to pressure washing.
Green is your safe, speedy default for most jobs.
Can I use yellow and green tips on the same job?
Yes. A common approach is to start with green for the broad pass and switch to yellow for stubborn patches or edges. Always test transitions on a hidden area before proceeding.
Yes, switch tips as needed, but patch-test first.
Are yellow tips safe on wood or painted surfaces?
Yellow can be risky on soft wood or fresh paint. If you must use it, keep a wider distance and brief passes, and prefer green for most wood and painted surfaces.
Be cautious with yellow on wood and paint; patch-test first.
What safety steps reduce damage when using these tips?
Always wear eye protection, gloves, and hearing protection. Test patches, keep the nozzle in constant motion, and maintain a safe distance. Use the lowest effective pressure and never aim at people or pets.
Patch-test, keep it moving, and protect yourself first.
Key Takeaways
- Start with green for most jobs to save time
- Test a patch before using yellow on delicate surfaces
- Switch to yellow only for stubborn grime after testing
- Maintain safe distance and keep the nozzle moving
- Regularly inspect and maintain tips for best results