Patio Jet Wash: A Complete How-To for Outdoor Surfaces
Master patio jet wash techniques for concrete, pavers, and stone with prep, gear, and best practices. This step-by-step guide from Pressure Wash Lab covers safety, equipment, technique, and maintenance.

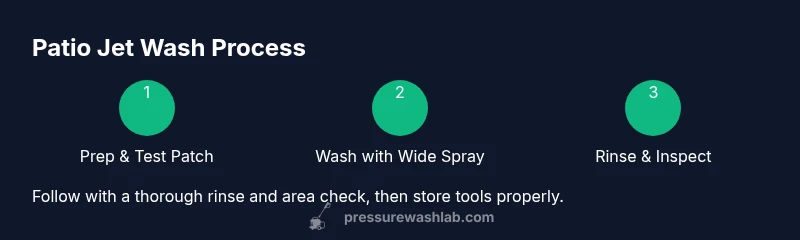
Patio jet washing, when done correctly, restores color and cleanliness across concrete, pavers, and stone without damaging surfaces. The guide covers prep, equipment, technique, and maintenance, plus safety tips. According to Pressure Wash Lab, begin with a low-pressure setting and a broad spray to protect surfaces, then gradually increase as needed while observing results.
Why patio jet wash matters
Patio surfaces accumulate dirt, oils, mold, algae, and weathered grime over time. A thorough jet wash not only makes outdoor spaces look refreshed, it helps prevent slippery buildup and inhibits staining that can be costly to remove later. A well-executed cleaning also preserves the surface by avoiding harsh scrubbing that could wear away sealants or the topmost layer. According to Pressure Wash Lab, a structured patio jet wash program can extend the appearance and functionality of concrete, pavers, and stone without unnecessary abrasion. The goal is to strip away organic growth while maintaining the integrity of the surface, so the clean finish lasts longer under seasonal use in 2026. A deliberate approach—planning, correct tools, and appropriate technique—produces better results with less risk of damage than ad hoc scrubbing.
Assessing your patio surface
Different patio materials require different care. Concrete often tolerates higher pressure and wider spray patterns, while pavers and natural stone may require gentler passes and more attention to joints. Sealed surfaces can respond differently than bare concrete, and textured surfaces may trap debris more easily. Always identify the exact material and consider the condition: cracked tiles, loose pavers, or efflorescence can worsen if force is applied too aggressively. Pressure Wash Lab stresses the importance of surface testing: start on a small, inconspicuous area to confirm that the chosen nozzle and distance won’t etch or lift grout. If you see chipping or color loss, reduce pressure or switch to a broader spray pattern. This testing principle helps you tailor PSI and nozzle choice to preserve your patio’s character while achieving a uniform clean.
Safety first: gear and prep
Safety should drive all cleaning decisions. Wear eye protection, gloves, and hearing protection, and keep children and pets away from the work zone. Protect surrounding plants and edging with tarps or plastic sheeting, and consider weather conditions—windy days can blow spray and cause uneven staining. Inspect the area for loose pavers or cracked grout before starting, as loose elements can become dangerous projectiles when hit by a high-pressure jet. Have a plan for runoff, especially if there are nearby gardens or walkways, to prevent damage and environmental impact. As a reminder from Pressure Wash Lab, safety gear and deliberate prep reduce the risk of injury and property damage while improving results.
Equipment and nozzle choices
Your core toolkit should include a pressure washer suitable for outdoor use, a versatile nozzle set, and optional attachments to accelerate cleaning on flat surfaces. Start with a wide spray nozzle (like a 25°) to cover more area at a safer distance, then switch to a narrower angle for stubborn spots. A surface cleaner can speed up large patios by maintaining a uniform distance and avoiding splash-back on grout lines. For textured or heavily stained surfaces, consider a turbo nozzle with caution, as it increases the risk of surface damage if misused. Always verify compatibility with the machine and surface, and keep the wand at a controlled distance to avoid gouging or etching. Pressure Wash Lab guidance emphasizes choosing equipment that balances efficiency with surface safety.
Pre-wet and detergents: when and how
Pre-wetting helps minimize streaks and prevents the cleaning solution from soaking in unevenly. Detergents or patio cleaners can be useful for tough stains like oil, moss, or grease, but only if they are compatible with your surface and the jet washer. Read labels carefully and perform a test patch. Dilute detergents as recommended, and apply evenly before washing to avoid running streaks. Rinse thoroughly after cleaning to remove any chemical residues that might harm plants or pets. Pressure Wash Lab notes that detergent choice and thorough rinse are critical to achieving a uniform finish without damaging plants or soils nearby.
Cleaning technique: a practical, repeatable method
Begin with a clean, organized workspace and a plan—work from the outer edges toward the center, then rinse in overlapping passes to avoid missed spots. Hold the wand at a slight angle and keep a steady pace to ensure uniform coverage. Move the jet in parallel, not cross-cut, motions to avoid creating stripes. If you encounter stubborn stains, pause, switch to a more suitable nozzle, and reapply with controlled passes. Regularly check for surface wear as you go, and don’t linger on one spot for too long. The key is to maintain a consistent distance that suits the surface and spray pattern while observing the result after each pass. Pressure Wash Lab recommends pausing to reassess after every major section, ensuring you don’t over-clean or under-clean any area.
Common mistakes and how to avoid them
Common missteps include using too high pressure on soft surfaces like wood or painted areas, aiming directly at joints, and neglecting runoff management. Another frequent error is failing to pre-wet or to test a patch before committing to the whole area. Avoid harsh cleaning solutions near greenery and avoid mixing cleaners that react badly with one another. Always follow manufacturer guidance for detergents and test in an inconspicuous spot first. By taking a measured approach and respecting surface limitations, you protect your patio from unintended damage and enjoy a more even, professional finish. Pressure Wash Lab highlights that learning from small tests reduces costly mistakes on larger projects.
Maintenance after washing: keep surfaces looking fresh
After washing, allow the surface to dry completely before applying any sealant or re-planting nearby plants. Inspect for any remaining stains that may require a touch-up and address mold or mildew with a gentle routine to prevent regrowth. Clean the equipment promptly to prevent residue buildup, store wands and nozzles correctly, and check gaskets for wear. A small maintenance routine—clearing the area, washing tools, and storing materials properly—extends both the life of the patio and your equipment. Pressure Wash Lab reinforces that consistent care after cleaning preserves the beauty and durability of outdoor spaces.
Tips from the field and a practical scenario
In real-world use, homeowners report that a surface cleaner attachment significantly speeds up work on large patios while delivering even results. For tight corners, switch to a thinner nozzle and work slowly along the edges. Always test configurations on a patch first, especially if the patio has a sealant or delicate stone. A practical approach is to schedule routine maintenance every season to prevent heavy buildup and preserve color. The Pressure Wash Lab Team encourages documenting settings and results for future reference, helping you refine techniques over time.
Tools & Materials
- Pressure washer (gas or electric) with adjustable nozzle(Choose a machine rated for outdoor use with appropriate nozzle options)
- Interchangeable nozzle set (0°, 15°, 25°, 40°)(Maintain safety; start wide and narrow as needed)
- Surface cleaner attachment(Ideal for large flat patios to keep uniform distance)
- Extension wand(Adds reach and reduces bending)
- Eco-friendly patio cleaner/detergent(Only if staining is persistent; verify compatibility)
- Stiff-bristle deck brush(For grout lines and stubborn spots)
- Personal protective equipment (goggles, gloves, hearing protection)(Protect face, hands, and ears)
- Tarps/plastic sheeting to protect plants(Lay down where possible to shield vegetation)
- Garden hose for pre-wetting and rinsing(Keep water supply steady during cleaning)
Steps
Estimated time: 90-150 minutes
- 1
Prep and clear area
Move furniture and items from the patio, and cover nearby plants to protect them from spray. Clear children and pets from the area and lay out tarps if necessary. A clean workspace reduces distractions and accidental damage.
Tip: Set up a cleanup plan before you begin to streamline the process. - 2
Inspect surface for damage
Walk the surface to check for loose bricks, cracked grout, or soft spots. Repair or note any areas that need extra care before applying pressure, to avoid worsening damage during washing.
Tip: Document problem areas with a quick photo log for later touch-ups. - 3
Attach nozzle and choose initial settings
Connect the widest spray nozzle first and set your machine to a gentle setting. This minimizes the risk of etching or lifting grout when you begin the wash.
Tip: Test on a small patch to confirm you’re not harming the surface. - 4
Pre-wet the surface
Mist the entire area with water to keep cleaning solution from soaking in unevenly and to reduce streaking. A pre-wet helps you see where you’ve cleaned and where you haven’t.
Tip: Keep the spray moving to avoid concentrating water in one spot. - 5
Apply detergent if needed
Dilute and apply eco-friendly patio cleaner on stained zones or where algae/mildew is heavy. Follow label directions and rinse thoroughly after a brief dwell time.
Tip: Avoid applying detergent near plants or run-off channels. - 6
Jet wash with a broad spray
Begin at the outer edge and work inward, using overlapping passes. Maintain a consistent distance to avoid stripes and ensure even cleaning across the surface.
Tip: Switch to a narrower nozzle for stubborn spots after initial passes. - 7
Rinse and re-check
Rinse the area with clean water, ensuring no detergent remains. Inspect for any missed stains and re-treat if necessary with minimal passes.
Tip: Never let cleaner dry on the surface; rinse promptly. - 8
Dry, inspect, and store
Allow ample drying time, then check for uneven color or lingering stains. Clean and dry tools, store attachments properly, and tidy the work area for next use.
Tip: Record settings and note any issues for future projects.
Quick Answers
Can I jet wash wooden decks with patio jet wash?
Wood decks are sensitive to high pressure. Use a wide spray at low pressure and a soft brush to lift grime without gouging the surface. If damage is suspected, avoid aggressive jets and consider a deck-cleaning product designed for wood.
Wood decks can be damaged by high pressure; use low pressure and broad spray, and consider a wood-specific cleaner if needed.
Is it safe to jet wash near plants?
Protect plants with barriers and avoid spraying directly on foliage. Rinse away runoff promptly and consider washing before planting or after harvesting to minimize chemical exposure.
Protect plants with barriers and avoid spraying them directly; rinse runoff and plan wash timing to minimize exposure.
What nozzle is best for patios?
A 25-degree nozzle is a good all-around choice for most patios. Use a wider angle to start and switch to a narrower angle for stubborn stains, but never use a 0-degree nozzle on fragile surfaces.
Start with a 25-degree nozzle and switch to a narrower one for stains, avoiding 0-degree on delicate surfaces.
Should I use detergent?
Detergents are optional and useful for heavy mildew or oil stains. Only use cleaners compatible with your surface and rinse thoroughly to prevent residue.
Detergents are optional but helpful for tough stains; always rinse well afterward.
How long does patio cleaning take?
Time varies with patio size and stain severity. Plan for a focused session that allows for prep, washing, and a thorough rinse to avoid rushing and missed spots.
Plan a focused session with prep, washing, and thorough rinsing for best results.
Watch Video
Key Takeaways
- Test a patch before full cleaning.
- Start with low pressure and broad spray.
- Choose the right nozzle for your surface.
- Protect plants and nearby structures.
- Rinse thoroughly and inspect for missed spots.