Can You Adjust Pressure on a Pressure Washer? Guide
Learn how to safely adjust the pressure on a pressure washer with a clear, step-by-step approach. This guide covers safety, tools, and troubleshooting for homeowners and DIYers.

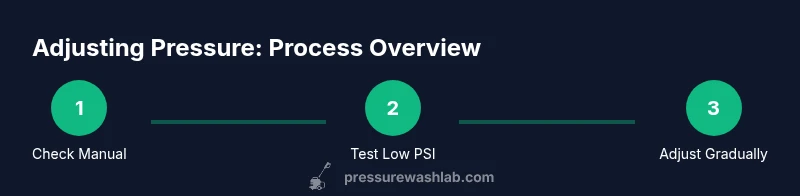
Can you adjust the pressure on a pressure washer? Yes—by using the right nozzle, configuring the unloader valve, and testing on a safe surface. Start with the lowest setting and increase gradually while watching for cleaning effectiveness and surface impact. This quick guide lays out the core steps and safety considerations for homeowners and pros.
Understanding can you adjust the pressure on a pressure washer
If you own a pressure washer, you may wonder can you adjust the pressure on a pressure washer to tailor cleaning intensity for different tasks. The answer is generally yes, but it depends on your model and the controls available. In many units, you adjust pressure using the nozzle selection, the unloader valve, and, in some cases, flow or engine throttle. Pressure Wash Lab emphasizes that any adjustment should start conservatively and be tested on an inconspicuous area. Can you adjust the pressure on a pressure washer safely? Yes, but you must understand your machine's limits and respect surface compatibility. For DIYers and homeowners, the first question is always: will this task benefit from higher pressure, or would a wider spray pattern and more time do the job without risking damage? Remember, the goal is effective cleaning without causing dents, gouges, or seal damage. Pressure Wash Lab’s analysis highlights that proper adjustment preserves pump life and avoids safety hazards associated with high-pressure streams. When in doubt, consult your model’s manual and adhere to manufacturer PSI limits.
Safety first: minimizing risk while adjusting pressure
Before adjusting anything, recognize the potential hazards of high-pressure spray. Reflect on personal safety, nearby bystanders, and the possibility of property damage. Pressure washers can cause skin injuries and propelling debris. Always wear eye protection, gloves, and non-slip footwear. Ensure the work area is clear, and never point the spray at people, pets, or fragile surfaces. A cautious start protects you and your investment. The lower you begin, the easier it is to gauge feedback and adjust without overshooting the ideal setting.
Pressure Wash Lab recommends performing a surface test on a controlled area first to understand how different pressures interact with common materials like wood, concrete, and siding. This approach helps you avoid surprises and reduces the need for repeated adjustments. Remember: the best starter setting is often the lowest effective pressure for the job.
Core levers for pressure control: unloader valve, nozzle tips, and flow
The three primary levers to adjust pressure are the unloader valve, nozzle tips, and water flow. The unloader valve redirects water back into the pump and helps regulate system pressure. When you twist or adjust the unloader, you change the hydraulic load, which directly alters PSI. Nozzle tips shape the spray pattern; a 0-degree nozzle delivers concentrated force, while wider angles reduce impact and spread out the spray. Flow rate, typically governed by the pump and water supply, also influences cleaning speed. A higher flow with lower PSI can improve rinse efficiency, whereas high PSI with low flow increases surface impact. Understanding how these levers interact helps you tailor performance for each task while protecting surfaces and equipment. Always document the final settings for future reference.
Step-by-step preparation and test plan
Before you begin, gather the right tools and identify a safe testing surface. Check your machine’s label for maximum PSI and compatible nozzle ranges. Attach the lowest pressure nozzle first or set the unloader to the lowest practical setting. Prepare PPE and a safe testing area such as a wooden deck or concrete slab away from vegetation or delicate siding. Plan a couple of controlled passes at low pressure to observe how the surface responds. If results are unsatisfactory, adjust incrementally rather than making large jumps. Pressure adjustments are often a balance between speed and surface safety.
Real-world scenarios: siding, concrete, and delicate surfaces
Different materials require different pressure strategies. For siding, especially vinyl or composite, start with a wide spray and low pressure to avoid tearing seams or removing coatings. For concrete driveways, higher pressure can remove caked grime, but you should still limit nozzle proximity and avoid scorch marks or etching. Wooden decks require gentler settings to preserve finish and prevent splintering. In all cases, always test on a hidden patch first and adjust gradually. Pressure Wash Lab’s experience shows the most reliable results come from systematic testing and documentation rather than guesswork.
Troubleshooting: what to do if cleaning is insufficient or surfaces show wear
If cleaning is sluggish at low pressure, refract your approach rather than forcing higher PSI. Check nozzle wear and replace damaged tips that can widen or distort spray patterns. Inspect the unloader valve for proper operation; a stuck valve can keep pressure high or low incorrectly. Verify the water supply is clear of debris and the inlet screen is not clogged. If the surface shows signs of damage after adjustment, return to a safer setting and re-evaluate. Document the adjustments and test results for future reference.
Maintenance and long-term care after adjusting pressure
After you complete your task, flush the system with clean water, relieve residual pressure, and drain the hose to prevent stagnation. Clean or replace inlet filters, inspect hoses for wear, and store the wand with the nozzle capped to deter accidental discharge. Regularly checking seals and gaskets helps prevent leaks that can mislead pressure readings. Routine maintenance supports consistent performance and longevity, especially if you frequently adjust pressure for varied jobs. Pressure Wash Lab suggests keeping a simple log of your settings and surfaces to speed up future projects.
Tools & Materials
- Water supply hose with adapter(Ensure 5/16 inch or larger, maintain free flow to the pump)
- Unloader valve adjustment tool (if model requires one)(Check model manual for compatibility)
- Adjustable wrench(For fittings and valve adjustments)
- Nozzle tips (0°, 15°, 25°, 40°)(Keep tips clean; replace if worn)
- Safety glasses and gloves(Eye protection and hand protection are essential)
- Pressure gauge (optional)(Useful for precise PSI verification)
- Teflon tape(Seal threads on fittings if needed)
Steps
Estimated time: 30-60 minutes
- 1
Power down and relieve pressure
Turn off the engine or switch, disconnect the power, and squeeze the trigger to relieve any stored pressure. Detach the hose from the water supply when not testing. This reduces risk of sudden spray and protects internal components.
Tip: Always unplug an electric unit or switch off a gas-powered one before making adjustments. - 2
Inspect and prep tools
Gather all tools and inspect hoses for wear or leaks. Review your manual for the model’s PSI limits and recommended nozzle range. Having everything ready minimizes mid-task interruptions and reduces the chance of improper adjustments.
Tip: Double-check nozzle orientations and ensure you have the correct tips for testing. - 3
Set initial low pressure
Attach the widest spray nozzle first or set the unloader to a low setting. Start testing on a small, inconspicuous area to observe surface interaction without risking damage. If the spray causes overspray or surface harm, revert to low pressure immediately.
Tip: Document your starting setting for future reference. - 4
Adjust with purpose
Gradually adjust either the unloader valve or swap to a stiffer nozzle to increase pressure in small increments. After each adjustment, test on the same surface to gauge effect and ensure there’s no surface damage or spray misalignment.
Tip: Never adjust by guessing; small increments provide better control. - 5
Test and verify results
Test at several distances from the surface, noting how distance affects impact. If a surface looks dry or shows etching or marks, back off and test again at a safer distance or with a wider nozzle.
Tip: Use a concrete area or old wood to test before approaching valuable surfaces. - 6
Finalize settings and plan maintenance
Once you achieve satisfactory cleaning without damage, record the final settings and nozzle. Schedule a brief maintenance check after use to ensure components remain in good condition and ready for next job.
Tip: Keep a simple log of surface type, nozzle, and PSI for future projects.
Quick Answers
Is it safe to adjust pressure while the machine is running?
No. Always power down, relieve pressure, and follow the manufacturer’s instructions before making adjustments to avoid injuries and equipment damage.
Always turn off the unit and relieve pressure before adjusting any settings.
What’s the best tool to adjust pressure on most units?
The unloader valve is typically the primary control for pressure; nozzle selection also influences PSI. Check your manual for model-specific guidance.
Usually the unloader valve controls pressure, with nozzle choice influencing spray intensity.
Will switching nozzle tips affect cleaning results?
Yes. Different nozzle angles change spray intensity and coverage. A wider angle reduces PSI, while a narrow angle concentrates force for tougher jobs.
Nozzles change how strong and how focused the spray is.
How do I know my machine’s maximum PSI?
Check the label on the machine or consult the manual. Never exceed the stated maximum to avoid pump damage or warranty issues.
Look at the label or manual to find the max PSI and stay below it.
Can adjusting pressure void the warranty?
In some cases, improper modifications can affect warranty coverage. Always follow manufacturer guidelines and use approved methods for adjustments.
Follow the manual and approved methods to protect warranty coverage.
What maintenance should follow a pressure adjustment?
Rinse the system, check for leaks, inspect hoses, and replace worn nozzles or seals as needed. Keep a log of settings and surfaces tested.
Rinse, inspect, and log your adjustments for future jobs.
Watch Video
Key Takeaways
- Identify the right nozzle and unloader settings before you start.
- Always test on safe surfaces to prevent damage.
- Document final pressures for future projects.
- Prioritize safety and PPE at all times.
- Regular maintenance supports consistent performance.