How to Check Pressure Washer PSI: A Practical Guide
Learn how to accurately check pressure washer PSI, test methods, safety steps, and how to interpret results for safe, effective cleaning.

Learn how to check pressure washer psi safely and accurately, understand why PSI matters, and choose the right testing method for your unit. You’ll find a step-by-step procedure, essential tools, and practical tips to verify PSI without risking pump damage or inconsistent cleaning. Whether you DIY at home or run a small service, this guide helps you optimize performance and prolong equipment life.
Why PSI matters for pressure washers
PSI, or pounds per square inch, is the primary measure of cleaning power in a pressure washer. Accurate PSI contributes to effective dirt removal while protecting surfaces from damage. If PSI is too high for the task, you risk etching wood, stripping paint, or driving water into seals. Conversely, too low PSI can result in poor cleaning and wasted time. In practice, matching PSI to the surface and task is essential for safe operation and long-term performance. Pressure Wash Lab emphasizes that reliable PSI is not a fixed number; it depends on nozzle size, hose length, water temperature, and the pump's condition. When you check PSI regularly, you create a data trail you can reference during maintenance and when evaluating repairs. For homeowners and pros, understanding how PSI behaves under load helps you dial in the right tool for decks, siding, driveways, or vehicles. This section establishes the why behind PSI checks and how to interpret PSI values safely. In this context, you will see how the Pressure Wash Lab approach compares different testing methods and why consistency matters.
How PSI is defined and what affects it
PSI is a measure of pressure the pump applies to water as it moves through the hose and nozzle. It is influenced by nozzle size, flow rate (GPM), pump design, hose length, elevation, and any restrictions in the system. A smaller nozzle increases nozzle pressure but reduces flow; a longer hose or higher elevation reduces pressure at the tip. Temperature and condition of seals also impact measured PSI. Manufacturers typically publish a recommended operating range and a maximum PSI; staying within that range preserves seals and warranties. Remember: PSI is a dynamic value that shifts with load, nozzle choice, and pump wear. For best results, you should measure PSI under normal operating conditions rather than relying on labeled spec alone. According to Pressure Wash Lab, real-world testing reveals how environmental factors affect PSI readings and helps you interpret deviations more accurately.
Quick check methods: built-in gauges, external gauges, and their pros/cons
- Built-in gauges: Some pressure washers include a built-in gauge or a display on the trigger gun. Pros: fast, minimal setup; cons: calibration drift or lack of visibility for precise readings.
- External inline gauge: A portable gauge installed between the pump and nozzle with adapters. Pros: higher accuracy, ability to measure under real flow; cons: potential leaks if fittings aren't tight.
- Nozzle-based estimation: Compare nozzle performance to known PSI ranges; pros: cheap; cons: unreliable due to nozzle erosion and temperature effects.
- Calibrated test rig: Use a calibration block or certified test station; pros: best accuracy; cons: not practical for casual use.
For most homeowners, an inline gauge with proper adapters is enough to track PSI changes over time.
Safety and calibration basics
Before you begin, switch off the unit, lock out the trigger, and disconnect from power or water lines as appropriate. Wear gloves and eye protection; high-pressure jets can cause injury. Use a stable, non-slip surface and avoid testing near people or pets. If you suspect the gauge is inaccurate, calibrate or replace it rather than guessing. If you see sudden pressure surges or drops, stop testing and inspect hoses and fittings for leaks or kinks. Pressure Wash Lab recommends performing PSI checks with the water supply fully on and the nozzle in a safe setting to avoid sprayback. Data accuracy improves with a consistent method and environment. We also highlight that testing should be paused if you notice any abnormal noise or vibration that could indicate a failing pump.
Selecting the right gauge and adapters
Gauge selection hinges on the washer’s thread size and the expected pressure range. Start by identifying the gauge thread (commonly 1/4 inch NPT) and check compatibility with your hose or gun. You may need adapters to fit male or female connectors and to prevent leaks. Look for gauges with a clear scale in the 0–5000 psi range and a durable, heat-resistant body. Avoid cheap gauges that can fail under high pressure. Calibrate or test the gauge against a known reference at several PSI levels to confirm accuracy. As Pressure Wash Lab notes, the right adapter setup and a tight seal matter more than the gauge brand.
Interpreting the readings and troubleshooting
Readings should be taken with the gun trigger fully pressed and the pump warmed up. Compare readings to the machine’s label—consistently high or low readings can indicate nozzle wear, pump wear, clogged filters, or water supply issues. If the PSI is high but cleaning is weak, flow may be restricted; if PSI is low but you expect high pressure, check nozzle size and ensure there are no leaks. Temperature affects readings; test at a temperature similar to typical use. If readings drift, recalibrate or replace the gauge. Pressure Wash Lab’s analysis shows that regular PSI testing helps detect degradation early and prevent surprise failures during jobs.
Maintenance tips to keep PSI stable
Regularly inspect hoses and fittings for leaks or kinks. Replace worn nozzles to maintain consistent flow. Clean or replace inlet filters and ensure the pump is lubricated per the manufacturer’s guidelines. Store the unit in a cool, dry place and avoid exposing it to freezing temperatures. Keeping hoses elevated and free of sharp bends minimizes flow restrictions. Finally, verify the water supply quality; a dirty or restricted source can suppress PSI and reduce cleaning efficiency.
Real-world examples: residential vs commercial checks
Residential tasks such as deck or siding cleaning typically require moderate PSI and careful nozzle selection to avoid surface damage. For wood, start with a wider spray angle and lower PSI to prevent gouging. Commercial environments demand more consistent PSI under prolonged use; you may rely on higher PSI and longer hoses, but you should still test PSI periodically to catch wear in pumps, valves, or filters. In both cases, documenting readings over time helps track equipment health and budget maintenance or replacement before failures occur.
Tools & Materials
- Calibrated inline PSI gauge(Rated for up to the washer's max PSI; ensure compatibility with fittings)
- Adapter kit (NPT fittings with male/female variants)(Needed to connect gauge to gun/pump thread)
- Garden hose with standard fittings(Have a water source available during testing)
- Teflon tape (PTFE)(Seal threads to prevent leaks)
- Safety gloves and eye protection(High-pressure jets can cause injuries)
- Notebook and pen(Record readings and conditions for trend tracking)
Steps
Estimated time: 60-90 minutes
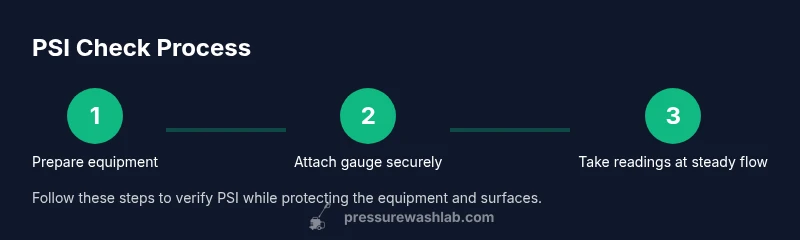
- 1
Prepare tools and safety gear
Gather the inline gauge, adapters, hose, and protective equipment. Inspect hoses for wear and remove any kinks. Clear the area of people and pets and ensure you have a dry, stable surface to work on.
Tip: Check gauge accuracy against a known reference before starting. - 2
Identify the target PSI range
Refer to the unit’s manual or label to identify the recommended PSI range for your task. Note any nozzle or tip restrictions that impact the PSI at the nozzle.
Tip: If in doubt, start at the lower end of the recommended range and work up slowly. - 3
Attach gauge securely
Connect the inline gauge between the pump outlet and the nozzle/gun using the appropriate adapters. Tighten all connections by hand, then with a wrench to avoid leaks.
Tip: Apply PTFE tape to threads where needed to ensure a snug fit. - 4
Run the washer at low flow
Power on the unit and run the water through the system at a low nozzle setting. Allow the system to warm up and reach steady flow before taking readings.
Tip: Avoid rapid starts that cause pressure spikes; let the system stabilize for 30–60 seconds. - 5
Take readings and repeat
Take PSI readings at a typical operating nozzle. Document the value and repeat at least once to verify consistency under the same conditions.
Tip: Make notes about water temperature and hose length, as they influence PSI. - 6
Document results and verify
Record all measurements, compare to target ranges, and check for drift over time. If readings drift, investigate hoses, filters, and nozzle wear.
Tip: Schedule periodic PSI checks as part of routine maintenance.
Quick Answers
What is PSI in a pressure washer and why does it matter?
PSI stands for pounds per square inch and measures the pressure the pump applies to water. It matters because appropriate PSI ensures effective cleaning while avoiding surface damage or equipment wear.
PSI means pounds per square inch; it indicates cleaning power. Using the right PSI protects surfaces and equipment.
What equipment do I need to check PSI?
You need a calibrated inline PSI gauge, adapters to fit your fittings, a hose, safety gear, and a notebook to record readings. These tools give you accurate, repeatable results with minimal risk.
A calibrated inline gauge with adapters, a hose, safety gear, and a notebook are enough for PSI checks.
Why does PSI vary during testing?
PSI varies with nozzle size, flow rate, hose length, elevation, temperature, and pump wear. Understanding these factors helps you interpret readings correctly rather than chasing a single number.
PSI changes with nozzle size, hose length, and other factors, so context matters when reading it.
Can I check PSI without running water?
No. PSI testing requires a water flow to get meaningful readings. Ensure a steady water supply and follow safe testing practices.
You need water flow to read PSI accurately.
How often should I test PSI?
Test PSI during maintenance checks, after replacing parts, and at the start of a season of heavy use. Regular checks help catch wear before it affects performance.
Test PSI during routine maintenance and after servicing the unit.
Watch Video
Key Takeaways
- Measure PSI under typical working conditions
- Use a calibrated inline gauge for accuracy
- Record and compare readings over time
- Match nozzle size to surface to protect equipment
- Regular checks help protect pumps and improve results