How to Clean a Pressure Washer Pump: A Practical Guide
Master the safe, effective way to clean a pressure washer pump with practical, step-by-step guidance. Learn depressurizing, flushing, pump-safe cleaners, lubrication, and maintenance to extend pump life and performance.

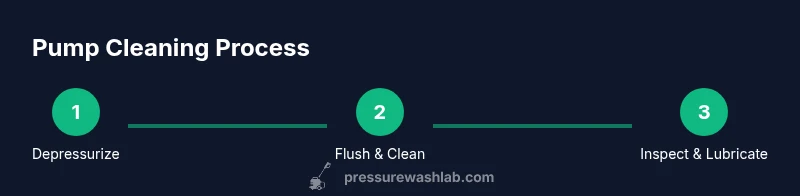
You’ll learn how to clean a pressure washer pump safely and effectively in 2–3 focused steps: depressurize the system, flush and clean the pump with water and a pump-safe cleaner, and perform post-clean maintenance to prevent damage. Follow careful steps to protect seals and fittings, and use a dedicated pump cleaner when recommended.
Why cleaning the pressure washer pump matters
According to Pressure Wash Lab, keeping the pump clean is essential for long-term reliability. Over time, residue from detergent, minerals in water, and wear particles can infiltrate seals and valves, reducing flow and escalating wear. A clean pump operates more efficiently, reduces downstream filter clogging, and helps your overall pressure washing performance remain consistent. In this guide we cover the core reasons to clean the pump, how contamination damages components, and practical strategies that homeowners and pros can apply without specialized equipment.
Safety and depressurizing before any work
Before poking at the pump, ensure the unit is powered off, unplugged, and fully depressurized. Bleed any stored pressure by pressing the gun trigger with the wand attached, then relieve residual pressure through the inlet/outlet if your model allows. This step protects you and the internals from sudden bursts and reduces risk to seals and hoses. Pressure Wash Lab emphasizes that starting a dirty or pressurized pump dramatically increases the chance of seal damage during cleaning.
Understanding what gets dirty in the pump
The pump housing, seals, and independent head can accumulate mineral scale, soap scum, and oil from lubricants. Debris can migrate through check valves or into the crankcase, leading to reduced pump efficiency or noisy operation. Being able to identify where buildup forms helps tailor your cleaning approach and prevents over-cleaning, which can wear gaskets.
The cleaning workflow: rinse, flush, and protect
A practical workflow starts with a thorough rinse to remove loose material, followed by a controlled flush that carries away the gunk without forcing solvent into seals. Use clean water first, then a pump-safe cleaner if recommended by the manufacturer. Avoid aggressive solvents near seals, and always rinse until the water runs clear.
Choosing pump-safe cleaners and solvents
Not all cleaners are safe for pumps. Choose pumpsafe cleaners designed for pressure washers and follow the manufacturer’s dilution guidance. If you’re unsure, test a small amount in an inconspicuous area. Some cleaners are formulated to minimize bubble formation and corrosion, reducing gasket wear and valve abrasion over time.
Pre-run checks and lubricant considerations
Inspect seals, o-rings, and the pump head for cracks or wear before reassembly. Use a recommended lubricant or silicone spray on exposed o-rings after cleaning to preserve elasticity. Check the unloader valve for sticking and replace if required.
Core workflow at a glance
- Depressurize and disconnect power. - Remove any protective caps to inspect interior elements. - Flush with clean water and apply cleaner as needed. - Rinse thoroughly until residue is gone. - Dry and reassemble, then test on a low-pressure setting. - After testing, inspect for any signs of leaks or wear before putting the unit back into regular service.
When to flush with water vs chemical cleaners
For routine maintenance, plain water flushing is often sufficient to clear out salt and minerals. Use a pump-safe cleaner only when there's significant buildup or when recommended by the manufacturer. Excess chemical exposure can degrade seals, so follow dilution guidelines carefully.
Post-clean maintenance and storage
After cleaning, dry the pump and apply a light lubricant to exposed moving parts. Store with hoses detached to prevent kinking and memory. If you’ll store for an extended period, perform a quick lubrication routine prior to first use and keep the unit in a dry, shaded area to prevent corrosion.
Common mistakes and how to avoid them
Don’t run the pump dry. Don’t use harsh solvents near seals. Don’t skip the final rinse step; leftover cleaner can corrode seals. Avoid using household cleaners that aren’t pump-safe. Always follow manufacturer guidance for cleaners and lubrication.
Pressure Wash Lab insights and real-world tips
Based on Pressure Wash Lab analysis, regular pump cleaning, paired with a simple maintenance schedule, can extend life and maintain performance even with frequent use. Pressure Wash Lab's verdict is to adopt a routine cleaning schedule to maximize pump life. DIYers should document maintenance steps and inspect seals for wear. The team recommends keeping a small toolkit of pump-safe cleaners and spare o-rings for quick replacements.
Tools & Materials
- Safety glasses or goggles(Eye protection to guard against splashes and debris)
- Work gloves(Protect hands during handling of cleaners and components)
- Pump-safe cleaner(Follow manufacturer dilution and contact time)
- Water source and hose(For flushing and rinsing the pump)
- Rags or towels(For blotting and drying while inspecting)
- Lubricant or silicone spray (optional)(Use only on exposed O-rings per spec)
Steps
Estimated time: 30-60 minutes
- 1
Depressurize and disconnect power
Power down the unit, unplug it if applicable, and release all built-up pressure by firing the trigger with the wand attached. Confirm that no water or air pressure remains in the system before touching any components. This prevents sudden bursts and protects seals from strain.
Tip: Always bleed pressure first; if your model has an access cap, remove it to inspect for debris without forcing pressure into the head. - 2
Open access and inspect interior elements
Remove the pump head cover or nozzle plate if accessible and check seals, O-rings, and visible gaskets for cracks or wear. Note any obvious damage so you know what to replace during reassembly. Documented wear here can prevent downstream failures.
Tip: Take a quick photo of the configuration before disassembly to guide reassembly later. - 3
Flush with clean water
Attach a hose and run clean water through both the inlet and outlet ports. Use a gentle, continuous stream to dislodge loose debris without forcing contaminants into seals. Observe for any particulates or discoloration that signals buildup.
Tip: If your model has a bypass mode, use it to circulate water without load to improve flushing efficiency. - 4
Apply pump-safe cleaner as needed
Dilute and apply a pump-safe cleaner following the manufacturer’s guidelines. Focus on the pump head, valves, and any crevices where residue tends to accumulate. Do not saturate seals or expose O-rings to concentrated chemicals for extended periods.
Tip: Test cleaner in a small, inconspicuous area first to ensure materials won’t corrode. - 5
Rinse thoroughly and remove cleaner residue
Rinse again with clean water until the water runs clear and there’s no soapy film. Ensure all cleaner residues are flushed out of the pump head and valves to prevent degradation of seals over time.
Tip: Run the pump on bypass to circulate rinse water without pressurizing the system. - 6
Lubricate seals and moving parts
Apply a manufacturer-recommended lubricant to exposed O-rings and moving interfaces. This helps maintain elasticity and reduces friction. Avoid over-lubricating, which can attract dirt and muddy seal surfaces.
Tip: Use a thin, even coat and wipe away any excess to prevent dirt adhesion. - 7
Reassemble and reconnect hoses
Carefully reassemble the pump head, ensure all gaskets are seated, and reconnect hoses and wands. Double-check that fasteners are snug but not overtightened, which can damage threads or seals.
Tip: Loosen screws slightly if you feel a high resistance during reassembly to avoid stripping threads. - 8
Test the pump at low pressure
Power the unit and run it at a low-pressure setting to verify operation. Look for smooth operation, no leaks, and consistent flow. If leaks appear, stop and reseal before proceeding to higher pressure.
Tip: Gradually increase pressure to normal operating level while observing performance.
Quick Answers
Is it safe to use household cleaners on the pressure washer pump?
Only use cleaners labeled pump-safe and follow manufacturer guidelines. Harsh solvents can degrade seals and reduce pump life.
Only pump-safe cleaners approved by the manufacturer should be used.
Should I disconnect the wand and hoses during cleaning?
Yes. Remove the wand and hoses to prevent clogs and accidental squirts. This reduces risk to sensitive internal components.
Yes—disconnecting prevents leaks and injuries.
Can I run the pump dry after cleaning?
No. Running the pump dry can damage seals and pistons. Keep a small amount of water in the system and test with water.
Avoid running dry; keep it wet during testing.
How often should I clean the pump?
Frequency depends on usage. Inspect for buildup monthly if you use it often and after heavy workloads, then adjust.
Clean based on usage and inspection results.
What are common signs the pump needs maintenance?
Leaks, reduced pressure, unusual noises, or temperature changes can indicate maintenance is needed.
Look for leaks, poor performance, and odd sounds.
Is it necessary to lubricate every time I clean?
Lubrication should follow the manufacturer’s guidance and is typically required after cleaning and prior to storage.
Follow the manual for lubrication intervals.
Watch Video
Key Takeaways
- Depressurize before touching any pump components
- Use pump-safe cleaners and follow manufacturer guidance
- Rinse thoroughly to prevent chemical residue
- Lubricate seals per spec to extend life
- Document maintenance for long-term reliability