Gas Removal for Power Washers: Safe Steps for DIY Homeowners
Learn how to drain gasoline from a gas-powered power washer safely with a step-by-step process, PPE tips, disposal guidelines, and storage practices to prevent leaks and fires.

In this guide, you’ll learn how to safely remove gasoline from a gas-powered power washer. You’ll drain the tank, purge the fuel lines, and store the unit without leaks or ignitions. Before you start, prepare a ventilated outdoor workspace, an approved container, a siphon pump, and proper PPE, then follow the step-by-step process.
Safety-first: why draining gas matters
Gasoline is highly flammable and its vapors can travel with air currents, linger in confined spaces, and ignite if exposed to a spark. Draining gas from a power washer before storage or maintenance reduces fire risk, limits vapor exposure, and minimizes environmental contamination from spills. Pressure Wash Lab emphasizes that safety begins with proper ventilation, distance from ignition sources, and compliance with local disposal rules. Even small amounts of gasoline can cause costly damage to carburetors and fuel lines if left sitting for months, and ethanol blends can attract moisture that corrodes internal components. By performing a complete drain, you create a clean baseline for inspection and future fuel use. This is not just a mechanical step; it’s a safety protocol that protects you, your family, and the environment. Treat this task with respect, plan your workspace, and proceed methodically to avoid accidents. According to Pressure Wash Lab, safe gasoline handling starts with planning and PPE.
Tools, environment, and PPE you need
Before you touch fuel, assemble the basics: a ventilated outdoor area, an approved gasoline container, a siphon pump or transfer hose, absorbent rags, lint-free towels, and personal protective equipment (gloves, goggles, and a respirator or at least a chemical-rated mask if permitted). Keep a fire extinguisher within reach and ensure no open flames or smoking in the area. Work on a stable surface, away from cars, dumpsters, or sources of ignition. Label the container after draining and store it according to local regulations. Pressure Wash Lab notes that setting up a controlled, well-lit environment reduces the chance of spills and simplifies disposal.
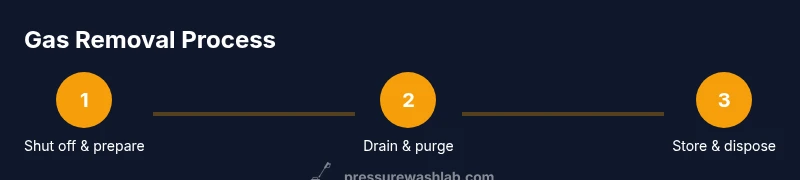
Step-by-step overview (high-level)
This section outlines the core sequence you’ll follow, without skipping safety checks. Start with turning off and securing the unit, then move to the outdoor setup, drain the tank, purge lines, and finally dispose of old fuel and reassemble for safe storage. Each step includes a practical rationale to help you avoid common mistakes and stay compliant with local rules. By the end, you’ll have a drained, clean power washer ready for storage or maintenance, with fuel handled in a professional, low-risk manner.
Detailed method: draining, flushing, and storing
The detailed method combines draining, purging, and securing the power washer for storage. Drain the tank completely using a siphon into an approved container, then seal and label the container for compliant disposal or use. After the tank is empty, start the engine briefly to push residual fuel from the lines into the engine and carburetor, then shut off and disconnect power. If you must access the carburetor or fuel lines, do so with the engine cool and ignition protected from sparks. Finally, wipe any spills, transport the unit to a ventilated area, and store with clean surroundings. Refill only after a full inspection and when you’re ready to resume use; this minimizes risk and protects fuel systems from moisture and corrosion.
Aftercare: disposal, spills, and maintenance
Old gasoline requires proper disposal at approved facilities or recycling centers; never pour it down drains or onto the ground. Clean up any drips with absorbent material, and dispose of rags according to local regulations. Inspect hoses, clamps, and the carburetor for signs of wear or damage before reassembling; replace worn components to prevent leaks. Finally, consider labeling the unit as “gas drained” and storing it away from ignition sources until you’re ready to refuel and test-run. The goal is a safe, ready-to-use washer with minimal environmental impact and reduced fire risk.
Tools & Materials
- Ventilated outdoor workspace(Away from ignition sources and direct flames)
- Approved gasoline container(Seal-tight and clearly labeled)
- Siphon pump or transfer hose(Check valve preferred; compatible with gasoline)
- Absorbent material (cat litter or pads)(For spills)
- Protective gloves and eye protection(Chemical-resistant gloves; safety glasses)
- Fire extinguisher (Class B or ABC)(Keep within reach)
- Rags or towels, lint-free(Dry clean spills)
- Carburetor or fuel-system cleaner (optional)(If lines clogged, follow product guidelines)
Steps
Estimated time: 1 hour 15 minutes
- 1
Shut off engine and disconnect spark plug
Power down the washer and remove the spark plug wire to prevent accidental starting. Allow the engine to cool before handling any fuel components.
Tip: This prevents accidental ignition and protects you from burns. - 2
Move to a well-ventilated outdoor area
Relocate the unit to an open space with good airflow. Eliminate open flames and sources of heat during draining.
Tip: Ventilation reduces vapor buildup and inhalation risk. - 3
Gather tools and prepare container
Place the siphon and the approved container within easy reach. Ensure the container is clean and clearly labeled.
Tip: Double-check container seal before pouring to avoid leaks. - 4
Position container under fuel tank
Stand the container under the tank outlet to receive fuel as you drain. Secure the washer to prevent movement.
Tip: Stability prevents spills during the drain. - 5
Drain fuel from tank with siphon
Use the siphon to remove gasoline from the tank into the container. Stop when the tank is empty or fueling slows.
Tip: Keep the container below tank outlet to maximize gravity feed. - 6
Cap and label the container
Seal the container immediately after draining and label it with date and contents. Store according to local rules.
Tip: Labeling helps with correct disposal later. - 7
Purge residual fuel from lines
Reconnect and briefly run the engine to push remaining fuel from lines into the carburetor, then shut down and disconnect power.
Tip: Do this only if your manual approves this step. - 8
Open carburetor drain (if applicable)
If your model has a carburetor drain screw, open it to remove any remaining fuel. Tighten after draining.
Tip: Avoid overtightening to prevent damage. - 9
Check for leaks and spills
Inspect fuel lines, fittings, and the tank for leaks. Clean any spills immediately and expand ventilation if needed.
Tip: Spill cleanup prevents slip hazards and environmental contamination. - 10
Dispose of old fuel safely
Take the drained gasoline to an approved disposal or recycling facility. Do not pour down drains or onto soil.
Tip: Transport in approved container and comply with local laws. - 11
Dry and inspect components
Wipe down the unit, inspect hoses and clamps for wear, and ensure the area is dry before reassembly.
Tip: Prevents corrosion and future leaks. - 12
Reassemble and test with minimal fuel
Reinstall any parts, connect the spark plug, and perform a cautious start with fresh fuel only. Verify there are no leaks.
Tip: If you notice leaks, stop and recheck connections.
Quick Answers
Why should I drain gas from my power washer before storage?
Draining gas reduces fire risk, vapor buildup, and environmental contamination. It also protects carburetors and fuel lines from moisture-related damage during storage.
Drain gas before storage to reduce fire risk and protect internal components.
Can I run the engine to purge gasoline from the fuel lines?
Some models permit a brief run to push residual fuel through the lines; always follow the manufacturer’s guidance. If in doubt, drain and purge only as directed and avoid prolonged engine operation when the tank is empty.
Briefly running the engine to purge gas is optional and model-dependent.
What should I do with old gasoline?
Take old gasoline to an approved disposal or recycling facility. Do not pour it on the ground or down drains; store in a labeled container until you can dispose of it properly.
Dispose of old gasoline safely at an approved facility.
Is siphoning gas safe for a DIYer?
Siphoning can be safe if you use proper equipment and follow safety rules, including ventilation and flame-free zones. Wear PPE and work slowly to avoid spills.
Siphoning is generally safe with the right tools and safety steps.
Do I need to remove the spark plug during draining?
For safety, disconnect the spark plug wire to prevent accidental starts, but removing the plug itself isn’t always required. Check your model’s maintenance guide.
Disconnect the spark plug wire to prevent starting during draining.
How long does the draining process take?
The process typically takes about an hour, depending on fuel system design and spill risk. Plan extra time for spills and disposal steps.
Expect about an hour, plus time for disposal.
Watch Video
Key Takeaways
- Drain fuel safely with a siphon into an approved container.
- Ventilate area and keep ignition sources away at all times.
- Dispose of old gasoline at an approved facility.
- Inspect and store the washer properly after draining.