How to Make a Pressure Washer with a Water Pump: A DIY Guide
Learn how to build a DIY pressure washer using a water pump, fittings, and safe wiring. This step-by-step guide covers parts, assembly, testing, and maintenance for a practical, budget-friendly cleaning tool.

With a standard water pump, a garden hose, and a few basic fittings, you can assemble a functional DIY pressure washer. This how-to walks you through selecting a pump, wiring and plumbing it safely, and testing performance. You’ll learn practical setup steps, leak-prevention measures, and maintenance tips to keep your water-pump-powered washer ready for tasks like deck cleaning and driveway scrubbing.
What you will build and what it does
According to Pressure Wash Lab, the core idea is to pressurize water from a motorized pump and deliver it through a handheld wand. A DIY pressure washer built around a reliable water pump can tackle typical outdoor cleaning tasks such as patios, small decks, and dirty siding when mounted on a stable frame. The design emphasizes simplicity, safety, and modularity so you can swap components as needed without a full rebuild. In this guide, we explore how the system works, what performance you can expect under common conditions, and how the main parts interact to create a usable cleaning tool. The goal is a compact, controllable unit that behaves like a light-duty commercial washer for everyday home chores.
Key components of a DIY pressure washer with a water pump
A functional DIY washer rests on several essential parts. At the heart is a safe, water-cooled pump capable of delivering a consistent flow. You’ll need a sturdy mounting frame to secure the pump and hose connections, plus a high-pressure output hose and a spray wand with replaceable nozzles. An unloader or pressure-relief valve helps regulate pressure when the spray gun is closed, protecting both the pump and fittings. The water intake should come from a clean supply with a filter to reduce debris. Finally, a basic electrical setup or battery source powers the pump, complemented by outdoor-rated cables and a proper GFCI outlet for safety. In practice, you’ll assemble these components on a small cart or rack so you can transport the unit to where you need to clean.
Safety considerations and limitations
DIY pressure washers can be powerful yet unpredictable. Always operate with water present to avoid dry running, which can overheat seals and shorten pump life. Use a GFCI-protected outdoor outlet and keep all electrical connections dry and away from the spray zone. Wear eye protection and gloves, and never point the wand at people, pets, or fragile surfaces. Understand that a home-built unit will not match the reliability, warranty, or PSI stability of commercial models, so avoid tasks that demand industrial-grade performance. Finally, de-energize and depressurize the system before disassembly or adjustments.
Selecting a water pump and flow rate
Choosing the right pump is critical. A pump with a built-in relief valve and a sensible balance of flow (GPM) and pressure (PSI) is ideal for a DIY setup. Look for compact electric pumps designed for outdoor use, and confirm compatibility with your hose and nozzle kit. The goal is smooth, controllable cleaning—avoid pumps that run at excessively high pressure without proper safe controls, as they increase the risk of damage to surfaces and components. If you’re unsure, prioritize reliability, simple maintenance, and compatibility with standard garden-hose fittings.
Building the frame and hose routing
Plan a simple frame that can support the pump, mount the hose reel, and route both input and output lines cleanly. Mount the pump so that its inlet faces the water source and its outlet points toward the high-pressure hose. Use clamps and brackets to keep hoses from kinking, and route cords and hoses away from heat sources or moving parts. Label the inlet and outlet hoses to avoid cross-connections, and allow enough slack for vibration and transport.
Plumbing connections and seals
A leak-free build relies on proper threading, sealing, and alignment. Apply Teflon tape or pipe sealant to male threads, and use O-rings where threaded connections meet fittings. Where hoses meet wands, use proper adapters and crimp clamps to prevent sudden disconnections under pressure. Finally, check every joint for tightness before powering the unit. A little time spent tightening fittings saves hours of frustration during testing.
Electrical considerations and wiring safety
If you’re using an electric pump, ensure the power source is suitable for outdoor use, ideally via a GFCI outlet. Use outdoor-rated extension cords, and keep cords away from water spray paths. Install a simple on/off switch or a kill switch in a safe location. Never work on live wiring; disconnect power before performing maintenance. If you’re unsure about electrical work, consult a qualified technician.
Start-up, testing, and tuning
Fill the system with clean water and prime the pump by opening the inlet slightly to remove air. Slowly open the spray gun to release trapped air, then observe for leaks at every joint. If leaks appear, tighten connections or re-seal as needed. Test cleaning on a non-critical surface and adjust nozzle choice to balance pressure and rinse rate. Keep the nozzle at a safe distance from fragile materials and body skin.
Maintenance and troubleshooting
Regular maintenance extends the life of a DIY washer. Rinse the system after use to remove dirt and residue, inspect O-rings for wear, and replace worn seals promptly. Clean the inline filter and check hose fittings for cracks. If performance drops, inspect for air leaks, tighten connections, and verify that the unloader valve is functioning correctly. Document any recurring issues to refine future builds.
Tools & Materials
- Electric high-pressure water pump(Compact, outdoor-rated; seek a model with a built-in relief valve if possible)
- High-pressure output hose(Pressure-rated, length to match cleaning area (e.g., 10-25 ft))
- Garden hose (input)(Match thread to pump inlet; ensure a secure water source)
- Spray wand with replaceable nozzles(Keep nozzles clean and use appropriate spray angle (e.g., wide for debris, narrow for tough grime))
- Unloader/pressure-relief valve(Safely regulate pressure when trigger is released)
- Frame or cart for mounting(Rigid, portable frame to support pump and hoses)
- Quick-connect fittings and adapters(Ensure compatible thread standards (NPT or barb and hose barb) and color-code where possible)
- Teflon tape and thread sealant(Use on all male-threaded connections to prevent leaks)
- O-rings and gaskets(Keep spares on hand for quick fixes)
- Outdoor-rated power cord and GFCI(Keep connections dry and use a weatherproof outlet box)
- Eye protection and gloves(Personal safety gear for all users)
- Inline water filter (optional)(Reduces debris entering the pump if your supply is not filtered)
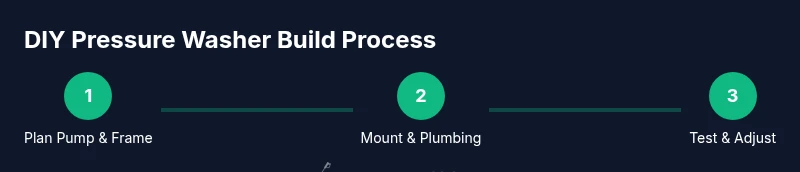
Steps
Estimated time: 3-6 hours
- 1
Plan and select your pump
Define cleaning tasks and select a pump with a safe, controllable output. Check compatibility with fittings and hoses, and ensure the motor size fits your electrical supply. A good plan reduces late-stage rework.
Tip: Double-check thread standards before buying adapters to avoid mismatches. - 2
Mount the pump to the frame
Secure the pump to a rigid frame or cart using appropriate mounting hardware. Leave space for inlet/outlet fittings and airflow. Ensure the frame is stable to prevent tipping during operation.
Tip: Use vibration-damping pads to minimize movement and wear. - 3
Attach intake water supply
Connect the garden hose to the pump inlet with proper seals. If you plan to filter, install an inline filter between the source and pump. Verify there is a continuous water source before powering.
Tip: Prime the pump by opening the inlet slightly and allowing air to escape before full operation. - 4
Install unloader valve and bypass
Install the unloader valve in the output line to regulate pressure. Ensure it is set to a safe level and that bypass tubing routes back to the water source or a safe reservoir when idle.
Tip: Test the bypass with the trigger closed to confirm it relieves pressure correctly. - 5
Connect high-pressure hose and wand
Thread the output hose to the pump’s outlet using compatible adapters. Attach the wand and nozzle set, ensuring all connections are secure and leak-free.
Tip: Avoid over-tightening; snug plus a sealant is enough to prevent leaks. - 6
Wire pump to power
Run outdoor-rated power conductors to a GFCI outlet or appropriate battery setup. Use a simple on/off switch at a convenient location. Never energize a wet unit or modify critical safety components.
Tip: Keep power cords above ground, away from spray paths. - 7
Prime, test, and adjust
Fill with clean water, prime the intake, and slowly open the trigger to release air. Check for leaks at every joint and adjust nozzle settings for the task at hand. Start with a wider spray and move to a narrower one as needed.
Tip: Test on a non-critical surface to calibrate pressure safely. - 8
Initial performance check
Run the unit on a short test surface and inspect seals, hoses, and fittings. Listen for unusual noises that may indicate cavitation or air leaks. Note any surface markings or damage and back off pressure if necessary.
Tip: Document adjustments for future maintenance.
Quick Answers
What is the simplest pump to start with for a DIY pressure washer?
A compact electric high-pressure pump with a relief valve is easiest for beginners. It provides manageable pressure and predictable performance when paired with standard hoses and nozzles.
For beginners, start with a small electric pump with a relief valve to keep pressure safe and predictable.
Do I need an unloader valve?
Yes. An unloader valve regulates pressure and diverts flow when the trigger is released, protecting the pump from overpressure and reducing wear.
Yes, you should have an unloader valve to manage pressure when you stop spraying.
Can I run this DIY washer without water?
No. Running without water can cause overheating and severe damage to the pump seals. Always verify a steady water supply before operation.
Never run it dry—always have water ready before you turn it on.
Can a DIY pressure washer replace a commercial unit?
For light to moderate cleaning tasks, a well-built DIY unit can be effective. It won’t generally match the durability, warranty, or PSI stability of professional-grade machines.
It can handle common household jobs, but it isn’t a full substitute for commercial equipment.
What maintenance tasks are most important?
Regularly inspect seals, flush after use, and clean or replace the inline filter. Check fittings and hoses for wear, and replace worn O-rings promptly.
Keep seals in good shape, flush after use, and check hoses for wear.
Is it safe to use on vehicles or painted surfaces?
High-pressure spray can damage paint. Use wider nozzles and maintain greater distance when cleaning vehicles or painted surfaces.
Be cautious with vehicles—lower pressure and wider nozzles protect finishes.
Watch Video
Key Takeaways
- Plan the build around a safe frame and accessible connections
- Choose a pump with reliable safety features and compatible fittings
- Test thoroughly, address leaks, and refine nozzle selections
- DIY units offer cost savings but have practical limits and safety considerations