How to Pressure Wash Without a Hose: Step-by-Step Guide
Learn how to pressure wash without a hose using a portable reservoir, a pump, and a pressure washer. This practical guide covers setup, steps, safety, and tips for homeowners and DIYers.

If you’re exploring how to pressure wash without a hose, you can power a portable pressure washer using a clean water reservoir, a submersible pump, and proper fittings. This hose-free setup lets you clean patios, siding, and driveways when taps aren’t available. You’ll fill the reservoir, prime the pump, and follow a careful step-by-step process to protect surfaces and equipment.
Understanding the concept of water self-sufficiency for pressure washing
If you’re pursuing how to pressure wash without a hose, the core idea is simple: use a portable water reservoir and a pump to deliver water to your pressure washer. This approach gives you freedom to work away from taps, but it also requires careful planning of water volume, container stability, and pump priming. In practice, you feed the pump from the reservoir, and the pressure washer converts the water into a controlled spray. The result is effective cleaning for surfaces like concrete, siding, and wood without depending on a fixed water line. The most important balance is between water supply and cleaning pace: run the pump too fast and you risk running the reservoir dry; run it too slow and the spray becomes inconsistent.
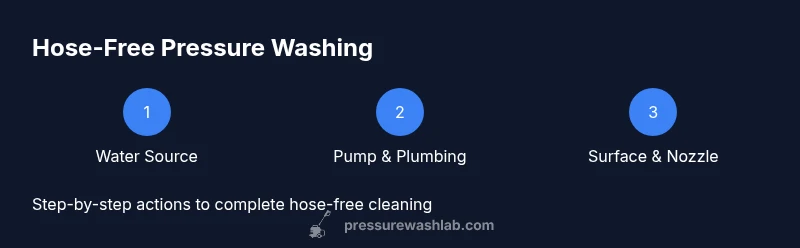
Essential setup: reservoir, pump, and nozzle
The backbone of a hose-free workflow is choosing compatible components. Start with a portable reservoir large enough to cover your project length. A submersible pump sits inside the reservoir, pulling water up through an intake hose to feed the pressure washer. Use a nozzle with adjustable spray to tailor coverage and avoid damage. Keep all connections snug and dry, and make sure your power source has GFCI protection if you’re operating outdoors. Plan your layout so the reservoir sits on stable ground within reach of the pump; a tangled setup invites delays and leaks.
Filling, priming, and getting a steady spray
Before you begin, verify that the reservoir is filled with clean water and that the pump is fully submerged. Power on the pump and watch for air pockets; bleed them by briefly running the spray at low pressure until a steady stream emerges. Prime the pressure washer by allowing water to flow through the system for a few seconds; this reduces cavitation and protects seals. Start with a wide spray angle and gentle pressure, then gradually narrow the nozzle if you need more bite on tough stains. Listen for surges or vibrating—these signal air in the line or a loose connection that should be addressed before continuing.
Surface-specific strategies: concrete, siding, deck, and more
Different surfaces tolerate different pressures. A broad 25-40 degree nozzle is a good starting point for most siding and wood decks; avoid concentrated, sharp jets on soft materials. For concrete, you can work with a lower angle (15-25 degrees) and slow, overlapping passes. Maintain a consistent distance from the surface and work in a methodical, top-to-bottom pattern to avoid streaks and water intrusion. On wood, test a hidden area first and avoid excessive dwell time to minimize damage.
Waste water management and environmental considerations
In hose-free setups, runoff and wastewater must be managed responsibly. If you’re cleaning on hard surfaces, direct runoff into a designated containment area and re-use where permitted. Do not discharge into storm drains unless local regulations explicitly allow it. Consider installing a basic filtration or settling approach to reduce silt and debris entering the soil. Always check local rules about water reuse and disposal prior to starting.
Common mistakes and quick fixes
A frequent error is running the pump without water; always ensure the reservoir is above the pump and that the intake is submerged. Another misstep is using too much pressure on delicate surfaces; stay at low-to-moderate pressure and increase only after testing. Finally, keep electrical components dry and away from puddles; use weather-rated cords and outlets. If you notice air in the line, pause, re-prime, and re-check connections before continuing.
Tools & Materials
- Portable water reservoir (5-20 gallons)(Food-grade water preferred; choose capacity based on project duration)
- Submersible pump(Rated for the discharge/flow your washer requires; keep submerged in reservoir)
- Pressure washer with adjustable nozzle(Ensure compatibility with your water source; use a wide-angle setting to start)
- Intake hose / suction hose(Connects reservoir to pump; avoid kinks and air gaps)
- Hose adapters/fittings(Have a few common sizes on hand in case of leaks or mismatches)
- Safety gear (goggles, gloves, closed-toe shoes)(Protect from spray and debris; wear hearing protection if needed)
- Wastewater containment (bucket or tarp)(Optional, helps with local disposal or reuse plans)
- Extension cord (if electric pump)(Use GFCI outlet; keep dry and away from water)
Steps
Estimated time: 60-90 minutes
- 1
Prepare the water source
Place the reservoir on stable ground near your work zone. Fill it with clean water and insert the submersible pump, ensuring it is fully submerged. Connect the intake hose and verify all connections are secure. Keep cords and components out of walking paths to avoid tripping.
Tip: Verify reservoir size matches the cleaning duration and keep the pump submerged before powering on. - 2
Set up the pump and connections
Attach the pump discharge line to the pressure washer inlet; ensure fittings are tight and corrosion-free. Position hoses to avoid kinks and ensure there’s a clear path from reservoir to wand. Confirm the power source is accessible and protected from splashes.
Tip: Avoid tight bends in hoses; use slightly curved runs to prevent kinks that block flow. - 3
Prime the system and check for leaks
Power on the pump at a low setting and look for air pockets; bleed air by briefly running the spray at low pressure. Check every connection for leaks and tighten as needed. Let water run through the system for a few seconds to ensure a steady flow.
Tip: If you see air pockets, pause, re-seat connections, and re-prime before increasing pressure. - 4
Attach the nozzle and set pressure
Attach an adjustable spray nozzle and start with a wide angle (25-40 degrees) at low pressure. Test on a hidden patch to ensure the surface reacts well. Once confident, adjust gradually based on the soil or grime.
Tip: Always start wide and slow; moving closer or increasing pressure too soon can damage surfaces. - 5
Begin cleaning with broad passes
Work from the top down or along the grain of the surface with steady, overlapping passes. Maintain a consistent distance to avoid uneven cleaning. Pause to re-check spray pattern and adjust as needed.
Tip: Keep the wand moving and avoid staying in one spot too long to prevent streaks or damage. - 6
Rinse and manage wastewater
Rinse the area with controlled passes and monitor runoff. If possible, collect used water for reuse or dispose of it according to local rules. Refill the reservoir if you need more cleaning sessions and keep the equipment dry when not in use.
Tip: Never let the pump run dry; keep an eye on water level throughout the session. - 7
Shut down, drain, and store safely
Turn off the system, release any built-up pressure, and disconnect hoses. Drain residual water from the pump and lines, then store components in a dry, secure location. Inspect equipment for wear and clean as needed before next use.
Tip: Store electrical components elevated and away from moisture; label and separate hoses and fittings.
Quick Answers
Will this method work for large outdoor areas?
Yes, it can cover large spaces, but it requires more water and time. Plan for longer sessions and keep refilling the reservoir as needed.
Yes, you can handle large areas, but expect longer sessions and more water usage.
Can I use a garden hose instead of a reservoir?
The goal here is hose-free cleaning. A garden hose can be used only to fill the reservoir before you start; during cleaning you should rely on the stored water.
You can fill from a hose before starting, but don’t rely on it during operation.
What nozzle should I use for delicate surfaces?
Use a wide-angle nozzle (40 degrees or more) and keep the wand at a safer distance. Test on an inconspicuous area first.
Start with a wide nozzle and keep a bit of distance until you know it’s safe.
How should I dispose of wastewater?
Collect wastewater when possible and dispose of it according to local regulations. Do not discharge into storm drains unless explicitly allowed.
Collect and dispose of water as local rules permit; avoid dumping into storm drains.
Is this method safe for wooden siding?
Yes, with low pressure and careful technique. Avoid high dwell time on wood and test first in a hidden area.
Yes, just keep pressure moderate and test first.
Watch Video
Key Takeaways
- Use a portable water source to power your hose-free setup.
- Prime and test the system before full cleaning.
- Start with wide-angle, low-pressure passes on delicate surfaces.
- Mind wastewater; dispose or reuse according to local rules.
- Safety first: PPE and dry electrical connections at all times.