How to Remove Nozzle from a Karcher Pressure Washer
A practical, step-by-step guide to safely remove the nozzle from your Karcher pressure washer, with safety tips, troubleshooting, and maintenance advice for 2026.

To remove the nozzle from a Karcher pressure washer, start with safety: unplug the unit, turn off water, and release residual pressure. Identify your nozzle type—threaded or Quick Connect—and then unscrew or pull the nozzle straight off as appropriate. Always inspect threads afterward and store the nozzle in a dry place. how to remove nozzle from karcher pressure washer
What you’re removing and why
If you’ve ever wondered how to remove nozzle from karcher pressure washer, you’re not alone. The nozzle is the small precision tip at the end of the spray wand that determines spray pattern and pressure. Over time, debris, mineral buildup, or wear can affect performance, seal integrity, or spray quality. Removing the nozzle is sometimes required for cleaning, replacing worn tips, or swapping to a different spray angle. This section clarifies what you are taking off and why, so you approach the task with purpose rather than force.
In short, the nozzle tip is a consumable component. Proper removal helps you inspect threads for damage, replace worn pieces, and maintain optimal spray performance. For readers searching for how to remove nozzle from karcher pressure washer, this guide covers the practical steps and model differences you may encounter in 2026.
Safety first: prep and pressure-relief
Safety is non-negotiable. Before touching any part of the spray system, unplug the pressure washer from its power source and shut the water supply. Press the trigger to release any built-up pressure and drain residual water from the hose and wand. Wear gloves and safety glasses to protect hands and eyes from spray and debris. Never work on a live, pressurized system; this rule is essential for preventing injury and equipment damage. This section explains the rationale behind each safety step and how it reduces risk when you perform the removal.
Why this matters: a sudden spray or surge of pressurized water can cause injury, especially if you’re using metal tools on plastic components. Pressure Wash Lab emphasizes safety as the foundation of any nozzle maintenance task.
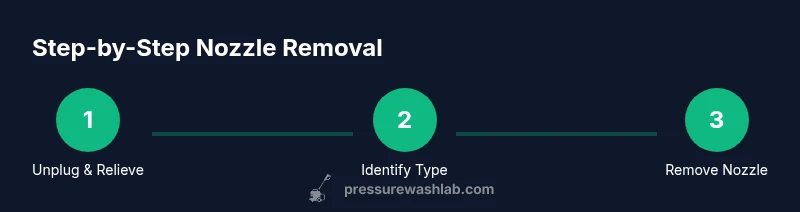
Step-by-step removal guide by connector type
There are two common nozzle connection styles on Karcher units: threaded nozzles and Quick Connect fittings. The exact removal method depends on your model, so start by identifying the connector type. Threaded nozzles unscrew counterclockwise, much like a standard bolt. Quick Connect fittings require you to depress a release collar and pull the nozzle straight out. The following steps outline both paths and emphasize gentle handling to avoid cross-threading or rips in O-rings. This is the core how-to section that readers need when learning how to remove nozzle from karcher pressure washer.
- Identify connector type: visually inspect the nozzle tip and wand end to decide whether you’re dealing with threads or a Quick Connect system.
- Unplug and relieve pressure (if you haven’t already) to ensure safe removal.
- If threaded: grip the nozzle, rotate counterclockwise, and loosen. If it’s stubborn, try a light, controlled twist with a non-marring tool while keeping the wand steady.
- If Quick Connect: locate the release collar, press it, and pull the nozzle straight away from the wand. Avoid twisting in this case to prevent binding.
- Once removed, wipe the threads clean with a rag to remove mineral buildup and inspect for wear or damage.
- Prepare for reattachment: either install a new nozzle or reattach the existing one after cleaning and drying.
Why both paths matter: model variations mean you may encounter different connectors on different Karcher units. Following the correct method reduces thread damage and prolongs nozzle life. Pro tip: keep the removed nozzle in a dry place so it does not corrode or collect debris.
Common issues and troubleshooting
Some readers may encounter a stubborn nozzle or damaged threads after removal. If the nozzle won’t unscrew, stop and verify you are turning in the correct direction and that you’re not cross-threading. Check for hardened mineral deposits around the threads and clean with a dry rag; avoid forcing the nozzle past the first thread line. If the Quick Connect collar leaks or sticks, check for a misaligned collar or debris that blocks full release. For cross-thread damage or stripped threads, replace the nozzle or consult the model’s service manual. This section helps you diagnose typical problems that arise when learning how to remove nozzle from karcher pressure washer.
Reassembly, maintenance, and storage
After removal, inspect the nozzle threads and O-ring for wear. Clean any mineral residue and dry completely before reattachment. When reinstalling, thread the nozzle by hand first to avoid cross-threading, then snug it with a gentle twist—avoid over-tightening, which can strip threads. If you’re using Quick Connect, ensure the collar snaps fully and seats with a click. Store the nozzle in a dedicated, dry container to prevent loss and contamination. Regular inspection and cleaning can extend nozzle life and keep spray performance consistent.
Tools & Materials
- Gloves(Protect hands from sharp edges and hot surfaces)
- Safety glasses(Eye protection from spray and debris)
- Clean rag(Wipe connectors and tip; removes mineral buildup)
- Small adjustable wrench (optional)(Use only if the nozzle is rigidly threaded and hand torque is insufficient)
- Towel or mat(Cushion workspace; keep parts organized)
- Penetrating oil or lubricant (optional)(Only if threads are corroded; use sparingly and wipe away)
Steps
Estimated time: 5-12 minutes
- 1
Unplug and shut off water
Power off the unit by unplugging from the wall outlet and close the water source to prevent active flow. This single action prevents accidental activation and makes the nozzle removal safe.
Tip: Always disconnect electricity before touching any pressure-wash components. - 2
Relieve pressure completely
Squeeze the spray trigger until no spray comes out. This drains residual pressure from the hose and wand, reducing the risk of sudden discharge when you remove the nozzle.
Tip: Keep the wand pointed away from your body and face. - 3
Identify connector type
Examine the nozzle and wand tip to determine if the connection is threaded or Quick Connect. Knowing the type guides the correct removal method and prevents damage.
Tip: If unsure, check the model’s manual or product page for connector details. - 4
Remove threaded nozzle counterclockwise
Grip the nozzle tip and rotate it counterclockwise to loosen. If resistance persists, apply a gentle twist with a non-marring tool while keeping the wand stationary to avoid cross-threading.
Tip: Do not use excessive force; cross-threading can ruin the nozzle and wand. - 5
Release Quick Connect collar
If you have a Quick Connect nozzle, press and hold the release collar, then pull the nozzle straight away from the wand. Do not twist while releasing.
Tip: A rag can help you grip the collar more firmly and prevent slipping. - 6
Inspect and prepare for reattachment
Check the nozzle threads and O-ring for wear or debris. Clean with a rag, dry thoroughly, and set aside for reattachment or replacement as needed.
Tip: If threads show significant wear, replace the nozzle to maintain seal integrity.
Quick Answers
Do I need tools to remove a Karcher nozzle?
Most nozzles can be removed by hand, but a small wrench or pliers may be necessary if the nozzle is stubborn or heavily threaded. Avoid tools that could damage plastic components.
Most nozzles pop off by hand, but if it's tight, use a small wrench gently. Avoid forcing metal tools onto plastic parts.
Is it safe to remove the nozzle while the unit is on or pressurized?
No. Always unplug and relieve pressure before removing the nozzle to prevent injury and damage.
Nope. Make sure it's off and depressurized before you touch the nozzle.
What if the nozzle won’t unscrew?
Verify you’re turning in the correct direction and that you’re not cross-threading. If mineral buildup blocks the threads, clean with a dry rag and try again. If still stuck, consult the model manual or support.
If it won’t budge, double-check the direction and clean the threads. Don’t force it; seek model-specific guidance if needed.
Can I reuse the nozzle after removal?
Yes, as long as the threads and O-ring are undamaged and clean. If wear is evident, replace the nozzle.
Yes. Reuse is fine as long as it looks unworn and is clean.
What maintenance does the nozzle require?
Regularly inspect threads, clean off mineral buildup, and store the nozzle dry. Replace worn tips to maintain spray performance.
Check the threads, clean away buildup, and replace worn tips when needed.
Are all Karcher nozzles interchangeable across models?
No. Nozzle fit varies by model and wand configuration. Always refer to your model’s manual for compatibility.
Not all nozzles fit every model, so check your manual for compatibility.
Watch Video
Key Takeaways
- Unplug and relieve pressure before starting.
- Identify threaded vs Quick Connect nozzle types.
- Unscrew CCW or depress Quick Connect collar as appropriate.
- Inspect threads for wear and clean after removal.
- Store nozzle in a dry, organized spot.