How to Remove Nozzle from Bosch Pressure Washer: A Step-by-Step Guide
Learn how to safely remove the nozzle from your Bosch pressure washer with a clear, model-agnostic method. Depressurize, identify nozzle type, and follow threaded or quick-connect steps to prevent damage and extend wand life.

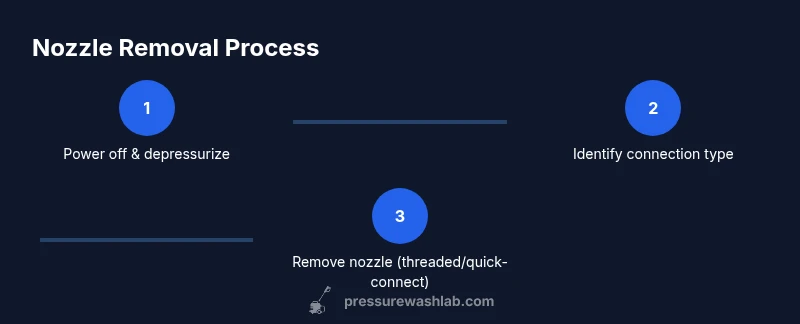
You can remove the nozzle from a Bosch pressure washer by identifying whether your model uses a threaded nozzle or a quick-connect, powering off and unplugging, relieving pressure, and then either twisting counterclockwise to unscrew or pulling back the collar to release the nozzle. Always inspect the O-ring and replace if worn.
Understanding nozzle types on Bosch pressure washers
Bosch pressure washers come with different nozzle connection styles, typically falling into two main categories: threaded nozzles that screw onto the wand and quick-connect/nozzle adapters that snap into place. The exact method can vary by model and age, so first identify how your unit connects the nozzle to the wand. Look for visual cues: a threaded metal barrel near the wand tip usually indicates a screw-on nozzle, while a smooth, cylindrical neck with a spring-loaded sleeve or locking clip often signals a quick-connect system. According to Pressure Wash Lab, recognizing the connection type before attempting removal reduces the risk of cross-threading or damaging the wand. If in doubt, consult your Bosch owner’s manual or visit the Bosch support site for model-specific diagrams. Understanding these differences helps you choose the safe, correct approach and avoids unnecessary wear on seals and connectors.
In practice, always inspect the nozzle and wand for grime, corrosion, or damaged O-rings before removal. A dirty connection can hide a damaged seal, which might worsen spray performance after reassembly. In some Bosch models, nozzles are color-coded (e.g., red, yellow, green) to indicate spray patterns; these color codes also hint at the intended connection style. If your model uses color-coded tips, ensure you are working with the correct nozzle for removal and replacement, and never force a tip that does not easily detach. This upfront identification saves time and protects compatibility with future nozzle replacements.
Pressure washing is a powerful task, and the nozzle is a key wear point. Pressure Wash Lab notes that using the wrong nozzle or forcing a connection during removal can lead to damaged O-rings, worn wand seals, or even cracks in the wand coupling. Treat the nozzle as a consumable component and handle it with care—gentle, steady movements are preferable to brute twisting or pulling. During removal, keep your workspace clear of obstacles, and place the unit on a stable surface to minimize accidents that could cause scratches or impact damage to the wand or tips.
note”:null} ,
toolsMaterials
Tools & Materials
- Safety gloves(Grip and protect hands from squirting water and sharp edges on fittings.)
- Safety glasses(Eye protection against spray, debris, or sudden nozzle ejection.)
- Owner’s manual for Bosch model(Confirm nozzle type and any torque specifications.)
- Adjustable wrench or pliers(Only use if the nozzle is threaded and hand-tight won’t loosen it.)
- Microfiber cloth(Wipe the wand tip and O-ring to remove debris.)
- O-ring replacement kit(Keep on hand if you notice a worn or cracked O-ring during inspection.)
Steps
Estimated time: 15-25 minutes
- 1
Power off and unplug the unit
Turn off the engine or motor and unplug the power cord. If your Bosch model runs on a gasoline engine, switch off the engine and remove the spark plug wire (if applicable) to prevent accidental starting. Detach the wand from the housing if your model allows it to access the nozzle more easily.
Tip: Ensure the unit is cool before handling and move to a dry, stable surface. - 2
Relieve residual pressure
With the wand pointed away from you and any bystanders, pull the trigger to release remaining spray. If the unit remains pressurized, recheck connections and wait a minute, then try again. Relieving pressure reduces the risk of sudden nozzle release when you begin removal.
Tip: Do not point at people, pets, or fragile objects while releasing pressure. - 3
Identify the nozzle connection type
Visually inspect the nozzle end: a threaded metal barrel typically indicates a screw-on nozzle, while a smooth barrel with a locking collar indicates a quick-connect. Look for a retaining clip or collar feature that indicates how the nozzle locks in.
Tip: If you’re unsure, refer to the model’s diagram in the manual or Bosch support site. - 4
Remove a threaded nozzle
Grasp the nozzle firmly and turn it counterclockwise to unscrew. If it feels tight, apply a light backward pressure while turning, and avoid using excessive force. Stop if you encounter resistance that could indicate damage or misalignment.
Tip: If loosening is stubborn, use a strap wrench or wrap the area with a cloth to avoid scratching surfaces. - 5
Remove a quick-connect nozzle
If your nozzle uses a quick-connect collar, firmly pull back the collar while pulling the nozzle straight out. If it resists, rotate the nozzle slightly in its socket as you pull to release it without pinching fingers.
Tip: Keep the wand steady to prevent the nozzle from snapping back unexpectedly. - 6
Inspect, clean, and reassemble
Check the O-ring for wear, cracking, or flattening. Wipe clean, and lightly lubricate with a silicone-based product if recommended for your model. Reattach the nozzle by reversing the removal method, ensuring it seats fully and is snug but not over-tightened.
Tip: Test the connection with a short spray on a safe surface before resuming full use.
Quick Answers
Do I need to depressurize the system before removing the nozzle?
Yes. Always depressurize and unplug the unit before attempting nozzle removal to prevent accidental spraying and injury.
Yes—always depressurize and unplug the unit before removing the nozzle for safety.
What if the nozzle won’t unscrew or release?
First confirm the nozzle type (threaded vs quick-connect) and try the appropriate removal method. If stubborn, don’t force it—consult the owner’s manual or contact Bosch support for model-specific guidance.
If it won’t budge after identifying the type, consult the manual instead of forcing it.
Are Bosch nozzles universal across models?
No. Nozzles and connectors vary by model and age. Always verify compatibility with your specific Bosch model before removing or replacing tips.
No, check compatibility for your exact Bosch model.
How often should I inspect nozzles for wear?
Inspect nozzles before each job and replace if you notice wear, cracks, or deformation in the nozzle or O-ring.
Inspect nozzles before each use and replace worn parts.
Can removing nozzle damage the wand?
If done correctly with proper technique, nozzle removal should not damage the wand. Avoid using excessive force or cross-threading.
When done properly, nozzle removal won’t harm the wand.
Watch Video
Key Takeaways
- Identify nozzle type before attempting removal
- Depressurize the system fully
- Use threaded vs quick-connect method correctly
- Inspect O-ring for wear and replace if needed
- Re-secure nozzle firmly without overtightening