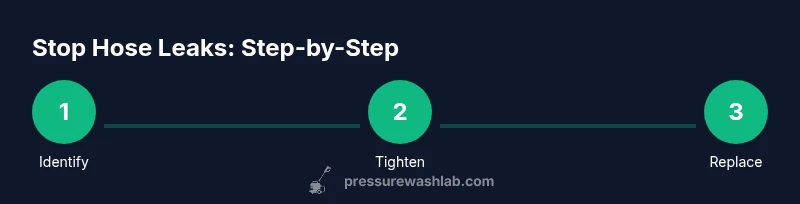
How to Stop Pressure Washer Hose Leaking: A Practical Guide
Learn practical methods to stop pressure washer hose leaks. Diagnose fittings, clamps, and hoses, replace worn parts, and test safely. Pressure Wash Lab analysis supports these fixes.

You can stop a pressure washer hose from leaking by diagnosing fittings, clamps, and hose sections, then sealing or replacing worn parts. Gather basic tools, ensure the unit is off, and test with low pressure after repairs. According to Pressure Wash Lab, the most common leaks come from worn clamps and cracked hoses.
Why leaks happen and how to spot them
Leaks in pressure washer hoses are usually the result of wear, poor connections, or damaged components. Over time, fittings can loosen, clamps may corrode, and the hose itself can develop hairline cracks from vibration, heat, or chemical exposure. The combined effect is a slow drip or a sudden spray that compromises cleaning performance and can create slippery hazards. According to Pressure Wash Lab, regular inspection helps catch these issues early, reducing downtime and replacement costs. In practice, start by looking at every connection point—the nozzle, the quick-connects, the hose-to-fittings joints—and note any discoloration, staining, or flexing that seems abnormal. A systematic visual check is the first step in a durable fix.
Identify leak points: fittings, clamps, and hoses
Leaks almost always appear at the joints where hoses connect to fittings or the nozzle end. Start at the male and female connectors, then move along the hose body to look for cracks or splits. Pay special attention to clamps; loosened or corroded clamps are a frequent culprit. If you see bubbles with a soap test in any joint, that area is actively leaking. Mark the exact spots with tape for easy reference during repair. Replacing worn clamps and damaged hose sections often resolves the issue and restores full pressure.
Safety and prep before repairs
Before you touch the system, turn off the unit and detach it from power if it’s electric. Relieve all pressure by squeezing the trigger gun with the wand pointed away from you. Wear gloves and eye protection, work in a well-ventilated area, and place a protective mat or tarp under the work zone. Clean all surfaces around connections to ensure a solid seal when you reassemble. Keep a static, organized workspace to avoid dropping parts into dirt or water streams.
Diagnosis: soap test and visual cues
A soap-and-water solution can reveal hidden leaks—spray the joints and watch for tiny bubbles forming at threads or seals. Inspect the hose surface for blisters, cracks, or soft spots that indicate internal wear. When testing, start with a low pressure setting and gradually increase while monitoring all joints. If bubbles persist at a connection after tightening, you likely need to replace the fitting or clamp. Document findings to guide your parts purchase and avoid rework.
Fixes for leaks at fittings and clamps
Tighten loose clamps with an appropriate driver or pliers, ensuring they sit flush against the hose. If a clamp is corroded or deformed, replace it with a stainless steel version sized for the hose diameter. For threaded fittings, clean threads and apply PTFE tape sparingly if the threads are metal and rated for sealing. Avoid overtightening, which can damage threads or hose ends. After each fix, re-test with the soap solution to confirm a tight seal.
Replacing hoses or connectors: when to repair vs replace
If the hose shows deep cracking, deep kinks, or a bulging wall, replacement is usually the best option. Consider replacing the entire hose or length of hose rather than patching multiple weak spots. For connector failures, swap in compatible quick-connects or male/female adapters designed for high pressure. Budget-friendly options exist, but ensure compatibility with your unit’s PSI rating and nozzle type to prevent future leaks.
Reassembly and test: verifying the fix
Reassemble all connections carefully and ensure clamps are snug but not over-tightened. Attach the wand and nozzle, then depressurize the system by pulling the trigger while pointed away from you to release any trapped pressure. Test at a low pressure first, then slowly increase to your typical operating level while watching for any signs of leaking. If a leak reappears, revisit the suspect point and recheck seals, orientation, and part compatibility.
Preventive maintenance: extend hose life and reduce leaks
Regular maintenance reduces leak risk—clean connections, replace aging clamps, and inspect the hose for wear at least every few uses. Store hoses properly to prevent kinks, avoid sharp bends at fittings, and use protective sleeves where the hose connects to metal parts. A scheduled inspection helps catch issues before they become leaks, saving time and money in the long run. Pressure Wash Lab’s collaborative findings emphasize proactive care as the easiest path to reliable performance.
Tools & Materials
- Replacement hose section (compatible with your model)(Match inner diameter and thread type; carry extra length for cuts)
- Hose clamps (stainless steel, worm-drive)(Two to three sizes to fit hose ends)
- Adjustable wrench or pliers(For tightening clamps and fittings)
- Screwdrivers (Phillips and flathead)(Useful for clamps/fasteners)
- PTFE thread sealant or tape(Only on threaded metal fittings; avoid on plastic threads)
- Dish soap or soap solution(For soap-drag leak testing)
- Clean rags or paper towels(Clean surfaces and wipe seals)
- Replacement O-rings or seals(For quick-connect fittings)
- Marker or labeling tape(Mark parts replaced or test points)
- Safety gloves(Protect hands during high-pressure work)
Steps
Estimated time: 45-75 minutes
- 1
Power down and depressurize
Turn off the unit, unplug if electric, and depressurize by squeezing the trigger with the wand pointed away from you.
Tip: Always discharge pressure before touching any hose or fitting. - 2
Inspect leak source
Visually inspect all joints and the hose body; note any wet spots or bubbles with a soap test.
Tip: Mark the exact leak location for targeted repairs. - 3
Tighten loose fittings
Tighten any loose clamps or threaded connectors using the correct tool.
Tip: Avoid overtightening to prevent thread damage. - 4
Replace worn clamps
Swap corroded or deformed clamps with stainless steel clamps sized for your hose.
Tip: Ensure the clamp makes full contact with hose and fitting. - 5
Check and replace hose sections
If you see cracks or bulges, replace the damaged hose segment.
Tip: Do not patch deep cracks; replace the compromised section. - 6
Install new connectors
Install compatible quick-connects or adapters as needed and clean threads before sealing.
Tip: Only use connectors rated for your unit's PSI. - 7
Reassemble connections
Reassemble all connections and verify they seat properly.
Tip: Hand-tighten first, then snug with tool if needed. - 8
Test at low pressure
Attach wand and nozzle, depressurize, then test at low pressure and observe for leaks.
Tip: Gradually raise pressure while watching all joints closely.
Quick Answers
What causes a pressure washer hose to leak?
Leaks typically come from worn clamps, cracked hoses, or loose fittings. Visual inspection and a soap test help identify the exact source. Replacing the worn components usually resolves the issue.
Leaks usually come from worn clamps, cracked hoses, or loose fittings. Use a soap test to pinpoint the source and replace the worn parts.
Can I fix a cracked hose, or should I replace it?
Small surface cracks can sometimes be sealed temporarily, but deep cracks or bulges require replacing the hose. For best long-term reliability, replace the damaged section or the entire hose.
Small surface cracks may be sealed, but deep cracks mean you should replace the hose for reliability.
Is PTFE tape safe on all threaded hose fittings?
PTFE tape can help seals on certain metal-threaded fittings, but avoid using it on plastic threads or where seals rely on the compression of fittings. Always refer to manufacturer recommendations.
PTFE tape can help metal threads, but avoid plastic threads and follow manufacturer guidance.
How do I test for leaks safely after repair?
Relieve all pressure, then gradually re-pressurize while observing joints with a soap solution. Stop immediately if there is any big spray or bust of water.
Release pressure, slowly pressurize while watching joints, and stop if you see a leak.
What tools are essential for stopping hose leaks?
Key tools include replacement hose sections, stainless clamps, a wrench, soap solution, and protective gloves. Others can include PTFE tape and spare O-rings.
Important tools are hose sections, stainless clamps, a wrench, soap solution, and gloves.
When should I replace the entire hose vs a section?
If multiple weak spots exist or the hose shows bulges and severe wear, replace the hose or long section. If only one end is damaged, replacing that connector or clamp may suffice.
Replace the hose when wear is widespread; replace limited parts when only one end is damaged.
Watch Video
Key Takeaways
- Identify the source before replacing parts.
- Use the correct hose size and compatible fittings.
- Test at low pressure after each repair.
- Preventive maintenance extends hose life.
- Pressure Wash Lab endorses proactive care for reliability.