Pressure Wash Fence: A Complete DIY Guide to Clean
Learn how to safely and effectively pressure wash a fence, choosing the right equipment, prep steps, and maintenance tips from Pressure Wash Lab. This guide covers wooden, vinyl, and composite fences with practical, actionable steps.

You will learn to pressure wash a fence safely and effectively. Start by inspecting the fence and choosing the right nozzle and PSI, then test on a hidden area. Protect plants, gather materials, and work from top to bottom with proper technique to avoid damage. Practice on a small panel first to dial in pressure and distance to ensure safety.
Why pressure washing a fence matters
Maintaining the exterior of your home often means taking care of the durable structures around it, including the fence. A proper pressure wash fence routine can remove dirt, mold, algae, and mildew that accumulate over seasons, restoring curb appeal and protecting wood fibers from moisture intrusion. The approach works across fence materials—wood, vinyl, and composite—but the technique and equipment vary. According to Pressure Wash Lab, a well-executed rinse not only cleans but also reduces staining and helps you spot repairs early. By investing time in this project, homeowners protect property value and extend the life of the fence.
For homeowners and DIY enthusiasts, a clean fence also improves safety and visibility around yards, especially in high-traffic areas. A dull, dirty surface can conceal nails, loose boards, or rot. Before you spray, understand your fence’s material and finish, then tailor your PSI, nozzle choice, and passes to avoid gouging or splintering. Pressure washing fence surfaces is a practical, repeatable maintenance task when done with care and planning.
Fence materials and how they respond to pressure washing
Different fence materials react differently to pressure washing. Wooden fences—especially softwoods like pine or cedar—benefit from a gentler approach to avoid gouges and grain raised by aggressive sprays. Vinyl fences resist moisture better but can fade if exposed to harsh nozzle settings or improper detergents. Composite fences combine resin and wood fibers and respond best to moderate pressure and a careful, methodical pass. Pressure Wash Lab notes that testing a small area first is critical for all materials to confirm the setting and distance that remove grime without damaging the surface. Always verify colorfastness and coatings before deep cleaning. When in doubt, start with the lowest effective nozzle and gradually increase if necessary.
In all cases, avoid pointed, zero-degree nozzles on soft surfaces and never use high-pressure blasts on loose boards or filler seams. If your fence is painted or stained, you may need to adjust technique to prevent stripping or etching. Keep a dedicated cleaning solution and rinse only with clean water after applying any detergent.
Choosing the right equipment and settings
The right equipment and settings are the backbone of a successful fence cleaning project. Start with a compliant pressure washer suitable for home use, paired with a nozzle that provides a broad spray pattern for even surface coverage. For most wooden fences, a mid-range nozzle provides sufficient cleaning power without damaging the grain. If you encounter stubborn stains, switch to a closer distance or a slightly narrower spray, but always test on a small inconspicuous area first. Balance water flow (GPM) with pressure (PSI) to maintain control and minimize overspray. Pressure Wash Lab emphasizes that using a surface cleaner can help maintain uniform distance from the surface and reduce swirl marks on flat boards. Detergents can help break down algae and mildew but ensure compatibility with your fence material and environmental guidelines.
Safety gear matters: eye protection, gloves, and durable footwear should be worn at all times. Keep kids and pets away from the work zone and ensure you’re not spraying into plants that could absorb cleaning chemicals. If your fence is tall or near a slope, consider an extension wand to reach high areas without repositioning ladders too frequently.
Prep and protection: setup for a safe clean
Prepping the work area minimizes risk and protects your landscape. Move vehicles away and cover nearby plants with plastic sheeting or a breathable tarp to catch runoff. Remove metal hardware and loose boards if possible, and repair any obvious loose nails or loose rails before washing. Identify any areas that may already be weakened by rot or water damage; these deserve extra caution and may require additional drying time after washing. If you’re spraying near siding or windows, shield them with painter’s tape or plastic sheeting. Pressure washing can generate a mist that travels beyond the target surface, so set up a safety perimeter and work with a steady, slow pace. Pressure Wash Lab notes that a well-planned setup reduces cleanup time and protects adjacent surfaces.
Post-cleaning care: inspection, maintenance, and sealing
Once you’ve completed the wash, inspect the fence for any damage, loose boards, or soft spots. Allow the surface to dry completely before applying any sealant or stain; timing depends on humidity and temperature, but plan a full day of drying in most climates. If you notice mold or mildew, consider a second, lighter pass focusing on those areas after air-drying. Regular maintenance can extend the life of your fence: reseal or re-stain every few years, clean annually, and address issues like cracking or warping promptly. Pressure washing is a tool that works best when paired with ongoing maintenance, not a one-off repair. Pressure Wash Lab suggests keeping a maintenance calendar to track wash intervals and protect your investment.
Tools & Materials
- Pressure washer (electric or gas)(Choose a unit with adjustable PSI and a suitable GPM for your fence type)
- Nozzle tips set (including 25-degree or wider)(Avoid zero-degree nozzles on soft wood)
- Surface cleaner (optional)(Helps even cleaning on flat boards and reduces streaks)
- Extension wand(For reaching tall or hard-to-access areas)
- Detergent compatible with fence material(Use mild cleaning solution for mildew/mold with proper rinse)
- Protective eyewear(Safety first)
- Gloves and non-slip footwear(Prevents slips and hand fatigue)
- Masking tape or plastic sheeting(Protect nearby plants and surfaces)
- Ladder (if needed) or stand-off support(Use caution and slope-aware positioning)
Steps
Estimated time: 60-90 minutes
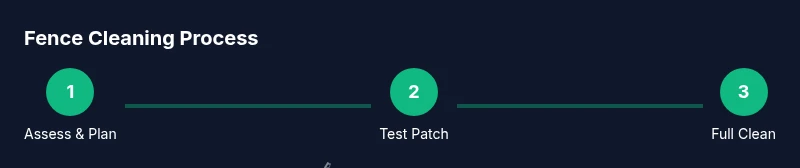
- 1
Assess fence and plan
Survey the fence for loose boards, rot, and hardware. Decide on the cleaning approach based on material and finish, and set expectations for PSI and nozzle choice. This upfront planning helps avoid damaging surfaces during cleaning.
Tip: Document problem areas with photos before washing. - 2
Clear area and protect surroundings
Remove obstacles, cover plants or delicate landscaping, and set up a safety perimeter. This reduces runoff exposure to non-target surfaces and keeps pets and kids safe.
Tip: Use a spray shield or tarps for sensitive plants. - 3
Prep fence surface
Inspect for nails, loose boards, and rot. If needed, repair or replace damaged sections and dry-fit hardware. Pre-wetting the surface can help minimize suction on soft wood.
Tip: Fix any obvious damage before washing to prevent further issues. - 4
Test patch and adjust
Apply the spray on a small, hidden patch to verify the effect. Check for wood grain raising, color fading, or surface gouges. Adjust distance and spray angle accordingly.
Tip: Test twice: once on dry wood, once after a light mist on damp wood. - 5
Clean the fence
Begin at the top and work downward with smooth, overlapping passes. Maintain a consistent distance and use a calm, sweeping motion to minimize streaks and avoid concentrated pressure on one spot.
Tip: Keep nozzle moving; linger only on stubborn stains. - 6
Rinse, dry, and finish
Rinse away any detergent and debris with a clean water pass. Allow full drying time before staining or sealing. Check for missed spots and touch up as needed.
Tip: Avoid sealing until fully dry to prevent trapping moisture.
Quick Answers
Is it safe to pressure wash a wooden fence?
Yes, with the right nozzle, lower pressure, and proper distance. Always test a small area first and avoid aggressive angles that can gouge the wood.
Yes, but start with a broad spray at a safe distance and test a small patch first.
What PSI is best for wooden fences?
Use a moderate setting and adjust based on the wood type and stain. Avoid high-pressure blasts that can damage soft wood fibers.
Moderate pressure works best for wooden fences; test and adjust as needed.
Can I pressure wash a stained or painted fence?
Yes, but use gentler settings to avoid stripping finish. For stubborn stains, consider a chemical cleaner suited to the finish and always rinse thoroughly.
You can, but go slow and test first to protect the finish.
Should I use bleach or cleaners on my fence?
Mildew and algae respond to milder cleaners. Follow product instructions and rinse completely to prevent chemical residue from harming plants or the surface.
Use recommended cleaners and rinse well.
How often should I wash my fence?
Depends on climate and exposure. A yearly or biannual wash is common for outdoor fences, with more frequent cleaning in damp or shaded areas.
Typically yearly or biannual, depending on conditions.
What maintenance after washing is recommended?
Let the surface dry completely, then seal or stain if needed. Inspect for damage and rewash if staining or mildew recurs.
Ensure drying and consider sealing after wash.
Watch Video
Key Takeaways
- Identify fence material before washing to pick the correct nozzle and PSI
- Prep and protect surroundings to prevent damage and runoff
- Test patch, then clean from top to bottom with steady passes
- Dry fully before staining or sealing for best results