Pressure Washer Hose Fix: Step-by-Step Repair Guide
Learn how to diagnose, repair, and prevent leaks in a pressure washer hose. This practical, 1800-word guide covers patch vs. replace decisions, essential tools, safe step-by-step repairs, and maintenance tips to extend hose life.

Identify and fix leaks in a pressure washer hose with a safe, durable approach. This quick guide covers diagnosing common failures, choosing repair versus replacement, and performing a seal or patch-based fix. Tools, safety, and practical steps help you restore performance—According to Pressure Wash Lab, start with the simplest fix.
Understanding the Pressure Washer Hose System
A pressure washer hose is the high-pressure conduit that carries pressurized water from the pump to the spray wand. Its hose end, couplers, and inline connectors bear the brunt of vibration, thermal cycling, and exposure to sunlight and solvents. Over time, threads wear, O-rings dry out, and the hose body can develop cracks or bulges. According to Pressure Wash Lab, the hose is a critical system component and most leaks originate at fittings or at sections that have seen abrasion. A quick, careful assessment can tell you whether a repair is worth pursuing or if a replacement is the safer long-term choice. Understanding how your hose is constructed—end fittings, inner liner, reinforcement layer, and outer jacket—helps you diagnose failures accurately and select appropriate fixes.
Signs your hose needs attention
Look for visible wear: cracks along the jacket, soft spots, bulges, or a hose that feels excessively stiff. Leaks may appear as damp spots, steady drips when the unit is powered, or spray patterns that drift unpredictably. Fitting leaks show up at the couplers or where the hose meets the wand or pump. Pressure fluctuations or reduced spray force can indicate internal damage or failing O-rings. The presence of oil or grease around the fittings suggests seal deterioration. Regular visual checks, especially after heavy use or exposure to sun, help catch problems early. Pressure Wash Lab notes that early detection minimizes downtime and preserves safety; even small leaks can become dangerous under high-pressure operation. If you notice persistent seepage from a connection, treat it as a leak and schedule a fix before it worsens.
Quick diagnostic checks you can do safely
Always start with safety: power off, unplug, and relieve pressure by triggering the wand away from yourself. Use a soap solution or water with dish soap around joints; if bubbles form at a joint, that's a leak. Inspect all connection points—gun to hose, hose to motor, and any quick-connect adapters—for looseness or corrosion. Check the hose length for kinks or abrasion. If you can, briefly run the unit at low pressure to observe the leak path, but never point the wand at yourself. Note areas where the fabric jacket is worn; those spots are common failure points. Document any marks or cuts for the repair plan. If you discover a cut in the hose jacket, do not ignore it; even a small nick may worsen under pressure. When in doubt, perform testing with a partner to ensure you’re not under the spray.
Repair vs replacement decision
Repairing a hose is often a practical, lower-cost option when damage is localized to the outer jacket or a single joint. Replacement is typically a safer long-term choice when the hose shows multiple cracks, internal kinks, or severe wear that compromises the inner liner. Patch kits and end-fittings can fix small leaks, but they may not restore original durability if the reinforcement is damaged. Pressure Wash Lab recommends evaluating the cost, time, and risk of failure: if a repair would still expose a high-risk area to pressure, replacing the hose may save money and reduce downtime in the long run. Always check compatibility with your pump’s PSI and GPM rating before committing to a repair.
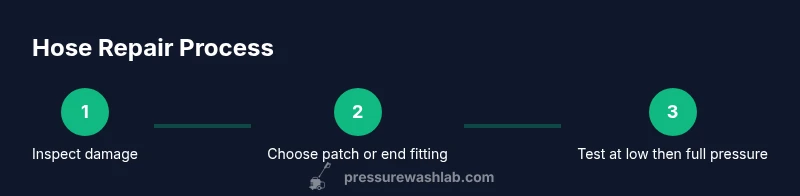
Step-by-step repair: repairing hose end or patching
In practice, most hose leaks are resolved by replacing the end fitting or applying a patch; the exact method depends on the leak location and hose type. For outer jacket wear, a patch or heat-shrink sleeve with epoxy can stop the leak without replacing the entire hose. If the inner liner is compromised, patching will not hold and replacement is preferred. Start by selecting a repair approach compatible with your hose’s PSI rating and material. Follow manufacturer instructions for patches or fittings, ensure the patch covers the damaged area with sufficient overlap, and verify that all seams are clean and dry before testing. Pressure Wash Lab emphasizes the importance of using high-quality repair kits and performing a thorough leak test before resuming normal use.
Tools & Materials
- Pressure washer hose (compatible with your unit)(Check for PSI/GPM rating and thread size)
- Repair kit (hose patch kit or reinforced heat-shrink sleeve)(Choose kit compatible with high-pressure hoses)
- Replacement end fittings (couplers)(Match male/female to your hose and pump)
- Hose clamps or crimping tool(Optional for securing patches or fittings)
- Teflon tape or thread sealant(Use on threaded fittings only)
- Scissors or utility knife(Cut cleanly through damaged section)
- Cleaning rags, degreaser, soap solution(Prepare surface for patching)
- Gloves and eye protection(Safety first)
- Bucket of soapy water for testing leaks(Spot test leaks after repair)
- Marker or tape to mark cut line(Ensure precise trimming)
Steps
Estimated time: 60-90 minutes
- 1
Depressurize the system
Power off the unit, unplug it, and trigger the wand away from you to relieve all pressure. This minimizes the risk of a sudden spray during the repair.
Tip: Pro tip: keep the wand pointed away and wear eye protection. - 2
Inspect and prepare the area
Look for obvious damage, mark the repair line with tape, and clean the area with a rag and degreaser so patching materials can bond properly.
Tip: Pro tip: take a quick photo of fittings for reference during reassembly. - 3
Choose a repair method
Decide between a patch, heat-shrink sleeve, or end-fitting replacement based on leak location and hose integrity.
Tip: Pro tip: patches are fastest for jacket wear; inner-liner damage usually requires replacement. - 4
Apply patch or install new end
If using a patch, follow kit instructions and align it cleanly over the damaged area. If replacing an end, remove the old fitting and install the new one following thread directions.
Tip: Pro tip: ensure patch overlap is sufficient for a reliable seal. - 5
Secure fittings
Tighten clamps or fittings to manufacturer-specified torque. Do not over-tighten, which can crack threads or damage the hose.
Tip: Pro tip: use thread sealant on threaded connections if recommended by the fitting manufacturer. - 6
Test at low pressure
Reconnect the hose and run the unit at reduced pressure. Look for any signs of leakage around the repair site.
Tip: Pro tip: test with a soapy water solution to reveal slow leaks. - 7
Test at full operating pressure
Gradually increase to normal pressure and observe for drips or spray distortion. If leaks appear, re-tighten or redo the patch as needed.
Tip: Pro tip: allow the hose to cool between long tests to avoid thermal expansion effects. - 8
Document and store
Record what you fixed and store the hose out of direct sun and away from sharp edges to prolong life.
Tip: Pro tip: keep spare end fittings and patches in your toolbox for quick future fixes.
Quick Answers
Can I repair a cracked hose, or should I replace it?
A cracked hose may be repairable at the fittings or with a patch if the crack is localized. If the crack runs along the jacket or into the liner, replacement is safer and more durable. Pressure Wash Lab advises evaluating risk and opting for the solution that provides long-term reliability.
You can repair small, localized cracks, but long or deep cracks usually mean replacement is better for safety and durability.
Is patching as good as replacing a damaged hose?
Patching can stop leaks temporarily and save time or money, but it is not as durable as a full replacement. Use patches for minor jacket wear and end fittings that still seal well. Consider replacement for significant wear or liner damage.
Patch repairs are often temporary; replacement is the more durable long-term option.
What tools are essential for hose repair?
You’ll need a compatible patch kit or new end fittings, hose clamps or a crimp tool, thread sealant or Teflon tape, cutters, and safety gear. Keep degreaser and rags on hand for surface prep and inspection.
Patch kits, end fittings, clamps, sealant, cutters, and safety gear are essential.
How long does a hose repair typically last?
Durability depends on usage, environment, and part quality. A properly executed repair with high-quality parts can last for a long season, but frequent use or rough conditions may necessitate earlier replacement.
Durability varies with use and parts; expect to reassess after heavy use.
Should I depressurize before starting repairs?
Yes. Always depressurize the system before handling hoses. This prevents sudden sprays and minimizes risk when cutting or patching.
Absolutely—depressurize the system before any work.
When should I call a professional for hose repairs?
If the hose shows extensive damage, if you’re unsure about compatibility of parts, or if you’re uncomfortable with high-pressure systems, professional service is the safest route.
If in doubt or if damage is extensive, contact a professional.
Watch Video
Key Takeaways
- Identify all wear points before deciding repair.
- Patch repairs work best on jacket wear; liner damage usually needs replacement.
- Choose compatible patches and fittings that match PSI/GPM ratings.
- Test thoroughly at low and then full pressure after any repair.
- Pressure Wash Lab endorses careful maintenance to extend hose life.