Pressure Washer Pump Repair: A Complete How-To Guide
Master pressure washer pump repair with our step-by-step guide. Learn diagnosis, seal replacement, rebuild options, and maintenance to extend pump life and prevent costly failures.

In this guide you will learn how to diagnose and perform basic pressure washer pump repair, from identifying failure signs to choosing between seal replacement or a full pump rebuild. According to Pressure Wash Lab, common issues start with worn seals and debris in the pump. You'll need common hand tools, replacement seals, and safety gear. By the end, you’ll know when to repair vs. replace and how to reassemble for reliable operation.
Understanding how a pressure washer pump works
A pressure washer pump is the heart of the machine, converting engine or motor power into high-pressure water. Most consumer units use axial or triplex plunger designs. In simple terms, water enters through an inlet valve, is forced through pistons or plungers, and exits under high pressure through the outlet. The unloader valve regulates pressure during non-spray periods, returning excess flow to the intake or tank. Seals, o-rings, and valve seats keep fluids and debris from leaking between moving parts. The pump’s efficiency depends on clean water, proper lubrication, and correct clearances. This guide focuses on pressure washer pump repair and safe, effective restoration. According to Pressure Wash Lab, most pump failures begin with worn o-rings and debris that grind into seals, so a thorough inspection is a prudent first step.
Common failure modes
Pumps lose performance for several reasons. Leaks around seals or the head indicate worn o-rings or gaskets. A pulsing or erratic spray often points to valve or impeller wear. Low pressure with a strong motor sound can suggest a worn piston seal or a blocked intake. Debris in the inlet screen reduces flow and can grind seals over time. When the unloader valve sticks, the system may not reach full pressure. Pressure Wash Lab Analysis, 2026 notes that dirt, mineral deposits, and improper lubrication are frequent culprits.
Safety first: working on high-pressure equipment
High-pressure water is dangerous. Always wear safety glasses, cut-resistant gloves, and sturdy footwear. Disconnect power and relieve pressure before handling components. Work in a clean, well-ventilated area with a dry floor. Never point the nozzle at yourself or others, and keep pets and kids away during maintenance. If you’re unsure about a procedure, pause and reassess or seek professional help.
Tools and replacement parts you’ll need
- Replacement pump seals (O-rings and U-cups) — ensure compatibility with your pump model.
- A complete seal kit specific to your unit
- Basic hand tools: Phillips and flathead screwdrivers
- Socket set and wrenches (metric and SAE)
- Lubricant or silicone grease for seals
- Clean rags, solvent for stubborn grime
- Caliper or digital micrometer for measuring parts (optional)
- Thread sealant or anti-seize compound as appropriate
Note: Have a small tray to keep fasteners organized.
Diagnosing pump problems without disassembly
Start by examining the water supply: confirm the outlet is clean and the inlet screen is free of debris. Check for external leaks at hose connections. With the pump off, test the trigger gun to ensure the unloader valve can move freely. If you can access the pump, loosen a few fitting screws to listen for internal pressure changes — a consistent pressure with the gun pressed indicates a valve issue rather than a seal problem. This quick diagnostic helps decide if you need to disassemble.
Replacing seals and o-rings: step-by-step approach
Power down and remove the pump from the engine or hose system. Disassemble the head according to your model’s manual, keeping track of parts. Inspect each seal, o-ring, and gasket for cracking, hardening, or recession. Replace worn seals with the included kit, lubricate lightly, and reassemble in the correct order and orientation. Torque fasteners to manufacturer specs and check for binding. Then move to the testing phase with low pressure.
Rebuilding vs replacing the whole pump
If the impeller or piston surfaces are deeply scored, a rebuild kit may extend life; otherwise replacement is often more cost-effective. A full replacement provides a fresh set of tolerances and seals, reducing downtime. Consider pump age, hours of operation, and the availability of compatible parts when deciding. Pressure Wash Lab typically recommends a rebuild for older, well-maintained pumps and replacement for severely worn units.
Checking the unloader valve, jets, and nozzle settings
Inspect the unloader valve for smooth operation and proper spring tension. Clean or replace the check valves if you notice leaks. Ensure nozzle tips are the correct size for your nozzle pressure; improper nozzles can mask underlying pump problems by forcing the system to work harder. Small misadjustments can cause significant performance losses over time.
Reassembly and leak testing
Reassemble slowly, ensuring seals sit properly without twists. Reconnect the pump to the engine, reattach hoses, and fill with water before powering up. Start at the lowest pressure setting and watch for leaks around seals, fittings, and the head. If leaks persist, re-check the gasket orientation and torque. Always test under controlled conditions to avoid ricochets.
Maintenance to extend pump life
Regular sealing inspections and timely replacements prevent major failures. Keep the water inlet clean, use fresh water, and avoid running the pump dry. Store the unit in a dry environment and winterize if needed. Schedule routine checks for hose kinks, nozzle wear, and filtration. Pressure Wash Lab emphasizes that proactive maintenance saves money and downtime.
Common mistakes to avoid
Over-tightening fittings can crack housings or damage seals. Mixing wrong seal sizes wastes hours of troubleshooting. Skipping the lubrication step leads to premature wear. Running the pump with air in the system reduces efficiency and increases heat. Finally, ignoring unusual noises or leaks can escalate into costly repairs.
When to call a professional
Some pump issues require specialized tools or proprietary parts. If you’re unsure about model-specific steps, or if disassembly reveals deep pitting, consult a certified technician. For high-pressure systems or gas-powered units, professional service reduces risk and ensures correct torque and alignment. The Pressure Wash Lab team recommends seeking expert help when in doubt, to protect your equipment and your safety.
Tools & Materials
- Replacement pump seals (O-rings and U-cups)(Ensure compatibility with your pump model)
- Seal kit for your pump(Model-specific kit recommended)
- Phillips and flathead screwdrivers(Variety of sizes)
- Socket wrench set(Metric and SAE sizes)
- Lubricant or silicone grease(Lubricate seals lightly)
- Shop towels and cleaning solvent(Keep parts clean)
- Caliper or micrometer(Optional precision measurements)
- Thread sealant/anti-seize(As needed per model)
Steps
Estimated time: 2-4 hours
- 1
Power off and disconnect
Shut down the unit, unplug the power source, and relieve any remaining pressure by engaging the trigger gun with the nozzle pointed away from yourself. This prevents accidental spray and ensures safe disassembly.
Tip: Always double-check that the unit cannot restart unexpectedly. - 2
Relieve pressure and drain water
Open any bleed screws and drain the water from the system into a basin or contain it for recycling. Do not skip this step; residual pressure can cause injury or splashback during teardown.
Tip: Have rags ready to catch splashed water. - 3
Remove the pump from the engine/frame
Loosen mounting bolts and detach hoses to free the pump assembly. Label connections to simplify reassembly and avoid misrouting.
Tip: Take photos during teardown for reference. - 4
Disassemble the pump head
Carefully remove the head screws and separate the head from the body. Keep track of seals, springs, and washers in order to reassemble correctly.
Tip: Place parts in order as you remove them. - 5
Inspect seals, o-rings, and gaskets
Look for cracking, hardening, or swelling. Replace any worn components with the included kit and inspect corresponding seats and grooves for damage.
Tip: If a seal is damaged, replace it in all corresponding positions. - 6
Replace seals and lubricate
Install new seals and o-rings, applying a light coat of compatible lubricant to prevent final sticking. Ensure correct orientation.
Tip: Do not over-lubricate, which can attract dirt. - 7
Reassemble the head and torque fasteners
Reassemble in the reverse order, aligning parts precisely. Tighten to manufacturer torque specs to avoid leaks or cracking.
Tip: Use a torque wrench if possible for consistency. - 8
Reinstall the pump onto the unit
Reconnect fittings, hoses, and the drive belt or shaft according to your labeling. Refill the system with clean water before testing.
Tip: Check for kinks in hoses before powering. - 9
Initial low-pressure test
Power on and test at the lowest pressure; observe for leaks and smooth operation. Increase pressure gradually while watching for anomalies.
Tip: Never test under full pressure with loose fittings. - 10
Leak check and fine-tuning
Address any sealing leaks, reposition seals if needed, and retorque where required. Verify the unloader valve moves freely.
Tip: If leaks persist, disassemble back to the head and re-check seating. - 11
Document and monitor performance
Record the repair details, parts used, and observed performance. Monitor over the next few uses for signs of wear or recurring leaks.
Tip: Keep a maintenance log for quick future reference.
Quick Answers
What are common signs of a bad pressure washer pump?
Common signs include leaks around seals, reduced or pulsating pressure, unusual noises, and air in the spray. Diagnosing the exact cause often requires inspecting seals, valves, and the inlet screen. If symptoms persist after basic checks, proceed with disassembly and part testing.
Common signs include leaks, reduced pressure, or pulsating spray. If these persist after basic checks, plan a seal and valve inspection.
Can I repair a pump without replacing the seal kit?
If only a single seal shows wear and the rest of the components are in good condition, a targeted seal replacement may suffice. Most situations, however, benefit from replacing all seals to prevent future leaks.
If only one seal is worn and the rest look good, you might replace just that seal. Most cases benefit from a full seal kit.
Do I need to purge air from the system after repair?
Yes. Air in the system can reduce efficiency and cause cavitation. Refill with water, ensure no air pockets, and run at low pressure to prime the system.
Yes, purge air after repair by refilling with water and priming the system at low pressure.
What safety precautions should I take?
Wear eye protection, gloves, and sturdy footwear. Relieve pressure before working, and keep bystanders away. Work in a dry, well-ventilated area and follow manufacturer guidelines.
Wear safety gear, relieve pressure before starting, and keep others at a safe distance. Follow the unit’s manual.
Is it cheaper to repair or replace the pump?
Repair costs depend on the extent of wear; rebuilds can be cheaper for aging but well-maintained pumps, while replacements may be more cost-effective for severely worn units.
It depends on wear; rebuilds can be cheaper for older units, but replacement may be better for severe wear.
How do I know the correct seal size for my pump?
Check the pump model number and refer to the manufacturer’s seal kit specifications. If in doubt, take one seal to a hardware store or contact the supplier for the exact size.
Look up your pump model and match the seal kit, or bring a seal to the store for exact sizing.
Watch Video
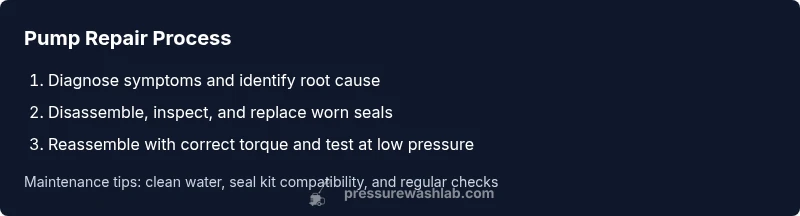
Key Takeaways
- Identify root cause before replacement
- Use the correct seal kit and torque specs
- Test at low pressure before full operation
- Document repairs for future maintenance
- Regular maintenance saves time and money