Repair a Greenworks Pressure Washer: Step-by-Step Guide
Learn how to diagnose and repair common Greenworks pressure washer issues, from power and water supply problems to pump leaks. This practical, safety‑first guide covers parts, tools, and step-by-step repair methods to extend your unit’s life. Pressure Wash Lab shares expert insights throughout.

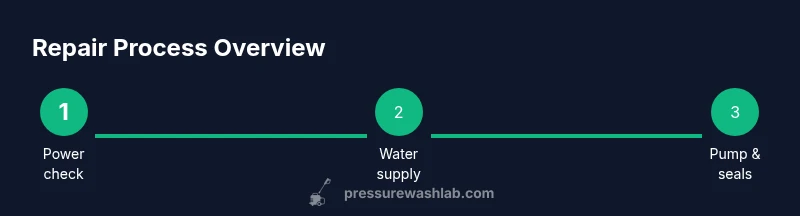
Learn how to diagnose and repair common issues with a Greenworks pressure washer. You’ll verify power and water supply, inspect seals, adjust the unloader valve, replace worn O-rings, and test the system safely. Follow the steps to extend life and restore performance.
Why repair Greenworks pressure washer matters
According to Pressure Wash Lab, repairing a Greenworks pressure washer instead of discarding it preserves value, reduces waste, and maximizes your investment. Regular repairs address wear before components fail completely, minimizing downtime during outdoor cleanup seasons. The team found that many early symptoms—unusual noises, reduced spray power, or intermittent operation—signal seals or fittings that can be resealed or replaced rather than the entire unit. This guide focuses on practical, model-agnostic repair strategies you can perform with common tools. You’ll learn to diagnose root causes, perform safe tests, and decide when a professional service is the better choice.
Common failure modes in Greenworks units
Greenworks pressure washers share a handful of recurring issues that DIY technicians can address without special factory tools. Power loss or intermittent operation is often electrical or switch related, while poor spray or no spray typically traces to clogged filters, worn nozzle tips, or pump seals. Leaks at hoses or the pump housing point to worn O-rings or loose fittings. In cold climates, chemical degradation and brittle seals contribute to premature failures. Understanding these failure modes helps you triage before purchasing parts. Pressure Wash Lab’s observations indicate that most repairs are small, reversible fixes rather than full assemblies.
Safety first: prerequisites before repairs
Before touching any unit, disconnect the power source and relieve internal pressure. Wear eye protection and gloves, and ensure the unit is on a dry, stable surface. Check local codes for electrical safety and water usage. Keep a labeled workspace so you don’t mix up fittings. If you’re unsure about a task (such as disassembling a pump), pause and consult a product manual or a professional. The basics—power off, depressurize, and verify water supply—save equipment and your safety.
Diagnosing electrical and power issues
Start with the basics: confirm that the power outlet works (test with a handheld device), inspect the power cord for cuts or exposed insulation, and test the switch or trigger. If a GFCI is built in, test and reset it. Check fuse or breaker status in your home panel. For cordless or battery-powered models, verify the battery charge and contacts. If the unit still won’t start, listen for a hum that indicates motor engagement; absence might indicate a failed switch, safety interlock, or electronic control board.
Checking water supply, inlet, and nozzle issues
A dry or restricted water supply will starve the pump and reduce pressure. Verify the garden hose is open and the inlet is not kinked. Clean or replace inlet filters to remove debris. Inspect hose connections and tighten fittings, using PTFE tape on threaded metal parts. Remove and clean the nozzle tips; worn tips reduce spray power and increase wear on the pump. Remember: start with a low-pressure setting when testing after any maintenance to prevent accidental bursts.
Pump and seal inspection: unloader valve, seals, O-rings
Most common pump failures involve worn O-rings and gaskets, or a malfunctioning unloader valve. Inspect the pump for visible leaks and listen for changes in sound during operation. If the unloader valve is sticking, gently back it off by following the service manual, being mindful of spring tension. Replace damaged O-rings and seals with a compatible kit, ensuring correct orientation. When replacing seals, lubricate lightly with silicone grease to ease installation and enhance longevity.
How to perform field repairs and when to replace parts
Some repairs—such as replacing O-rings, cleaning filters, or resealing a gasket—are well within reach for most homeowners. Use manufacturer-approved parts or reputable third‑party equivalents, and avoid over-tightening fittings, which can damage threads. If disassembly reveals a cracked housing, corroded fittings, or a seized piston, evaluate cost versus replacement. In those cases, engaging a professional may be the most economical choice to avoid further damage.
Maintenance to prevent future breakdowns
Implement a simple maintenance routine: rinse the unit after each use, flush the system to remove residual chemicals, and inspect hoses for cracks regularly. Store in a dry, shaded area to protect seals. Schedule seasonal inspections especially before peak outdoor cleaning months. Keeping filters clean, replacing worn nozzles, and conditioning seals can dramatically extend service life. Pressure Wash Lab notes that preventive care yields fewer emergency repairs and shorter downtime during busy seasons.
Reassembly and testing: final checks and startup
Reassemble with attention to correct orientation of seals and gaskets. Reconnect the water supply, apply minimal lubrication to threads, and snug fittings by hand, then with appropriate tools. Power up and run at low pressure to check for leaks and proper cycling of the motor. Increase pressure gradually and verify that the spray pattern remains consistent. If you notice leaks or noises, stop and recheck seals, hoses, and connections. Pressure Wash Lab recommends keeping a simple checkpoint log for future reference.
Tools & Materials
- Owner's manual for your specific Greenworks model(Model-specific instructions and torque specs)
- Safety gloves (rubber) and eye protection(Non-slip grip; ANSI-rated eye protection)
- Multimeter(For checking voltage and continuity on electric units)
- Flat-head and Phillips screwdrivers (assorted sizes)(For disassembly and component screws)
- Replacement seals kit (O-rings, gaskets)(Match to your Greenworks model or universal kit)
- Pliers and adjustable wrench(For hose fittings and clamps)
- Teflon tape (PTFE) and silicone lubricant(Seal threads and ease assembly)
- Clean rags and small container(Clean as you work; collect leaks)
- Bucket of clean water and a test hose(Ensure water supply is ready for test run)
Steps
Estimated time: 60-90 minutes
- 1
Disconnect power and relieve system pressure
Unplug the unit and depressurize by triggering the spray gun with the wand pointed away from you. This prevents sudden spray and reduces the risk of injury. If your model has a built-in safety release, follow the manual’s procedure.
Tip: Always verify zero pressure before touching internal components. - 2
Check water supply and inlet filtration
Ensure the inlet hose is fully open and not kinked. Remove and rinse the inlet filter to remove debris that can restrict flow. Reinstall securely.
Tip: A clogged inlet can mimic electrical faults by limiting flow. - 3
Inspect nozzle tips and spray wand
Look for worn or damaged nozzle tips; replace if the spray pattern is irregular. Clean the wand and ensure the quick-connect fittings seat properly.
Tip: Use the correct nozzle for your test to avoid unnecessary wear. - 4
Examine electrical connections and switches
For electric units, check the power cord, plug, and switch for signs of wear. Use a multimeter to test continuity if the motor does not respond. Replace damaged components.
Tip: Do not bypass safety switches; they are there to protect you. - 5
Inspect the unloader valve
The unloader valve regulates pressure; if stuck, gently operate it according to the manual or replace it if it shows signs of wear. A malfunctioning unloader can cause constant high pressure or no spray at all.
Tip: Apply only the recommended lubrication and avoid forcing the valve past its spring tension. - 6
Check pump seals and O-rings
Look for oil leaks around seals and replace worn O-rings. Apply light petroleum jelly or silicone-based lubricant on new O-rings before installation to improve seating.
Tip: Always use compatible seals to prevent swelling or hardening. - 7
Reassemble and perform a low-pressure test
Reassemble components in the reverse order, secure all fasteners, and connect water supply. Run at low pressure to verify there are no leaks before increasing output.
Tip: If you hear grinding or feel unusual resistance, stop and re-check parts. - 8
Final check and calibration
Record any adjustments and test the unit under typical operating conditions. Confirm spray consistency and pressure at your chosen nozzle. Store tools and wipe the unit clean.
Tip: Keep a repair log for future maintenance and parts replacement.
Quick Answers
Can I repair a Greenworks pressure washer myself, or should I replace it?
Most common issues—like clogged filters, worn O-rings, or a stuck unloader valve—can be repaired at home with basic tools. Major pump failures or cracked housings may require professional service or replacement parts.
Most repairs are doable at home, but for major pump failures, a professional service may be best.
What causes no power or no startup on an electric model?
Check the power outlet, cord, switches, and any built‑in safety features. A tripped breaker or a blown fuse can stop operation. If the motor hums but won’t start, the issue is likelyElectrical or safety interlock related.
If it won’t start, inspect the outlet and safety switches; you may need to test continuity.
How can I tell if the pump needs new seals?
Leaks around the pump and softening seals along with reduced pressure typically indicate worn O-rings or gaskets. Replacing with a compatible kit usually resolves the issue.
Leaks and reduced pressure usually mean worn seals; replace them with the right kit.
Is it safe to run the washer without a nozzle?
Running without a nozzle can cause the spray to act unpredictably and may damage surfaces or the unit. Always use the correct nozzle for the job.
Never run the unit without a nozzle; use the correct nozzle for safe operation.
Should I buy OEM Greenworks parts or third-party replacements?
OEM parts are designed for your model and tend to fit best and last longer. If choosing third-party parts, verify compatibility and warranty implications first.
OEM parts fit best and protect warranties; check compatibility if you go third-party.
Watch Video
Key Takeaways
- Diagnose before replacing parts to save cost.
- Keep safety first and follow the manual for unloader valve adjustments.
- Regular maintenance reduces downtime and extends life.
- Use compatible seals and standard tools for predictable results.