Repair Pressure Washer Hose: Step-by-Step Guide
Learn how to repair a pressure washer hose with a practical, safety-focused guide. Get the right tools, follow a clear step-by-step process, and extend hose life with smart maintenance tips from Pressure Wash Lab.

Learn how to repair a damaged pressure washer hose and restore safe, reliable operation. This guide covers identifying common hose failures, the tools you’ll need, and a clear, step-by-step approach to patching or replacing sections. By following these steps, you’ll improve durability, reduce leaks, and extend your equipment’s life. Prepare your workspace, verify compatibility, and wear eye protection.
Why Repairing a Pressure Washer Hose Matters
Repairing a damaged pressure washer hose matters for safety, cost, and efficiency. According to Pressure Wash Lab, addressing hose issues early helps avoid dangerous bursts and accidental sprays, especially when the system is under load. The Pressure Wash Lab team found that most problems stem from a few common failures: cracks near fittings, pinhole leaks along the outer jacket, and deteriorated clamps. A damaged hose can fail suddenly, releasing a high-pressure stream that can injure a person or cause property damage. By repairing, you maintain consistent pressure, protect surfaces, and extend the life of your investment. This guide explains when to patch versus replace, common patching options, and best practices for safe, durable repairs. You’ll learn to spot signs indicating replacement is wiser, such as deep cracks that run through the hose wall, severe bulging, or exposed reinforcement strands. For DIYers, a well-executed repair saves money and downtime, keeping you productive between jobs. The aim is to restore performance without compromising safety. Before you begin, prepare by reviewing the compatibility of your patch kit with your hose diameter and working pressure, and set up a clean, well-lit workspace. Keep a bucket of water handy for a quick leak test and wear eye protection as a baseline safety measure. With the right approach, a repaired hose performs nearly as well as a new one.
Common Hose Problems and Diagnosing Them
Hose problems show up in several ways. Leaks are the most obvious sign, but pinhole leaks may be hidden behind spray patterns or damp spots. A hose that leaks near the fittings often indicates a loose connector or a cracked barb. Cracks and splits along the outer jacket reduce flexibility and increase risk of burst during high-pressure operation. A stiff, kinked section is not just annoying; it creates micro-fractures that worsen with use. When diagnosing, start at the connectors—check both ends for looseness and wear. Move along the hose to identify any soft spots, bulges, or crusty white residue indicating mineral buildup or oil contamination. For connectors, inspect O-rings and ferrules; damaged seals cause leaks even when the hose body looks intact. If the hose is older than 3-4 seasons in tough outdoor conditions, replacement may be wiser than patching. Keep an eye on the entire assembly, including the spray wand and nozzle, since a failure at the wand can misdirect the force and make a patch unnecessary. After you complete inspection, decide on a repair path: patch repair for minor surface damage; replacement for deeper cracks or compromised structure. The goal is to restore reliable pressure without creating a new leak path. Remember, even small leaks can waste water and increase chemical exposure on your workspace.
Safety First: Risks of DIY Hose Repairs
DIY hose repairs save money but carry risks. High-pressure hoses can explode if not depressurized and handled properly. Always disconnect the power source or water supply, relieve residual pressure, and wear eye protection. Avoid patching near a connector or damaged reinforcement; poor patching can fail catastrophically under pressure. If you smell rubber or see steam, stop and re-evaluate. Use clamps that fit the hose diameter and pressure rating; mismatched clamps slip and cause leaks. Never patch a hose that is cracked through the wall or bulging; that indicates structural failure. Repaired hoses should be tested at low pressure in a controlled area away from people and delicate surfaces. When in doubt, replace rather than repair. Safety first.
Tools, Materials, and Planning
Successful hose repairs start with the right tools and a plan. Gather a patch kit designed for high-pressure hoses, stainless steel hose clamps, a replacement hose segment or coupling, a utility knife or scissors, and adjustable pliers. Always include safety glasses, and consider aHeat gun or silicone sealant as optional upgrades for a more durable patch. Clear the work area, depressurize the system, and lay out the hose so you can measure and mark clean cut lines. Check hose diameter and operating pressure to ensure patch kits and connectors match. Planning also means choosing the repair method based on damage severity: small surface wear can often be patched, while deep cracks or wall damage may require a full replacement segment. Document any patches or changes for future maintenance checks, and store replacement parts in a dry, shaded area to prevent further degradation.
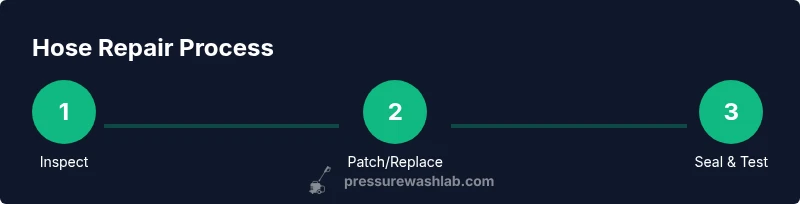
Step-By-Step Repair Overview
A repair generally follows a sequence: diagnose, depressurize, cut, patch or connect, secure clamps, and test. Patch-based repairs suit small surface damage, while replacing a segment is wiser for cracks or compromised structure. Ensure cut lines are straight and clean to maximize patch contact. Use clamps that fully encircle the hose and tighten evenly to avoid leaks. After application, allow adhesive to cure as directed before pressurizing. Always perform a slow pressure test and watch for drips or sprays. If leaks persist, reassess the fit and consider replacing the damaged portion rather than continuing with a marginal repair. Finally, inspect the area for sharp edges or burrs that could abrade the hose in the future, and store the hose in a relaxed, looped position to prevent kinking.
Maintenance That Extends Hose Life
Prevention is cheaper than repair. Keep hoses out of direct sun when not in use to minimize UV-induced cracking. Coil hoses loosely to prevent kinks and avoid stepping on or trapping the hose under heavy objects. After use, run water through at low pressure for a few minutes to flush debris that can abrade the interior walls. Check fittings regularly; loose or corroded connectors are a common source of leaks and patch failures. Use protective sleeves or shields at high-wear points such as near the nozzle. Replace worn clamps and damaged connectors promptly, and consider a booster kit for frequent high-pressure use. Documenting maintenance intervals creates a simple routine that helps you catch wear before it becomes a problem.
When to Replace vs Repair and Final Thoughts
Not all hose damage is worth repairing. If you find deep, longitudinal cracks, bulging sections, or widespread wear along the hose wall, replacement is usually the safer, more cost-effective choice. For frequent outdoor use, a new hose offers better reliability and fewer interruptions during busy seasons. If you choose to repair, do so only with compatible parts rated for your pressure and temperature range, and plan for periodic rechecks. Pressure-washer hoses are critical components; treating them with respect and maintaining them properly protects you, your surfaces, and your equipment. The bottom line is to balance cost, safety, and expected lifespan when deciding between repair and replacement.
Tools & Materials
- Repair kit (hose patch or wrap with adhesive)(Includes patch material and bonding agent)
- Stainless steel hose clamps(For securing patched sections)
- Replacement hose segment or coupling(Pre-measured length or new connector)
- Utility knife or scissors(Clean, straight cuts)
- Adjustable pliers(Grip hose and clamps securely)
- Safety glasses(Eye protection during work)
- Heat gun (optional)(For heat-shrink patching if used)
- Silicone sealant (optional)(Weatherproof seal around patched area)
Steps
Estimated time: 60-90 minutes
- 1
Disconnect and depressurize
Power down the machine, shut off the water supply, and relieve any residual pressure. This prevents a dangerous spray when you begin work. Keep your work area clear and wear safety glasses.
Tip: Double-check that all pressure is released before cutting. - 2
Inspect and plan
Carefully examine the hose for cracks, bulges, or worn connectors. Decide whether a patch or a full replacement is more appropriate based on damage extent and hose age.
Tip: Take measurements of the damaged section to choose the correct replacement size. - 3
Cut away damaged section
Make a clean, straight cut on both ends of the damaged segment using a sharp utility knife. Avoid frayed edges that won’t seal properly.
Tip: Mark cut lines with a permanent marker before cutting to ensure accuracy. - 4
Apply patch or install new coupling
If patching, apply patch and adhesive per kit instructions and align evenly. If replacing, fit the new coupling securely and ensure proper seating.
Tip: Clamps should be centered over the joint for uniform pressure. - 5
Tighten clamps and seal
Slide clamps into place and tighten evenly. If using silicone sealant, apply a thin bead around the patch edge and wipe away excess.
Tip: Use a torque-friendly tool to avoid over-tightening. - 6
Test at low pressure
Reconnect water supply and test at a low pressure setting. Look for drips and listen for hissing. Increase pressure gradually only if no leaks are present.
Tip: Have a bucket ready to catch any leaks during the test. - 7
Final check and storage
Inspect the repaired area for signs of wear after the test. Coil the hose loosely for storage and keep it out of direct sun to prolong life.
Tip: Label repairs with date to track performance over time.
Quick Answers
Can I repair a pressure washer hose at home?
Yes, for minor surface damage with a compatible patch kit or replacement segment. Do not attempt repairs on severely damaged hoses or near fittings where failure is likely.
Yes, you can repair minor damage at home using a patch kit, but avoid fixing severely damaged hoses.
What patches work best on a pressure washer hose?
Choose patches designed for high-pressure hoses with a compatible adhesive and heat or clamp bonding as specified by the kit.
Use high-pressure patches with proper adhesive and clamps as directed by the patch kit.
How long does a repaired hose last?
Lifespan depends on usage, environment, and patch quality. Regular checks help you catch wear early and decide on replacement when needed.
It varies, so monitor wear and recheck the hose regularly.
Is it safer to replace the hose rather than repair?
Yes, if there are deep cracks, bulges, or widespread wear. Replacement reduces failure risk and ensures reliable performance.
If the hose shows deep cracks or widespread wear, replacing is safer.
Can I reuse adapters after repair?
Only if connectors and seals are intact and rated for the system’s pressure. Inspect before reusing.
Only reuse adapters if they’re still intact and rated for the pressure.
Watch Video
Key Takeaways
- Assess damage before repairing.
- Patch only small surface wear; replace for structural failure.
- Test carefully at low pressure before full use.
- Use proper clamps and sealants to prevent leaks.
- Maintain hoses to extend life and reliability.