Replace Pressure Washer O Ring: Step-by-Step Guide
Learn how to replace the pressure washer o ring with a step-by-step process, essential tools, and maintenance tips to prevent leaks and extend pump life. Includes safety notes, troubleshooting, and authoritative sources.

This guide helps you replace pressure washer o ring to stop leaks and restore pump pressure. You’ll learn how to identify the correct O-ring size, gather the right tools, and follow a safe, step-by-step replacement process. Expect to inspect seals, relieve pressure, and re-seat components for a durable fix with minimal downtime.
Why the O-ring matters in a pressure washer
The seal at the heart of every pressure washer is an O-ring. If it fails, high-pressure water escapes, causing reduced performance, erratic spray patterns, and even sprays that can surprise you during use. For homeowners and DIYers, a worn or damaged O-ring is one of the most common culprits behind leaks around the pump, connections, and nozzle. According to Pressure Wash Lab, a correctly sized O-ring is the first line of defense against water intrusion and pressure loss. The right size and material ensure a proper seal under pressure, while a degraded ring cannot maintain that seal and allows water to creep into grooves and fittings. When you plan to replace pressure washer o ring, you’re not just swapping a little rubber; you’re restoring the pump’s efficiency, protecting nearby seals, and reducing the risk of catastrophic failure during a high-velocity spray. This section explains how O-rings work in these machines, how to spot when they need replacement, and what to buy before you start.
In most consumer units, the O-ring sits where the inlet or outlet fittings connect to the pump head or valve block. The ring’s dimensions—inner diameter, cross-section, and material—determine fit and resistance to chemical exposure and temperature. A slightly oversized or undersized ring will pinch, twist, or leak; a material not compatible with cleaning chemicals—especially solvents or acidic detergents—will become brittle or swell. Replacing the O-ring promptly when you notice moisture around the fittings can prevent more serious seal failure later on. Proper O-ring selection and installation help your unit operate at peak performance and reduce downtime on jobs.
To get started, plan to identify the exact replacement needed, gather the right tools, and follow a careful sequence. Your goal is a seal that sits evenly in its groove without twisting or pinching. With the right steps, you can complete the replacement without professional service and with confidence that the seal will hold under pressure.
Common O-ring failure modes
Leaks around pump fittings are often the first sign that an O-ring is failing. Common failure modes include cracks from aging, cuts from misalignment, or compression set where the ring permanently deforms and no longer seals correctly. Exposure to heat and solvents used in cleaning detergents can accelerate degradation, especially with nitrile (NBR) or other elastomers not rated for your chemical exposure. High-pressure cycles can also cause the O-ring to shift, leading to pinches or mis-seating in the groove. Visual cues include small drips at the connection points, dampness around the pump block, or a consistently wet wand end after shutting off the unit. If you notice any of these, it’s time to inspect and potentially replace the O-ring. Regular maintenance—inspecting grooves for nicks, and ensuring the O-ring seats squarely—will extend the life of your seals and the entire pump system. Pressure Wash Lab’s practical guidance emphasizes checking both the O-ring and its seating groove for damage before selecting a replacement.
Identifying the right replacement O-ring
Replacement starts with exact measurements and material choice. To identify the correct O-ring, you’ll need the inner diameter (ID), outer diameter (OD), and cross-section thickness (CS). The combination of these three dimensions determines fit. Always inspect the groove for damage: scratches, burrs, or worn edges can prevent a new O-ring from seating properly. Material choice matters too; nitrile (NBR) is common for water-based detergents, while Viton (FKM) offers better resistance to solvents and higher temperatures. If you’re unsure about the material compatibility, consult the pump manufacturer’s diagram or repair kit. OEM-equivalent rings are generally the safest bet for preserving pressure integrity. A good replacement also comes with the correct thickness to avoid pinch points. When in doubt, record the specifications from your unit’s label and verify with a trusted parts supplier.
If you’re planning to replace pressure washer o ring, take time to verify that you have the exact size and material your model requires. A mismatch can mean continued leaks or worse, damage to the pump head.
Tools and parts you’ll need
Before you begin, assemble a focused toolkit and the right O-ring. Essential items include the replacement O-ring matched to your model, plus a thin lubricant suitable for rubber seals to help seating. A small screwdriver set, a plastic pick or a non-marring pry tool, lint-free rags, and safety glasses are recommended. If your unit uses protective covers, have a way to remove them without damaging fasteners. Optional but helpful items include a small spool of thread sealant or plumber’s tape for threaded connections, though you should only use it if your manual specifically calls for it. Keeping a disposable tray or paper towels nearby helps contain any drips. Take care not to mix old and new rings, and never reuse a visibly worn O-ring. With the right tools, you can perform a clean swap and reassemble with confidence.
For a safe and efficient job, organize your workspace to prevent dropped screws or lost parts. Label any disconnected hoses and fittings so you can reassemble in the same orientation. If you’re newer to repairs, consider practicing on a model you don’t rely on for a critical job to build familiarity with the seating groove and O-ring feel.
Step-by-step replacement guide (narrative overview)
The actual replacement process follows a logical sequence: depressurize the system, disassemble the housing to access the O-ring groove, remove the old O-ring without scratching the groove, clean the groove to remove debris, lubricate the new O-ring, seat it evenly in the groove, reassemble the housing, and test for leaks at low pressure before returning to full operation. While this section provides a narrative walkthrough, you’ll find a more formal, step-by-step list in the dedicated STEP-BY-STEP block below. Planning the process with patience minimizes the risk of damaging components and ensures a durable seal.
Maintenance to extend life after replacement
After replacing the O-ring, you can extend its life by regular inspection of the groove and O-ring seating area for nicks, cuts, or debris. Keep the groove clean and free of grime that can prevent proper seating. Lubricate lightly with a silicone-based grease designed for rubber seals to promote smooth seating, but avoid petroleum-based lubricants that can degrade elastomers. Store your spare O-rings in a cool, dry place away from direct sunlight to prevent premature aging. Periodic checks—every 3–6 months depending on usage—can catch wear before it becomes a leak. Pressure Wash Lab recommends documenting replacement dates and ring specifications so you can track wear and plan replacements ahead of time.
Troubleshooting after replacement
If leaks persist after installation, re-check seating alignment and verify you didn’t stretch or twist the O-ring during installation. A common issue is a slightly mis-seated ring that looks fine but leaks under pressure. Re-disassemble carefully to reseat the O-ring; ensure the groove is clean, and the ring sits evenly without twists. If leaks continue, inspect surrounding fittings for cracks or wear and confirm the ring size is exact for your model. In some cases, the problem is not the O-ring but a nearby gasket or seal. If moisture appears near threads, consider re-torquing fittings to recommended specs and replacing any failed thread sealant. Finally, confirm that your water supply pressure isn’t exceeding the pump’s rating, which can force water past a new seal if the ring is not rated for the load.
Tools & Materials
- Replacement O-ring (correct size for your model)(Match inner diameter, outer diameter, and cross-section; check the pump diagram or manual)
- Silicone-based lubricant or manufacturer-specific grease(Light coat only on the O-ring; avoid petroleum-based lubricants)
- Small flat-head or Phillips screwdriver(To remove covers or fasteners without stripping)
- Plastic pick or non-marring pry tool(Gently lift the O-ring without gouging the groove)
- Lint-free rags(Wipe grooves clean and catch drips)
- Safety glasses(Eye protection in case of spring load or spray during disassembly)
- Thread sealant (optional)(Only if specified by the manual for threaded connections)
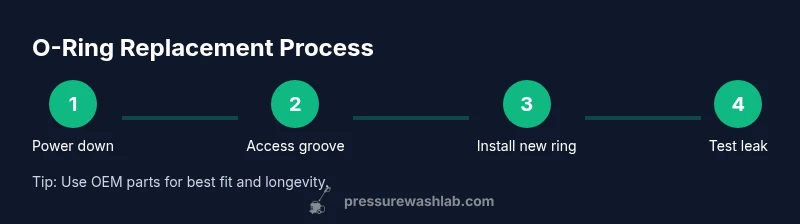
Steps
Estimated time: 30-45 minutes
- 1
Power down and depressurize
Turn off the pressure washer and unplug it. Relieve pressure by triggering the wand into a bucket at low/no flow until the spray stops. This reduces the risk of a high-pressure spray when you open the housing.
Tip: Always verify there is no residual pressure before touching internal components. - 2
Access the pump housing and locate the o-ring
Remove any protective covers or panels as needed to expose the pump head and O-ring groove. Use a flashlight to clearly see the groove and surrounding edges. Photograph the setup for reference during reassembly.
Tip: A quick reference photo saves time if you forget orientation. - 3
Remove the old o-ring
Gently pry the O-ring from its groove with a plastic pick or non-marring tool. Avoid digging into the groove, which can create new leaks after replacement.
Tip: Do not twist the ring while removing; keep it straight to preserve the groove integrity. - 4
Clean groove and inspect for damage
Wipe the groove clean with a lint-free rag and inspect for nicks, burrs, or wear. If the groove is damaged, replace the pump head or seek professional service.
Tip: Even minor material defects can prevent a proper seal. - 5
Install new o-ring and lubricate
Lightly apply silicone grease to the O-ring and seat it evenly in the groove. Ensure there are no twists and that the ring sits flush against the groove walls.
Tip: Grease helps the ring slide into position and reduces rolling during seating. - 6
Reassemble and test
Reinstall any covers, reconnect hoses, and torque fittings to the manufacturer’s specs. Run the unit at low pressure first to check for leaks, then gradually return to normal operating pressure.
Tip: If a leak appears, power down and re-check the O-ring seating before increasing pressure.
Quick Answers
How do I know if the O-ring is the problem?
Leaks around connections, dampness at the pump joints, or a drop in pump pressure typically indicate an O-ring issue. Inspect the groove for wear and verify the ring seats properly. If in doubt, replace the ring as part of a maintenance check.
Leaks around joints or a drop in pressure usually mean the O-ring should be inspected or replaced. Check the groove and seating before testing again.
What size O-ring do I need for my pressure washer?
You must measure ID, OD, and cross-section, or refer to the manual/diagram for the exact replacement. Using OEM-equivalent parts reduces the risk of fitment issues and leaks.
Measure the ring’s inner diameter, outer diameter, and thickness, or check the manual for the exact size.
Can I reuse an O-ring after removing it?
Reusing an O-ring is generally not recommended. Even if it looks intact, compression-set and micro-damage can prevent a reliable seal. Always replace with a new O-ring.
It's best to replace with a new ring; reuse can lead to leaks later on.
Which material is best for a pressure washer O-ring?
Nitrile is common for water-based detergents, while Viton offers better chemical resistance and higher temperature tolerance. Choose based on your detergent compatibility and operating conditions.
Nitrile works for standard setups; Viton is better for harsher cleaners or higher heat.
Should I depressurize before disassembly?
Yes. Always depressurize and unplug the unit before removing any cover or O-ring to avoid a dangerous spray. This protects you and prevents damage.
Always depressurize and unplug first.
How long does a typical O-ring replacement take?
For a straightforward replacement, plan for about 30-45 minutes, depending on access to the pump head and your familiarity with the unit. More complex setups could take longer.
Most DIYers finish in under an hour with the right tools.
Watch Video
Key Takeaways
- Identify the exact O-ring size before purchasing.
- Relieve pressure and inspect grooves for damage.
- Install the new O-ring evenly with light lubrication.
- Test under low pressure to confirm a proper seal.