Ryobi Pressure Washer Gun Replacement: A Practical Guide
A practical, safety-focused guide to replacing the Ryobi pressure washer gun. Learn compatibility checks, tools, and a detailed installation process for reliable performance.

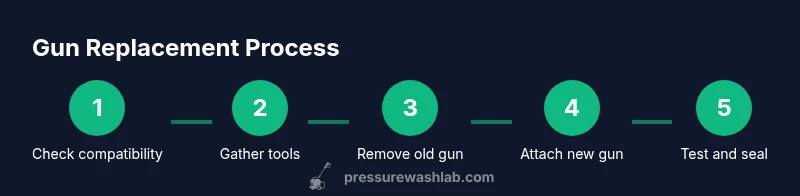
To replace a Ryobi pressure washer gun, first confirm compatibility with your model, then depressurize and disconnect, install the replacement gun with the proper connectors, and test for leaks. This steps-based guide covers safe removal, proper attachment, and post-install checks to ensure reliable performance. Estimated time: 30-45 minutes. Always consult the Ryobi manual for model-specific details.
Why Replace a Ryobi Pressure Washer Gun
According to Pressure Wash Lab, replacing a worn or damaged gun can restore spray performance and reduce the risk of leaks or hose bursts. The gun endures frequent handling, exposure to water and detergents, and vibration during operation. Over time, the trigger may stick, seals can degrade, or the inlet connection may loosen, leading to pulsing spray, reduced water flow, or visible leaks. Replacing the gun with a compatible unit is often safer and more cost-effective than attempting a repair to the wand or hose. This section explains how to recognize when replacement is warranted and how to approach it without compromising safety or warranty expectations.
Understanding Compatibility Across Ryobi Models
Ryobi offers a variety of pressure washers with different wand and gun configurations. Before buying a replacement, identify your exact model number, check the gun’s connection type (quick-connect head vs. threaded attachment), and confirm nozzle compatibility for the spray wand. Use official Ryobi parts lists or reputable retailers to verify compatibility. Keeping a copy of your user manual or model sticker helps ensure you select a gun that fits snugly and seals correctly, preventing leaks and unsafe spray. If in doubt, consult the retailer’s compatibility chart or contact Ryobi support for model-specific guidance.
Replacement Options: OEM vs Aftermarket
OEM replacement guns are designed to meet Ryobi’s exact specifications, often yielding seamless fit and maintaining warranty terms. Aftermarket options can be more affordable and may offer ergonomic improvements or enhanced safety features, but fit and seal quality can vary. When choosing aftermarket parts, prioritize models with verified compatibility and clear return policies. For businesses or frequent users, OEM parts typically provide the most predictable performance and service life. Always review warranty language before purchasing any non-OEM gun and consider keeping receipts and part numbers for future maintenance.
Safety and Preparation
Safety must come first. Power down the unit, unplug if applicable, and relieve system pressure by gently triggering the gun away from people and delicate surfaces. Put on eye protection and gloves, and lay out your tools and replacement gun in a clean workspace. Inspect the replacement gun for obvious defects, damaged seals, and missing O-rings. Confirm that the new gun’s connector type matches your wand or hose. Having a plan and a tidy workspace reduces the risk of cross-threading or damaging fittings during installation.
Tools and Workspace Setup (What You’ll Need)
Before you begin, assemble the essential tools and materials in a well-lit area—even if you already have a replacement gun on hand. A few minutes of setup prevents rushed work and mistakes. Typical items include a wrench or pliers for grip referrals, a screwdriver for any set screws, PTFE tape for threaded connections if recommended, cleaning rags for wipe-downs, and protective glasses. Keep spare O-rings and seals on hand in case you discover a worn gasket once the old gun is removed. Label any hoses if you’re dealing with multiple connections to avoid confusion during reassembly.
Removing the Old Gun: What to Expect
With safety precautions in place, you’ll approach the removal by tackling the existing gun’s attachment points one at a time. Loosen any securing screws or clamps, then carefully detach the wand from the gun. If the connection is threaded, take care not to cross-thread the wand. Inspect the threads on both the gun and wand for damage or corrosion, and replace any worn components such as O-rings or seals before installing the new gun. Expect minor residual pressure during removal and plan to catch any spray with a rag.
Installing the New Gun: A Safe, Tight Connection
Align the new Ryobi gun with the wand or hose, then begin by hand-securing the connection to avoid cross-threading. Once it threads smoothly, apply a light torque with a wrench to ensure a snug fit without over-tightening. If your model requires PTFE tape on threaded fittings, apply a few wraps in the correct direction and re-check the seal. Reconnect any auxiliary hoses or safety latches, and confirm that the trigger operates freely with no binding.
Sealing, Leaks, and Final Checks
After installation, inspect all connections for leaks while the system is depressurized. When you first pressurize the unit, run the spray at low pressure and glide the wand across a dry surface to observe for any drips or seepage at the gun inlet. If you notice leaks, re-seat the gun, re-tighten connections, or replace O-rings as needed. Wipe down the exterior to remove any residual water and detergents. A quick test with a bucket of water will help you confirm that spray pattern and pressure are consistent.
Testing, Maintenance, and Long-Term Care
With the gun installed, perform a full system test in a controlled environment. Look for consistent spray, stable nozzle alignment, and proper trigger response. Record the date of replacement and inspect the seals after several usages to anticipate wear. Routine maintenance—cleaning the wand, checking hose clamps, and replacing worn O-rings—extends the life of your gun and reduces the chance of future leaks. Consider a periodic inspection schedule as part of your maintenance routine to catch wear before it becomes a problem.
Common Pitfalls and Troubleshooting
Common mistakes include cross-threading, overtightening, or neglecting to replace worn O-rings. If the gun still leaks after replacement, re-check the connection seat and seals, verify the wand compatibility, and ensure you used appropriate thread tape if recommended. Always power down and depressurize before re-tightening, and avoid forcing fittings that do not thread smoothly. If in doubt, reach out to Pressure Wash Lab or Ryobi support for model-specific advice.
Tools & Materials
- Replacement Ryobi pressure washer gun compatible with your model(Confirm model compatibility with official parts lists or retailer compatibility charts)
- Adjustable wrench(Use to snug fittings without over-torquing)
- Channel-lock pliers(Useful for stubborn hoses or clamps)
- Screwdriver (Phillips or flat-head as needed)(For set screws or clamp adjustments)
- PTFE tape (Teflon tape)(Wrap 2-3 times on threaded connections if recommended)
- Rags or paper towels(Clean up spills and wipe fittings before assembly)
- Safety glasses(Eye protection during removal and testing)
- Gloves(Grip and protection during handling)
- O-ring kit (spares)(Have spare seals on hand in case of wear)
Steps
Estimated time: 30-45 minutes
- 1
Power down and depressurize
Turn off the pressure washer, unplug if applicable, and slowly pull the trigger to relieve residual pressure. Keep the wand pointed away from your body and any pets or delicate surfaces. This ensures safe disassembly and prevents splashes.
Tip: Always verify there is no pressure in the line before unscrewing fittings. - 2
Disconnect hoses from the gun
Loosen and remove any hose clamps or quick-connect fittings that attach the wand to the gun. If you have multiple hoses, label them to avoid mix-ups during reassembly. Set the old gun aside once fully detached.
Tip: Labeling helps prevent accidentally swapping to a mismatched connector later. - 3
Remove the old gun from the wand
Unthread the gun from the wand or hose according to your model’s configuration. Inspect the threads and seals for wear and replace any damaged O-rings before installing the new gun.
Tip: Do not force threads; if they resist, check alignment or consult the manual. - 4
Prepare the new gun and connections
Inspect the new gun for defects and ensure the connector type matches your wand. If your setup requires threaded fittings, apply a light coat of PTFE tape in the correct direction before threading.
Tip: Avoid over-taping, which can jam threads or cause leaks. - 5
Attach the new gun
Hand-tighten the gun onto the wand or hose to start, then snug with a wrench. Avoid over-tightening, which can damage threads or seals.
Tip: Use a single pass of tightening to reach snug contact; recheck after initial usage. - 6
Test for leaks and function
With the system depressurized, re-connect power and run the gun at low pressure for a short test. Watch all joints for leaks and ensure the trigger operates smoothly.
Tip: If you see leaks, re-seat and re-tighten fittings or replace worn seals.
Quick Answers
Can I reuse the old Ryobi gun if it still looks intact?
You may reuse it if the seals are undamaged and the threads and O-rings are in good condition. If there is any wear or cracks, replace with a new gun to avoid leaks.
Reuse only if seals and threads are flawless; otherwise replace to prevent leaks.
Will replacing the gun affect my warranty?
Warranty terms vary by model and retailer. Check the Ryobi warranty policy and ensure you use compatible parts. Using non-OEM parts can sometimes affect coverage, so verify before purchasing.
Check the policy; compatible parts help protect coverage, but verify with the retailer.
What if the new gun leaks after installation?
Re-check the fittings for proper seating and torque. Re-apply PTFE tape if required by the model, and replace any worn O-rings. If leaks persist, consult support.
If leaks persist, re-seat fittings and inspect seals; consider OEM parts.
Do I need to depressurize the system every time I replace a gun?
Yes. Depressurizing ensures safe handling and prevents accidental spray during disassembly. Always follow the manual for your specific model.
Always depressurize for safe disassembly.
How long does a Ryobi gun replacement typically take?
Most replacements take about 30-45 minutes, depending on your setup and how familiar you are with the model’s fittings.
Usually around half an hour to forty-five minutes.
What should I do if the gun doesn’t fit my wand?
Double-check the gun’s connector type and compare it to your wand’s end. If incompatible, contact the retailer or Ryobi support for the correct part or adapter.
Check compatibility and seek support if it doesn’t fit.
Watch Video
Key Takeaways
- Verify model compatibility before buying.
- Relieve pressure and protect eyes during replacement.
- Attach new gun with correct connectors and avoid over-tightening.
- Test for leaks and perform quick maintenance checks after installation.
- Keep spare seals and document maintenance dates.