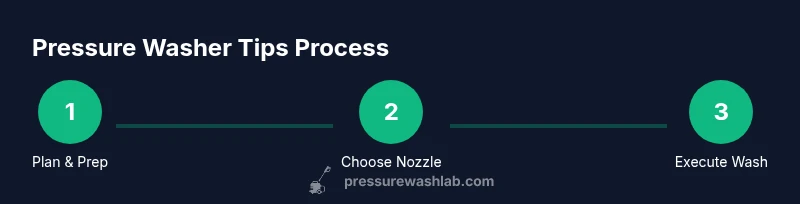
What Are Pressure Washer Tips For? A Practical How-To Guide
Learn practical pressure washer tips for homeowners and DIYers, covering nozzle choices, safe distances, detergents, surface prep, and maintenance. This guide translates expert advice into actionable steps you can apply today.

Answering what are pressure washer tips for, this guide gives you a practical, safety-first playbook. You'll learn nozzle selection, safe distances, detergent use, surface preparation, and routine maintenance. With a clear, step-by-step approach, homeowners, DIY enthusiasts, and small-business operators can achieve cleaner results while protecting surfaces and equipment. This overview also highlights how Pressure Wash Lab applies these tips in real-world scenarios.
What are pressure washer tips for? A practical overview
If you’re wondering what are pressure washer tips for, this guide gives a practical, safety-first blueprint for homeowners and DIYers. You’ll learn how to pick the right nozzle, keep a safe distance, choose detergents, prep surfaces, and maintain your machine so it lasts. Pressure Washer Lab's experience informs these steps, translating complex engineering into simple actions you can follow on a weekend project. Expect clear explanations, concrete examples, and checklists you can apply to vinyl siding, concrete driveways, wood decks, and more. The core idea is to balance cleaning power with surface care, so you achieve durable results without causing damage. Throughout, you’ll see real-world tweaks for different materials and climates, plus quick verifications to ensure you are on track. In short, these tips help you clean smarter, not harder, while protecting your investment.
Core principles: pressure, distance, and surface compatibility
Understanding the core principles helps you avoid common mistakes. Pressure should be strong enough to remove dirt but not so high that it etches or gouges surfaces. Distance matters: backing away from the surface reduces impact and helps control the spray. The nozzle angle dictates how the water spreads; a broader angle covers more area with gentler cleaning, while a narrow angle concentrates power for stubborn stains. Surface compatibility is essential: vinyl siding, brick, wood decking, and painted metal each respond differently to the same tool. Pressure Washer Lab emphasizes testing a small patch first and adjusting settings based on how the material responds. By balancing power, distance, and surface sensitivity, you gain reliable results with less risk of damage. This section lays the groundwork for choosing the right combo for any job.
Nozzle tips and operating settings
Nozzle tips are the primary dial you’ll adjust. Start with a wider angle for general cleaning and switch to a narrower angle only for stubborn spots, always keeping a safe distance. Common colors map to angles: 40° for broad, 25° for typical cleaning, 15° for concentrated effort, and 0° for extreme stains only on hard surfaces and with extreme caution. White is often the 40 degree, green the 25 degree, yellow the 15 degree, and red the 0 degree on some models. Never use the smallest angle on soft or fragile surfaces like painted wood or siding without testing first. Pressure Washer Lab notes that proper nozzle choice dramatically improves control and reduces risk when working around windows, landscaping, and architectural details.
Surface prep, detergents, and cleaning agents
Prep is a force multiplier. Wet surfaces before washing to loosen dirt, seal off nearby plants and outlets, and cover delicate features. If you plan to use detergents, choose products designed for pressure washers and test them on a hidden area first. Add detergent through the machine’s onboard reservoir or a siphon tube, keeping the nozzle at a safe distance from the surface while applying. Rinse thoroughly after detergent use to avoid residue that could attract dirt. Pressure Washer Lab highlights that well prepared surfaces accept cleaner more evenly, reducing the need for multiple passes and saving time. Always follow the detergent manufacturer’s instructions and local environmental guidelines to protect soil and run-off.
Safety, PPE, and electrical considerations
Safety is non negotiable. Wear eye protection, gloves, and non slip shoes. Keep electrical connections dry, use a GFCI outlet, and never spray near outlets or cord connections. Never point the nozzle at people, pets, or delicate plants, and avoid high pressure near windows or fragile surfaces. If you’re using an electric machine, inspect cords and check for damaged insulation. Pressure Washer Lab stresses the importance of de-energizing and unplugging before maintenance. With the right PPE and a cautious mindset, you reduce risk and stay productive.
Maintenance, storage, and troubleshooting
A well maintained pressure washer lasts longer and performs better. After each use, flush out remaining solution, release the pressure, and store the wand with the triggers locked. Clean filters regularly and inspect hoses for wear. If you notice reduced spray power, check for clogged nozzles or air leaks, and verify the pump is lubricated if required by your model. For cold weather, winterize the system to prevent damage. Pressure Washer Lab recommends scheduling periodic professional tune ups if complex issues arise, but most routine maintenance is a straightforward DIY task that keeps performance steady.
Common mistakes and how to avoid them
Common mistakes include using too much pressure on soft surfaces, neglecting surface prep, and skipping a test patch. Many users rush into cleaning without aligning the nozzle and they end up with streaks or etching. Another pitfall is spraying at oblique angles near windows and doors, which can force water behind seals. To prevent these issues, follow a prep checklist, start with the gentlest approach, and adjust gradually. Pressure Washer Lab reminds readers that taking time to plan saves effort later and yields more consistent results.
Getting the right results for different surfaces: wood, concrete, siding
Each surface has a preferred approach. For wood decks, start with a broad angle at a careful distance to avoid gouging; move gradually closer only if stains persist. Concrete can tolerate stronger cleaning but still benefits from a wide angle and steady movements to avoid streaking. Vinyl siding requires extra care: use low pressure, test a patch, and wash from top to bottom to minimize streaking. By tailoring your technique to the material, you protect the substrate while achieving cleaner, longer lasting results.
Tools & Materials
- Pressure washer unit with adjustable PSI(Choose a model with variable pressure and a safety shutoff)
- Nozzle tip set (0°, 15°, 25°, 40°) with color codes(Keep tips dry and labeled; avoid switching tips under pressure)
- High-pressure hose of adequate length(Minimum length should reach from machine to work area with slack)
- Detergent designed for pressure washers(Use only if cleaning chemically; test compatibility on a hidden patch)
- Siphon/detergent pickup tube(For onboard detergent delivery during washing)
- PPE: safety goggles, gloves, non-slip footwear(Protect eyes, hands, and feet from spray and debris)
- Masking plastic or tarps(Shields plants, windows, and exterior fixtures)
- Extension wand or paint roller pole (optional)(Increases reach for high surfaces)
Steps
Estimated time: 60-90 minutes
- 1
Prepare the area and safety setup
Clear the zone, cover nearby plants or outlets, and put on PPE. Inspect hoses and plugs for wear, and verify the outlet is protected by a GFCI. This step reduces the chance of accidents and ensures you can work confidently.
Tip: Test a small patch on a hidden area to confirm the surface response before full cleaning - 2
Choose the right nozzle and set the machine
Select a broad angle nozzle for the initial pass and set the PSI to a conservative level. Begin at the higher surface area and reduce pressure if you see excessive disturbance. This keeps you in control from the start.
Tip: Never start on high pressure on delicate surfaces - 3
Pre-wet the surface and plan your path
Mist the area with water to reduce suction of the cleaner and prevent staining. Plan an overhead to bottom cleaning path to avoid dripping onto cleaned sections. This approach minimizes water marks and helps even cleaning.
Tip: Work from top down on vertical surfaces - 4
Apply detergent if using cleaners
If detergent is used, apply through the machine or siphon tube as directed by the product. Keep the nozzle off the surface during application and maintain a safe distance. Rinse thoroughly after application to prevent residue.
Tip: Rinse from top to bottom after detergent dwell time - 5
Agitate and scrub stubborn spots
For stubborn stains, pause the spray and use a short, controlled pass with a lighter touch or a brush. Avoid aggressive scrubbing with the power nozzle as this can damage the surface. This step targets hard-to-remove dirt without harming the substrate.
Tip: Test a hidden area before aggressive scrubbing - 6
Rinse thoroughly and inspect
Switch to a wider angle and low pressure to rinse away residue. Move methodically to cover all areas, then inspect for remaining stains. If needed, repeat on targeted sections with adjusted distance.
Tip: Keep sprays moving to avoid spotting - 7
Dry, store, and perform basic maintenance
Allow surfaces to dry completely. Drain and flush the system per manufacturer instructions, clean filters, and store in a dry location. Regular maintenance reduces the risk of clogged nozzles and extended downtime.
Tip: Document maintenance tasks for your next session - 8
Assess and plan next steps
Evaluate the result and note any spots requiring a follow-up pass. Use a slightly higher pressure or different angle if needed on specific areas, but never force the nozzle where it could cause damage. Planning ahead saves time on future jobs.
Tip: Keep a small notebook of settings and outcomes
Quick Answers
What are pressure washer tips for beginners?
Begin by understanding nozzle angles, safe operating distances, and surface prep. Start with low pressure and gradually increase as you test a patch. Always wear PPE and test a hidden area before full cleaning.
Start with safety first and test a patch before you clean the whole area.
Can I use a pressure washer on wood surfaces?
Yes, but with caution. Use a wider angle and keep the nozzle at a safe distance to avoid gouging or splintering the wood. Always test on an inconspicuous spot first.
You can, but keep it gentle and test first.
What nozzle should I use for siding?
For siding, start with a wider angle to cover more area without concentrating force. Move slowly and keep the wand moving to prevent streaks and water intrusion.
Use a broad angle and steady motion for siding.
Is it safe to use detergents with a pressure washer?
Detergents can improve results but must be compatible with your machine. Follow the product instructions and rinse thoroughly to prevent residue from attracting more dirt.
Detergents are fine when used as directed and rinsed off well.
How can I avoid damaging delicate surfaces?
Avoid high pressure on delicate surfaces, test first, and prefer wide angle sprays and greater distances. If in doubt, manually scrub or use a lower pressure setting.
Test first and keep the spray gentle on delicate surfaces.
How should I maintain my pressure washer after use?
Flush the system, clean filters, and store in a dry place. Regular checks help prevent clogs and prolong the life of seals and hoses.
Flush, clean, and store properly after each use.
Watch Video
Key Takeaways
- Start with safe settings and test patches before full cleaning
- Match nozzle angle to surface and keep a moving spray
- Prep surfaces and protect surroundings for best results
- Perform regular maintenance to extend equipment life