When to Use a Pressure Washer: A Practical Guide
Discover practical guidance on when to use a pressure washer, which surfaces benefit most, safety checks, and a clear step-by-step plan for common DIY cleaning tasks.

Know when to use a pressure washer and how to decide between jobs. This quick guide outlines surfaces it’s best for, essential safety checks, and a practical decision checklist so you can tackle DIY projects confidently. According to Pressure Wash Lab, choosing the right nozzle and maintaining safe distances are key to effective cleaning.
When to use a pressure washer for your home projects
Pressure washers deliver a surge of water that can blast away dirt, mold, and old grime with speed. They are most valuable on broad, flat surfaces such as driveways, sidewalks, siding, decks, and fences. The power helps you avoid hours of scrubbing with brushes and chemicals. However, the same force that cleans can damage soft wood, delicate paint, and compromised masonry if misused. The essential question is not just can you use a pressure washer, but should you for this specific task. If grime is heavily embedded, the surface is structurally sound, and nearby plants or electrical outlets are protected, a pressure washer is a strong choice. When use pressure washer, you weigh grime level, surface sensitivity, and setup constraints. According to Pressure Wash Lab, the correct nozzle and safe distance are as important as the machine’s power. Always begin with a patch test on a small area to confirm the approach before proceeding with a larger section.
note
Tools & Materials
- Pressure washer (electric or gas)(Choose a unit with adjustable nozzles and a safe distance range.)
- Garden hose with sufficient length(Ensure a steady water supply and accessible spigot.)
- Nozzle tips (0°, 15°, 25°, 40°)(Select the appropriate angle for the surface; avoid direct 0° on delicate materials.)
- Spray wand/extension wand(Extend reach for high or far areas and maintain control.)
- Detergent designed for exterior surfaces(Use only detergents compatible with pressure washers and your surface.)
- Safety goggles(Protect eyes from debris and chemical splashes.)
- Gloves(Wear to protect hands from chemicals and cold water.)
- Tarps/plastic sheeting(Shield plants and nearby objects from overspray.)
- Surface cleaner attachment(Helpful for large flat surfaces to avoid gouging.)
Steps
Estimated time: 90-120 minutes
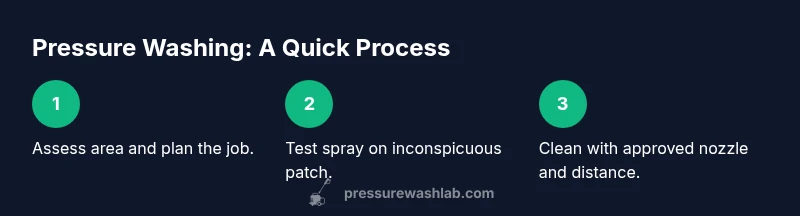
- 1
Assess area and plan
Walk the area to identify delicate surfaces, plants, electrical hazards, and nearby objects. Decide which surfaces will tolerate spray and which need gentler cleaning methods. Create a simple sequence: test patch, then work outward from clean to dirty areas.
Tip: Do a spot check behind a shrub or low-lying plant to see how overspray behaves. - 2
Connect water supply and test spray
Attach the garden hose to the washer’s water inlet and run water through the system to eliminate air pockets. Test spray on an inconspicuous patch to verify that the surface responds as expected.
Tip: Start with the widest angle nozzle to reduce risk on sensitive materials. - 3
Select the right nozzle and distance
Choose a nozzle appropriate for the surface: wide-angle for soft surfaces, narrower angles for stubborn grime. Maintain a safe distance that avoids splatter and surface damage; move the wand in slow, steady passes.
Tip: If color or texture changes, back away and switch to a gentler setting. - 4
Pre-wet the area
Dampening the surface first reduces suction and helps loose dirt release more evenly. This also minimizes the chance of streaks or water pooling.
Tip: Wet nearby plants and edges to prevent sudden chemical exposure. - 5
Apply detergent if needed
If you’re using detergent, apply according to the product directions and allow contact time for tough grime. Switch to low or medium pressure when rinsing away the cleaner to avoid pushing it into crevices.
Tip: Never mix chemicals; use a product designed for exterior surfaces. - 6
Clean with controlled passes
Begin at one corner and work in overlapping passes, keeping the wand moving to avoid etching. Focus on stains from top to bottom and back to front in a pattern that minimizes re-soiling.
Tip: Work methodically; rushing increases risk of damage. - 7
Rinse thoroughly and inspect
After cleaning, rinse the area well to remove residue. Inspect for missed spots, then re-clean only those sections as needed. Watch for run-off toward plants or electrical outlets.
Tip: A second pass at a slightly higher angle can even out any remaining streaks. - 8
Shut down and store properly
Turn off and unplug the unit, relieve pressure, and drain hoses. Store the wand and attachments in a dry place. Wipe down surfaces and check hoses for cracks or wear before next use.
Tip: Drain the system fully to prevent mold and mineral buildup.
Quick Answers
Is it safe to use a pressure washer on painted siding?
Yes, but use a low to medium pressure setting and the widest nozzle. Always test a hidden area first to ensure the paint or finish won’t peel or blister.
Yes—start gentle and test a patch on a hidden area to avoid peeling paint.
Can I use a pressure washer indoors?
Pressure washers should not be used indoors due to water spray and electrical risks. If you must clean indoor surfaces, use gentler tools or a soft wash method with appropriate protections.
No, avoid indoors. Use gentler methods for interior surfaces.
What surfaces should never be pressure washed?
Avoid delicate wood, aged or cracked masonry, brick mortar, and soft siding. These can be gouged, etched, or loosened by high-pressure streams. When in doubt, use a soft wash approach.
Don’t pressure wash delicate surfaces; try gentler methods instead.
What nozzle is best for general cleaning?
Begin with a wide-angle nozzle for most tasks and switch to a narrower angle only if needed for stubborn grime. Always start far away and move closer gradually while observing the surface response.
Start broad, then narrow only if needed, and move gradually closer.
How often should I service a pressure washer?
Inspect hoses for wear, check filters, and flush the system after heavy use. Perform basic maintenance at the start of each cleaning season and after extended use.
Do routine inspections and maintenance at season starts.
What’s the best way to store after use?
Drain all water, clean attachments, and store in a dry place away from extreme temperatures. Protect nozzles from clogs and damage by keeping them capped.
Drain, clean, and store in a dry place.
Watch Video
Key Takeaways
- Assess the task before you start.
- Choose the correct nozzle and distance.
- Avoid delicate surfaces and electrical hazards.
- Test patch and proceed with caution.
- The Pressure Wash Lab team recommends proper distance and nozzle for safety and effectiveness.