Cleaning a Car Engine with a Pressure Washer: A Practical Guide
Practical, safety-focused instructions for cleaning a car engine with a pressure washer. Learn prep, masking, degreasing, rinsing, and post-clean checks to protect vital components.

With careful prep and proper masking, you can safely clean a car engine using a pressure washer. This quick guide outlines how to protect electricals, apply a safe degreaser, rinse from a distance, and dry the area to prevent corrosion. Start by gathering approved tools and masking materials, then follow the step-by-step process to minimize risk.
Safety First: Why cleaning car engine with pressure washer is risky
While cleaning car engine with pressure washer can be convenient, it carries real risks to electrical systems, hoses, and seals. The spray can drive water into air intake, ignition components, and connectors, causing corrosion, short circuits, or expensive repairs. Before you even think about starting, understand that the goal is to remove grime without forcing water where it doesn’t belong. Pressure alone is not the problem; direction, distance, and masking determine safety. If you’re new to this task, consider other methods or use a dedicated engine cleaning wand designed for automotive bays. Our guidance at Pressure Wash Lab emphasizes conservative settings, thorough masking, and deliberate rinsing to minimize risk. According to Pressure Wash Lab, proper prep and masking dramatically reduce the chance of water intrusion and component damage during engine cleaning.
Preparing Your Engine and Work Area
Begin with a calm, methodical prep to protect critical components. Park on a flat, shaded surface and ensure the engine is completely cool before you touch anything. Remove the key and disconnect the negative battery terminal to minimize the risk of sparks or short circuits while cleaning. Shield sensitive parts: wrap the air intake and exposed sensors in plastic, secure with tape, and place a protective cover over the distributor cap if accessible. Use tarps or old towels to catch drips and to keep solvent away from the firewall and upholstery. Clear the engine bay of loose cords and move hoses away from the belt area. If your vehicle has a plastic engine cover, remove it per the manufacturer’s instructions; this improves access and reduces splash risk. Finally, ventilate the area if you’re using solvent-based degreasers by opening the hood slightly and ensuring good airflow.
Choosing the Right Equipment and Cleaning Solutions
Select equipment that allows control and protection: a pressure washer with adjustable spray nozzle, a low-pressure setting, and a range of brushes for agitation. Use an engine-safe degreaser or mild detergent designed for automotive use, avoiding highly caustic chemicals. Have masking materials ready: plastic sheeting, painter’s tape, and drip pans or tarps. Keep absorbent rags handy for any drips. Always test a hidden area first to confirm that the cleaning solution and spray won’t affect gaskets or seals. Pressure Wash Lab recommends selecting products that specify safe use on automotive engines and avoiding direct spraying on electrical connections or exposed wiring.
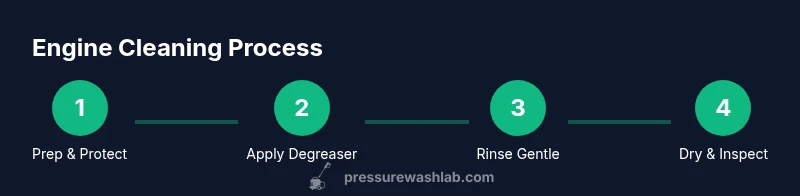
The Step-by-Step Cleaning Process: High-Level Overview
This section provides a high-level map of the process so you can plan ahead. First, ensure the vehicle is safely supported and the engine is cool. Then mask all critical components and apply the degreaser to the engine surfaces. After letting it dwell for the recommended time, scrub grime with appropriate brushes. Finally, rinse using a gentle spray angle, maintaining distance from sensitive parts and drying the area thoroughly. This overview keeps you oriented before you dive into the detailed steps.
Applying Cleaner and Mechanical Agitation
Begin by applying a conservative amount of engine degreaser to dirty surfaces, focusing on heavily soiled areas like the valley beneath the hood and valve covers. Allow the cleaner to dwell for several minutes, following the product’s instructions. Use a soft brush for delicate areas and a stiff brush for stubborn grime, working in small sections. Mechanical agitation helps break the bond between grease and metal, but avoid aggressive scrubbing near electrical connectors. If you encounter stubborn spots, reapply a light amount of cleaner and re-agitate. Always wear gloves and eye protection during this stage to stay safe and comfortable while you work.
Rinsing, Drying, and Post-Clean Inspection
Rinse with a low-pressure spray from top to bottom, keeping the nozzle at a safe distance and never pointing directly at electrical components. Work in sections, not circles, to prevent water pooling. After rinsing, dry the engine bay with clean microfiber towels and use compressed air if available to remove remaining droplets from inaccessible crevices. Inspect for soap residue and dry spots; ensure electrical connectors and sensor areas are dry before reassembly. Reconnect the battery if you had disconnected it, remove masking materials, and perform a gentle startup check to confirm there are no warning lights or abnormal sounds. If anything looks off, consult a professional.
Common Mistakes and How to Avoid Them
A frequent error is using too much pressure near wiring, sensors, or hoses. Another is neglecting masking, which leads to water intrusion or chemical exposure. Skipping the drying step can leave moisture that causes corrosion or electrical issues later. Always test the spray on a small area, keep the nozzle moving, and avoid spraying directly into the air intake. Finally, never clean a hot engine; always wait until it’s cool and never spray solvent-based cleaners near ignition sources.
AUTHORITY SOURCES
- https://www.epa.gov - Environmental protection guidelines and safe solvent practices
- https://www.osha.gov - Workplace safety guidelines for handling cleaners and electrical risk
- https://www.nfpa.org - Fire safety guidance on solvent use and engine bays
These sources provide general safety and chemical-handling context that complements practical steps for engine cleaning.
Practical Tips and Maintenance After Cleanup
Keep a protective routine: inspect belts and hoses for wear after a cleaning, and rinse any stubborn residues that might attract dirt during operation. Store chemicals securely and dispose of dirty rags per local regulations. Regular maintenance and mindful cleaning will extend engine life, reduce corrosion risk, and keep your vehicle looking sharp. Pressure Wash Lab emphasizes documenting your process and reviewing outcomes to refine your approach for future cleanings.
Tools & Materials
- Pressure washer with adjustable nozzle(Use a low-pressure setting or a wide fan spray to minimize force on sensitive components)
- Engine-safe degreaser or mild detergent(Choose products labeled safe for automotive engines; avoid highly caustic agents)
- Plastic sheeting, painter’s tape, masking materials(To shield air intake, sensors, distributor, and wiring)
- Protective gear (safety glasses, gloves)(Chemical-resistant gloves and eye protection are essential)
- Soft-bristle and stiff-bristle brushes(Soft for delicate areas; stiff for grime in joints and crevices)
- Towels or rags and drip pans(To absorb drips and prevent solvent from reaching upholstery)
- Optional: plastic bag or cap for air intake(Helpful for extra masking on complex intakes)
- Drying aid (microfiber towels, compressed air)(Ensure all moisture is removed before reassembly)
Steps
Estimated time: 40-60 minutes
- 1
Prepare and safety
Park on a flat surface, confirm engine is cool, and remove the key. Disconnect the negative battery terminal to reduce spark risk. This initial safety step protects you and the vehicle during cleaning.
Tip: Always work with the engine off and the battery disconnected before handling the engine bay. - 2
Mask and protect
Cover the air intake, sensors, and exposed wiring with plastic and painter’s tape. Place tarps beneath the engine bay to catch drips. Proper masking prevents water and cleaner from reaching electrical components.
Tip: Double-check that masking is secure and that no openings allow spray into sensitive areas. - 3
Apply cleaner
Spray a light, even coat of engine degreaser onto greasy surfaces. Avoid soaking electrical connections. Let the cleaner dwell for the recommended time to break down grime.
Tip: Use multiple light passes rather than one heavy application to prevent pooling. - 4
Agitate grime
Scrub with soft and stiff brushes in targeted areas, working grime toward open spaces. Focus on valve covers and heavy deposits while avoiding connectors.
Tip: Keep brush strokes gentle near hoses and sensors to avoid damage. - 5
Rinse cautiously
Rinse with a gentle, distance-maintained spray. Keep the nozzle moving and avoid directly spraying into the air intake or electrical components. Allow runoff to drain away from the engine.
Tip: Stop if you see any water wicking toward sensitive areas; reassess masking before continuing. - 6
Dry thoroughly
Wipe surfaces with microfiber towels and use compressed air where available to remove residual moisture from tight spaces. Thorough drying reduces corrosion risk after the wash.
Tip: Inspect for any remaining moisture behind wiring harnesses and seals. - 7
Reconnect and inspect
Reconnect the battery, remove masking materials, and perform a visual inspection. Start the engine briefly to confirm normal operation and watch for leaks or warning lights.
Tip: If warning lights appear, shut down and recheck connections before driving. - 8
Post-clean assessment
Check belts, hoses, and electrical connectors for signs of wear or damage after cleaning. Record outcomes to refine your process for next time.
Tip: Keep a log of products used and dwell times for future reference.
Quick Answers
Is it safe to use a pressure washer on my engine?
It can be safe if you follow masking, keep the nozzle at a safe distance, use a low-pressure setting, and avoid electrical components. Always assess your specific engine layout before proceeding.
Yes, but only if you mask sensitive parts, keep the spray gentle, and avoid wiring and sensors.
What should I mask before cleaning?
Mask or cover air intake, electrical connectors, sensors, and belts. Use plastic sheeting and tape to seal openings and prevent water ingress.
Mask air intakes, sensors, and wiring to prevent water and cleaner from causing damage.
Can I start the car immediately after cleaning?
Wait for the engine to dry completely and inspect for any moisture or residue before starting. If you see any moisture, re-dry and recheck masking.
Wait until everything is completely dry and recheck for moisture before starting.
What cleaners are best for engine cleaning?
Choose degreasers specifically labeled for automotive engines. Avoid harsh solvents that could deteriorate hoses or gaskets.
Use engine-safe degreasers and avoid harsh chemicals near seals and hoses.
Do I need to disconnect the battery?
Yes, disconnect the negative terminal to reduce risk of sparks and electrical shorts during cleaning.
Yes—disconnect the negative terminal to prevent shorts.
What are common signs of trouble after cleaning?
Look for lingering moisture, corrosion on metal parts, unusual smells, or warning lights after startup.
Watch for moisture, corrosion, or warning lights after running the engine.
Watch Video
Key Takeaways
- Protect sensitive components before cleaning.
- Use a light, controlled spray and gentle agitation.
- Masking and drying are essential for safety and effectiveness.
- Inspect after cleanup for signs of moisture or residue.
- Follow manufacturer guidance and safety protocols to minimize risk.