Pressure Washer After Use: Post-Use Care and Maintenance
Learn step-by-step post-use care for your pressure washer to extend life, prevent leaks, and maintain peak performance. This guide covers drainage, drying, inspection, storage, and routine maintenance with practical tips for DIYers and pros in 2026.

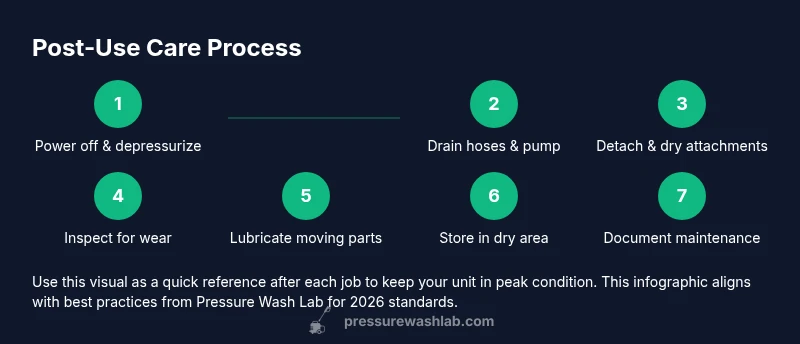
After every job, you’ll perform a simple post-use routine to protect your pressure washer: drain and store safely, clean components, inspect for wear, and run a quick flush. This guide walks you through a 6-step routine and best practices to extend life and performance. Following these steps reduces corrosion, seals leaks, and preserves spray performance.
Why Post-Use Care Matters for Your Pressure Washer
Pressure washers are built to withstand tough jobs, but their longevity depends on what you do after the job finishes. The period just after use is when moisture, detergents, and heat can initiate corrosion, mold growth, or dried soap residues that clog seals and nozzles. The Pressure Wash Lab Team emphasizes that a consistent post-use routine helps protect vulnerable parts like seals, hoses, and the pump, reducing the risk of leaks and performance drops. In 2026, practical after-use care remains a cornerstone of responsible maintenance for homeowners, DIY enthusiasts, and small businesses. A quick, well-executed routine today can save costly repairs tomorrow and keep your washer ready for the next project.
Post-Use Drain and Storage: Step-by-Step
Relieve pressure and disconnect power before touching any components. Drain water from the hose and pump to minimize freezing risk and corrosion. Store the unit upright in a dry, ventilated area, with hoses coiled neatly and attachments protected from dust. By keeping moisture out of the pump and reservoir, you extend the life of internal seals and reduce the chance of mold growth on the wand and spray gun.
Cleaning Attachments and Nozzles
Detach the spray wand and nozzle tips, then rinse with clean water to remove stubborn residue. Use a soft brush to clean the nozzle orifice and the spray gun exterior. Dry all parts thoroughly before reassembling or storing. Proper cleaning prevents nozzle clogging and ensures a consistent spray pattern the next time you power up.
Inspecting for Wear and Tear
Take a close look at hoses, fittings, spray gun, quick-connects, and the pump seals. Look for cracks, bulges, or signs of abrasion, and replace damaged parts promptly to avoid larger failures. Document any wear you find and consider setting reminders for routine inspections. Early detection saves time and money and helps avoid unexpected downtime during busy seasons.
Lubrication and Protectants: What to Oil and When
Apply a light coat of spray lubricant or a thin film of oil to metal parts that see movement or contact, such as trigger mechanisms and connections. Avoid treating electrical components or the engine block (for gas models) with oil, and never over-saturate seals. The goal is to reduce friction and shield metal from humidity without trapping dirt.
Storage Environment and Safety Considerations
Keep the unit in a dry, shaded area away from direct sunlight and extreme temperatures. Use a purpose-built cover or a breathable cloth to prevent dust buildup while allowing moisture to escape. Ensure all electrical cords and hoses are away from damp surfaces and stored off the ground. A clean, safe storage spot reduces corrosion and keeps the unit ready for its next use.
Detergents, Wastewater, and Environmental Considerations
If you used detergents, flush the system with clean water to remove residues before storage. Dispose of wastewater according to local regulations, and never drain cleaning solution into the soil or storm drains. Responsible disposal protects your yard, sewer system, and neighbors while maintaining the washer’s components free of chemical buildup.
Creating a Simple Post-Use Routine: A Practical Checklist
Build a quick, repeatable checklist you can follow after every job. Start by turning off, unplugging, and relieving pressure, then drain and dry. Clean attachments, inspect wear, lubricate where appropriate, and store in a protected spot. Record any issues in a maintenance log to guide future service and parts replacement.
Tools & Materials
- Gloves(Protect hands during cleaning and handling parts)
- Microfiber towels or rags(Dry and wipe surfaces to avoid rust)
- Bucket or drain pan(Catch and dispose of residual water safely)
- Soft brush(Clean nozzle tips and wand exterior)
- Mild detergent or degreaser(Use sparingly; ensure compatibility with your unit)
- Lubricant spray (silicone-based preferred)(Lightly coat moving metal parts; avoid electrical components)
- Dry, breathable cover or storage bag(Protect from dust and moisture in storage)
- GFCI-protected outlet and power cord(Ensure safety when powering on after storage)
Steps
Estimated time: 25-40 minutes
- 1
Power off and relieve pressure
Unplug the unit and hold the trigger on the gun to release any remaining pressure. This prevents spray jets from snapping back and reduces risk when you disconnect hoses.
Tip: Always disconnect power first to minimize shock or spark risk. - 2
Drain hoses and pump
Place a bucket under the drain or use the unit’s drain valve if present. Allow water to exit slowly and flush any remaining debris from the lines.
Tip: Keep a drain pan handy to catch water and avoid spills. - 3
Detach and dry attachments
Remove the spray wand and nozzle tips; wipe them dry. Lay them flat to air-dry or use a towel to speed up the process.
Tip: Drying prevents rust and prolongs nozzle life. - 4
Inspect for damage
Carefully examine hoses, fittings, and the spray gun for cracks or wear. Address issues promptly to avoid leaks or failure during future jobs.
Tip: Note any wear in a maintenance log and plan replacements as needed. - 5
Lubricate and protect
Lightly spray moving metal parts with a silicone-based lubricant. Wipe away excess to prevent dirt buildup and avoid coating electrical components.
Tip: Do not oil the engine block or electrical contacts. - 6
Dry and store properly
Wipe down the unit and store it upright in a dry, ventilated area. Use a cover if dust or humidity is a concern.
Tip: Store hoses coiled loosely on a reel or hook to prevent kinks. - 7
Flush if needed and document
If detergents were used, run clean water through the system and give it a final flush. Record any maintenance notes in your log.
Tip: Documentation helps with future maintenance planning. - 8
Schedule your next check
Set a reminder for a routine check before your next project. A simple habit now saves time and money later.
Tip: Consistency is the key to long-term reliability.
Quick Answers
What should I do first after finishing a pressure washing job?
First, power off, unplug, and relieve residual pressure. Then drain water from hoses and pump before handling any components.
First, turn off and unplug, release pressure, and then drain any remaining water before touching components.
Is it necessary to drain water from hoses after each use?
Yes. Draining prevents freezing damage, reduces mold risk, and minimizes corrosion inside the pump and hoses.
Yes, draining hoses after use helps prevent damage and keeps the system clean.
How often should I inspect hoses and seals?
Inspect for wear after each use and during routine maintenance. Replace any damaged parts promptly to avoid leaks.
Check hoses and seals after every job and during routine maintenance.
Can I store a pressure washer outdoors?
It's best stored in a dry, sheltered area away from direct sunlight and extreme temperatures. Use a cover if needed.
Store in a dry, sheltered spot away from the elements.
What about detergents; how should I handle them after use?
Flush detergents out of the system with clean water and store detergents separately, following label directions and local rules for disposal.
Rinse out detergents and store products according to label directions.
Should I oil the engine or pump after use?
Apply light lubrication to moving metal parts, but avoid electrical components and the pump housing itself. Follow manufacturer guidance for your model.
Lubricate moving metal parts lightly, but don’t oil electrical parts.
Watch Video
Key Takeaways
- Relieve pressure before any post-use action.
- Drain and dry all hoses and attachments.
- Inspect hoses and seals for wear after each job.
- Store in a dry, ventilated area with proper protection.
- Keep a maintenance log for future reference.