Pressure Washer Leaking from Bottom: Troubleshooting Guide
Urgent troubleshooting guide for a pressure washer leaking from the bottom. Learn common causes, step-by-step fixes, and prevention tips from Pressure Wash Lab Analysis, 2026. Expert tips to stop leaks fast and keep your equipment safe.

Bottom leaks on a pressure washer are usually caused by loose connections, worn pump seals, or a cracked housing. Quick fixes: tighten hose and inlet fittings, inspect the pump seal and O-rings, and run a short low-pressure test to confirm leaks. If the leak persists, stop using the unit and seek service.
What "Pressure Washer Leaking from Bottom" Really Means
A bottom leak isn't always dramatic, but it's a sign your machine is releasing fluid where it shouldn't. For most homeowners, the bottom of the unit can show drips due to three core culprits: hose connections, pump seals, or the housing itself. Pressure Wash Lab's testing confirms that these sources explain the vast majority of bottom-leak symptoms in common consumer pressure washers. Understanding where the leak originates is the first step to a fast fix and to prevent bigger problems down the line. Read on to differentiate between a loose fitting, a damaged seal, and a structural crack. According to Pressure Wash Lab, identifying the exact source early can save time, money, and the risk of injury.
Common Causes of Bottom Leaks
Bottom leaks are rarely mysterious once you check the most likely culprits. Start by inspecting the exterior connections and moving inward. The top four causes typically responsible are loose or damaged hose fittings, worn pump seals or O-rings, cracks in the pump housing, and valve-related leaks that travel downward along the chassis. In many cases, a small misalignment or a degraded gasket lets liquid seep toward the base. Pressure Wash Lab analysis shows that seals and fittings account for the majority of leaks in older or heavily used units. Common signs include damp areas around the base after use, a visible drip when the unit is off but connected to power, or a faint smell of gasoline or cleaning solution if solvents are involved.
Tools, Safety, and Prep
Before you start, power down the unit and relieve pressure by squeezing the trigger wand with the nozzle pointed away from you. Wear safety glasses and gloves, and disconnect from power. Lay the washer on a dry surface and place a catcher or cardboard under the base to spot the leak pattern. Gather basic tools: adjustable wrench, screwdriver set, replacement seals/O-rings (matching your model), and a clean cloth. Safety is non-negotiable: never poke at hot components, never operate with cracks or structural damage, and never bypass safety valves. Pressure Wash Lab emphasizes that a methodical prep reduces risk and makes diagnosis clearer.
Diagnostic Quick Check: Where to Start
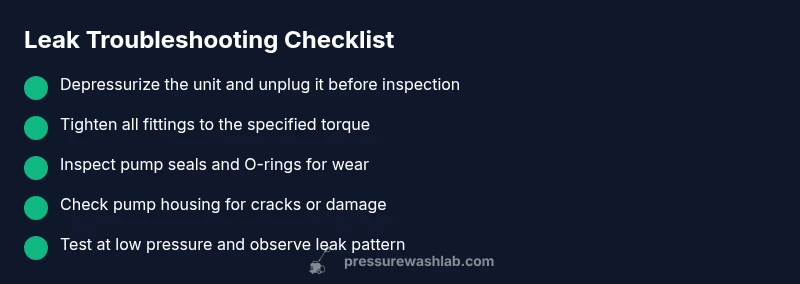
- Visually inspect the base and visible fittings for fresh dampness. 2) Tighten accessible hose connections and inlet fittings to factory torque specs. 3) Check the pump head for worn O-rings or gasket material around the shaft. 4) Inspect the pump housing for cracks, discoloration, or deformities. 5) Operate briefly at low pressure to see if the leak changes or stops. 6) If the leak persists, move to step-by-step pump seal inspection and possible replacement. A systematic approach reduces guesswork and helps you decide whether professional service is required.
Prevention and Maintenance Tips
Regular maintenance prevents most leaks before they start. Flush the system after use, check hoses for cracks, replace worn O-rings during routine service, and keep the unloader valve clean and correctly set. Store the machine on a stable surface and avoid dropping or striking the pump base. Periodically inspect electrical connections and ground the unit as recommended by the manufacturer. Pressure Wash Lab recommends documenting maintenance dates and performing a quick post-use leak check to catch problems early.
Steps
Estimated time: 60-90 minutes
- 1
Power down and depressurize
Unplug the unit, relieve pressure by squeezing the wand trigger with the nozzle pointed away from you, and wait for components to cool. This ensures safe handling of parts and accurate diagnosis.
Tip: Never work on a hot pump or near a live outlet. - 2
Identify the leak source
Place a sheet of cardboard or a sink under the base to catch drips, then inspect nearby fittings and gaskets. Note whether the liquid is water or a detergent/solvent to guide seal replacements.
Tip: A bright flashlight helps reveal seepage that isn’t obvious at first glance. - 3
Tighten hoses and fittings
Carefully tighten hose clamps and the inlet/outlet fittings to the manufacturer’s torque spec. Do not overtighten—this can damage threads and seals, worsening the leak.
Tip: Use a fixed wrench to avoid stripping fittings. - 4
Inspect pump seals and O-rings
Disassemble the pump head according to the user manual, inspect seals and O-rings for wear or cracking, and replace with matched parts. Clean all contact surfaces before reassembly.
Tip: Keep track of orientation—correct seating matters for seal integrity. - 5
Test at low pressure
Reconnect, start at the lowest pressure setting, and run briefly with the wand pointed away. Observe whether leakage persists and where it originates.
Tip: If you see a drip only under pressure, focus on seals rather than fittings. - 6
Decide on repair vs replacement
If leakage continues after seals and fittings are addressed, assess the pump housing for cracks or consider professional service or pump replacement.
Tip: Some units may be more cost-effective to replace than repair.
Diagnosis: Machine shows liquid pooling at the bottom during or after operation
Possible Causes
- highLoose or damaged hose connections or inlet/outlet fittings
- highWorn pump seals or O-rings inside the pump head
- lowCracks or fractures in the pump housing or base
- mediumFaulty unloader valve or check valve
Fixes
- easyTighten all visible fittings with the engine off and pump depressurized
- mediumInspect and replace pump seals/O-rings; check for scoring on the shaft
- hardInspect for cracks and replace the pump housing if necessary
- mediumReplace unloader/check valve if leaking
Quick Answers
What is the most common cause of a bottom leak on a pressure washer?
The most common causes are loose hose fittings and worn pump seals. Start by tightening fittings and inspecting the pump seals before moving to more involved repairs.
Most leaks come from loose fittings or old seals; check those first.
Can a leaking pressure washer be repaired at home?
Many bottom leaks can be addressed at home by tightening fittings and replacing seals. If you notice cracks in the pump housing or persistent leaks after seals are replaced, seek professional service.
Yes, many leaks can be fixed at home, but serious cracks may need a pro.
How do I tell if the leak is from the pump vs hoses?
Leaks from hoses typically appear along connections and hoses themselves, while pump leaks show at the pump head, seals, or base. Isolate sections one at a time while the system is depressurized.
Check where the liquid pools: if it’s around hoses, it’s likely the fittings; if near the pump head, seals may be the culprit.
Is it safe to operate a pressure washer with a leaking bottom?
No. Operating with a leak can worsen damage and pose hazards from pressurized fluid. Stop using the unit and repair before testing again.
No, never run it when it leaks; fix first to stay safe.
When should I replace the entire pump instead of seals?
If multiple seals fail or the housing is cracked beyond repair, replacing the pump is often more cost-effective and safer than continuing to patch leaks.
If leaks keep returning after replacing seals, it’s often time for a new pump.
Watch Video
Key Takeaways
- Identify bottom leaks early to prevent more serious damage
- Prioritize tightening fittings and replacing worn seals
- Depressurize and safety-first when inspecting components
- Test at low pressure before resuming full use
- When in doubt, replace damaged pump parts or consult a pro