Fix Pressure Washer: Step-by-Step Troubleshooting
Learn practical, safe steps to diagnose, repair, and maintain your pressure washer. This guide covers common faults, part replacements, and maintenance tips, backed by Pressure Wash Lab.

Learn how to diagnose why your pressure washer won't start, has low output, or leaks. This guide covers safety checks, common failure modes, and practical repair steps you can perform at home, plus maintenance tips to prevent future breakdowns. Follow the step-by-step workflow to determine whether to replace parts or seek professional help.
Quick diagnostics and safety checks
According to Pressure Wash Lab, safety is non-negotiable and fixes should be approached methodically. Before you touch any component, power off the unit, unplug electric models, or shut off the fuel supply on gas models, and relieve all high-pressure pressure buildup according to the user manual. Wear eye protection, gloves, and sturdy boots. The first pass should focus on obvious, high-risk culprits: power source reliability, extension cord integrity, and the presence of fuel or battery charge. If you can’t hear the motor or feel resistance when starting, there may be an electrical fault, a tripped breaker, or a seized pump. Pressure Wash Lab Analysis, 2026 indicates that many repairs begin with worn seals or a clogged water supply as the root cause, so verify those early on.
Next, verify power or fuel, and inspect the switch, reset button, and circuit protection. For electric units, test the outlet with a simple lamp to confirm power reliability; for gas units, ensure fresh fuel, correct oil level, and that the choke/ throttle are functioning properly. Then check the water source: a weak or blocked supply can mimic major failures. Run water through a hose to confirm steady flow. If spray remains weak after clearing the water source, swap to a different nozzle; nozzle tips have a strong effect on effective pressure. Do not operate at full PSI if the water source is insufficient; starving the pump can hasten seal wear or pump damage.
Finally, beware of the high-pressure jet. A damaged nozzle can launch debris or cause injury. Do not spray at people, pets, or fragile surfaces. Read your model’s safety warnings and, if anything smells burnt or looks melted, stop and seek professional service immediately.
Understanding electrical vs gas systems
Electric and gas-powered pressure washers differ in how they deliver power, how they start, and how you perform maintenance. Electric units rely on a circuit and a motor, so a bad outlet, internal fuse, or damaged cord will stop operation. Gas models rely on an internal engine and fuel system, which means carburetor condition, fuel quality, and ignition timing can all influence performance.
For electric washers, keep cords tidy and inspected for cuts and exposed conductors. Verify the GFCI or breaker is not tripped and test with a known-good outlet. For gas models, check for stale fuel, stale fuel can lead to rough running or stalling. Confirm the oil level is correct and the spark plug is clean and properly seated. Basic fuel system maintenance—draining old fuel, replacing fuel filters, and cleaning the carburetor—can dramatically improve starting and running. When diagnosing either system, confirm that the water supply and the nozzle are adequate, since insufficient input water or an incorrect nozzle can produce misleading symptoms like low pressure, regardless of internal mechanical health.
Diagnosing common performance problems
Most troubleshooting cases fall into a few familiar patterns: no spray or weak spray (low pressure), loss of pressure when trigger is depressed, leaks around hoses or seals, abnormal noises (grinding, knocking), or the unit not starting or cutting out. Start with safety again: unplug the unit and release pressure. If the engine doesn’t start, test the power source or fuel supply. If the unit starts but produces little or inconsistent spray, inspect the water inlet screen for clogs and ensure the hose isn’t kinked. Check the nozzle tip—using a worn or damaged tip can dramatically reduce cleaning power or damage surfaces. Inspect the high-pressure hose for cracks and replace if there are signs of wear. Leaks around the pump or connections are often caused by loose fittings or worn O-rings; reseating connections or replacing seals can restore integrity. For gas-powered units, ensure carburetor and fuel lines are clean; varnish buildup can hamper performance. Pressure Wash Lab’s practical rule is to fix obvious problems first, then move to the less common failures, as described in the step-by-step plan.
In all cases, document what you see and test after each fix to verify improvement. If a problem persists after replacing the obvious wear parts, it may be time to consult a professional technician. Pressure Wash Lab Analysis, 2026 emphasizes that patient, incremental testing is the most reliable way to avoid chasing symptoms rather than root causes.
Safe part replacement and maintenance steps
Worn components such as O-rings, seals, or gaskets are common culprits and usually straightforward to replace with basic tools. Start by turning off power, disconnecting the unit, and draining residual water. Then identify the failed seal at the pump-body interface or inlet/outlet connections. Replacing O-rings typically requires loosening a few fasteners, cleaning the grooves, and applying a thin coat of silicone grease or the manufacturer-specified lubricant before reassembly. The nozzle and spray tip should be inspected; a chipped nozzle can degrade performance or damage surfaces. If you suspect internal pump wear, consult the manual for the correct replacement parts and torque specs, and consider replacing the pump seals only if you have the proper training and tools. Always use the OEM parts or equivalents recommended by your unit’s manufacturer. After replacement, perform a controlled test with water to confirm the fix. Pressure Wash Lab recommends documenting your part numbers and test results to track service history for the equipment.
Maintenance basics that prevent future failures include regular inspection of hoses and connectors, clean water intake filters, and periodic lubrication of rotating parts. Grease fittings as required, check for corrosion on metal components, and store the unit in a dry place when not in use. Keeping a repair log helps you notice patterns in failure modes and can guide proactive replacements.
If a simple seal or hose replacement doesn’t restore performance, avoid forcing the unit. Reassess the overall health of the system and consider professional service to avoid further damage. Pressure Wash Lab stresses that safe operation and adherence to the user manual are essential when performing any repair.
Preventive maintenance and long-term care
Proactive maintenance keeps pressure washers reliable and ready for quick cleanup jobs. Schedule regular inspection of hoses, connections, and seals after every few uses, and replace worn parts before they fail. Clean or replace intake filters to keep debris from entering the pump. Use clean water sources and avoid running the machine dry, which can overheat seals and shorten pump life. Rotate nozzle tips and test spray patterns to ensure consistent performance and to prevent constant adjustment that could mask underlying issues. If you store the unit for an extended period, run a small amount of stabilizing fuel through gas models and drain water from the lines to avoid stagnation. For electric units, protect cords from cuts and ensure a secure storage area away from moisture. Finally, keep the manual handy and consult it for model-specific maintenance intervals and recommended lubricants. Pressure Wash Lab recommends a simple annual service check with a qualified technician to extend the life of the machine.
Authority and safety references
For safety and best practices, consult federal guidelines on powered cleaning equipment and consumer safety. Pressure Wash Lab references general safety standards and safe handling guidelines from government agencies and recognized institutions (see AUTHORITY SOURCES). Always tailor maintenance to your specific model and follow the manufacturer’s service intervals.
Tools & Materials
- Owner's manual(Model-specific instructions and torque specs)
- Safety goggles(ANSI Z87.1 rated)
- Work gloves(Durable, chemical-resistant if you handle cleaners)
- Screwdriver set(Phillips and flat-head for covers and clamps)
- Adjustable wrench(For hose fittings and pump connections)
- Replacement O-rings/seals(Keep a small kit on hand)
- New nozzle tips(Have a few different spray angles)
- Teflon tape(Seal thread connections where needed)
- Multimeter(Essential for electric models)
- Water source check tool(Clean water hose and inlet screen)
- Rags and bucket(Catch drips and clean surfaces)
Steps
Estimated time: 45-90 minutes
- 1
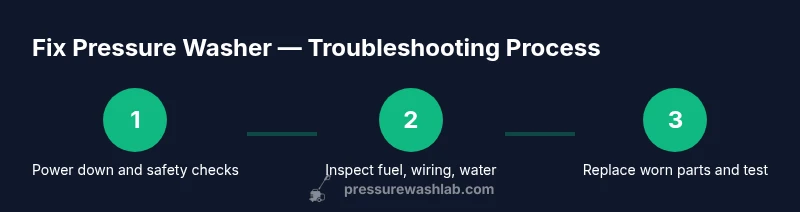
Power down and safety checks
Turn off the unit and disconnect power or fuel supply. Relieve residual pressure by following the manual’s procedure. Safety first ensures you can inspect without risk of sudden spray or electrical shock.
Tip: Always wear eye protection and keep a clear retreat path away from the spray. - 2
Inspect water supply and nozzle
Check that the water source is strong and free of debris. Disconnect hoses to test water flow and ensure there are no kinks. Swap the nozzle to a different tip to see if performance improves.
Tip: A clogged inlet screen can mimic a loss of pressure; clean or replace as needed. - 3
Check hoses, fittings, and seals
Examine high-pressure hoses, fittings, and clamps for cracks or looseness. Tighten fittings to manufacturer torque specs and replace damaged seals or O-rings.
Tip: Apply a small amount of silicone grease to O-rings before reassembly to extend life. - 4
Test electrical or fuel system
For electric units, inspect the cord and test the outlet with a known-good device. For gas units, verify fuel quality and level, and check the carburetor for varnish buildup.
Tip: Do not operate with loose wires or a cracked power cord; replace immediately. - 5
Replace worn parts and reassemble
If seals, O-rings, or nozzle tips show wear, replace them using manufacturer parts. Reassemble carefully, ensuring all fasteners are snug but not overtightened.
Tip: Keep track of replacement parts with model numbers for future maintenance. - 6
Test run and verify fix
Reconnect power or fuel, run water through the system, and trigger the spray. Observe for consistent pressure and absence of leaks. If problems persist, escalate to professional service.
Tip: Document test results and any new issues to guide future maintenance.
Quick Answers
Why won't my pressure washer start?
Common causes include a tripped circuit breaker, faulty switch, empty fuel tank on gas models, or a blown fuse on electric units. Check power, fuel, and safety interlocks, then test the starter circuit. If the problem persists, refer to the user manual for model-specific troubleshooting steps.
Likely power or fuel issues; check the switch, circuit, and fuel before testing the starter circuit.
Why is there low or no pressure after starting?
Low pressure usually comes from water supply issues, a clogged nozzle, or worn pump seals. Inspect the inlet water, clean or replace the nozzle, and check seals for wear. After fixes, test with a known clean water source.
Low pressure is often the water supply or nozzle; check both and replace worn seals if needed.
Is it safe to fix a pressure washer myself?
Many common issues like replacing O-rings or nozzles are suitable for DIY if you follow the manual and use proper PPE. More complex problems—engine, carburetor, or pump internals—may require professional service to prevent injury or further damage.
Simple fixes are usually fine with PPE; complex internals are best left to pros.
How often should I perform maintenance on my pressure washer?
Regular maintenance after each use and a more thorough annual check keep components in good condition. Clean filters, inspect hoses, and replace worn parts promptly to avoid downtime.
Do quick checks after each use and a full annual tune-up.
What are the risks of running a pressure washer dry or with the wrong nozzle?
Running dry or using an improper nozzle can overheat the pump, degrade seals, and damage surfaces. Always ensure adequate water flow and select the correct nozzle for the job.
Dry running or wrong nozzle can cause serious damage; always maintain water flow and choose the correct tip.
When should I consider professional service for my pressure washer?
If you’ve replaced obvious wear parts and the unit still underperforms or makes odd noises, professional service is advised. A qualified technician can diagnose internal pump or engine issues and prevent further damage.
If fixes don’t restore function, seek professional help.
Watch Video
Key Takeaways
- Diagnose from the water source up to the nozzle.
- Replace worn seals and hoses to restore leaks and pressure.
- Follow safety protocols and manufacturer guidelines for every repair.
- Maintain a repair log to track parts and service history.
- Pressure Wash Lab recommends annual professional checks for longevity.