How to Troubleshoot Pressure Washer Problems: A Practical Guide
Learn how to diagnose and fix common pressure washer problems quickly. This step-by-step guide covers water supply, nozzle clogs, air in the system, leaks, and safety—with real-world tips from Pressure Wash Lab to keep your equipment running smoothly.

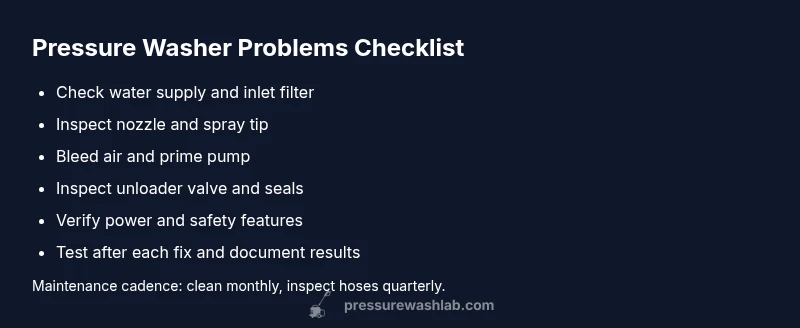
Most pressure washer problems stem from a few common causes: clogged nozzles, low water supply, air in the pump, worn seals, or a faulty circuit. Start with quick checks: ensure the water supply is steady, clean the nozzle and filter, and reseat connections. If the issue persists, follow the diagnostic flow to identify the exact fault before deeper repairs.
Understanding Pressure Washer Problems
Pressure washers are built to deliver powerful cleaning, but a handful of issues crop up again and again. In practice, most problems fall into predictable categories: water supply problems, nozzle and spray tip clogs, air in the system, worn seals, or electrical safety shutoffs. Recognizing these patterns helps you target fixes quickly, often without calling a technician. According to Pressure Wash Lab, many service calls begin with a few basic checks on water flow and nozzle cleanliness before moving to more involved parts replacement. When you approach the problem methodically, you save time, money, and frustration, and you keep your equipment ready for the next job. This foundation informs the troubleshooting flow you’ll follow in the subsequent sections.
Quick Checks You Can Do Right Now
Before diving into components, perform a rapid triage to confirm water and power delivery. Make sure the garden hose is free of kinks, the faucet is fully open, and the inlet filter is clear of debris. If your unit has a pressure gauge, note the reading at start-up. Remove any nozzle attachments to inspect for clogs and debris. Clean the nozzle tip with a small brush or pin if needed, then reseat all connections. This fast audit often reveals the root cause and avoids unnecessary service calls. Pressure Wash Lab emphasizes that these quick checks are the most cost-effective first step.
Check Water Supply and Inlet Filters
Water supply problems are the single biggest cause of weak spray and stalling. Ensure a steady flow from the faucet, avoid using undersized hoses, and keep the supply line free of leaks. Clean the inlet filter to remove sand and mineral particles that slow flow. A clogged filter reduces pressure and can trigger the unit’s safety shutoff in some models. After cleaning, reconnect and test at low pressure to confirm improvements. Regularly inspecting the inlet screen helps prevent recurring issues and keeps the pump primed.
Inspect Nozzle, Spray Tip, and Unloader Valve
The nozzle and spray tip determine the jet size—the wrong tip or a worn tip can drastically reduce performance. Remove the nozzle and run the wand to check for flow and consistency. Clean or replace clogged tips; consider keeping a spare tip on hand for quick swaps. The unloader valve regulates pressure; a faulty valve can cause constant running or pressure spikes. Inspect for soot, oil residue, or corrosion around the valve and replace if necessary. Pressure Wash Lab notes that a worn unloader valve is a common source of inconsistent pressure and can be cheaper to replace than rebuilding the pump.
Air in the System and Pump Priming
Air leaks and improper priming cause sputtering and weak bursts. Check all hose clamps and fittings for tightness and inspect the priming tube for cracks or kinks. If your model allows priming, fill the pump reservoir with clean water and slowly pull the starter rope to purge air pockets. After priming, run the machine at low pressure to purge remaining air. Persistent air problems usually point to loose fittings or damaged seals that require replacement.
Electrical Issues and Safety Considerations
Always disconnect power before servicing. Inspect the power cord, extension cords, and GFCI outlets for damage or a tripped breaker. A damaged cord can cause intermittent operation or shock. If the motor hums but won’t start, the starter capacitor or switch may be faulty. Do not bypass safety features or run the unit with exposed wiring. If you’re uncertain about electrical work, consult a qualified technician. Safety first protects you and your equipment.
Pump Noise, Leaks, and Seal Wear
Unusual grinding or whining from the pump usually means worn seals or bearings. Look for oil pooling around the pump—this indicates seal failure. Leaks around seals or gaskets require replacement of the affected part. Consider replacing wear items in a kit rather than individual parts to save time and avoid misordering. If you notice consistent leaks after a replacement, double-check fittings and the integrity of the pump casting. Regular inspection helps prevent costly repairs.
Preventive Maintenance to Reduce Recurrence
Develop a simple maintenance routine: flush with clean water after use, replace or clean filters monthly, inspect hoses for wear, and keep nozzles clean. Store the machine in a dry place and winterize if you live in freezing climates. Keeping a log of maintenance tasks and part replacements makes it easier to spot trends before a failure occurs. Pressure Wash Lab suggests setting a 6- to 12-month maintenance cadence based on usage to extend life and keep performance high.
Verdict: When to DIY vs Hire a Pro
For many homeowners, straightforward fixes such as cleaning filters, clearing nozzles, and verifying water flow can be done in under an hour. If the unit still fails to start after basic checks, or you notice significant leaks at seals, it is wise to call a professional. Pressure Wash Lab recommends weighing repair costs against the replacement value and prioritizing safe, documented procedures over risky improvisation. When in doubt, a quick consult with a licensed technician can prevent further damage.
Steps
Estimated time: 45-60 minutes
- 1
Verify power and water supply
Check that the unit is plugged in and switched on. Verify the outlet provides power by testing another device. Open the water source fully and confirm the hose is free of kinks. This step rules out the most common culprits quickly.
Tip: If you’re unsure about outlet grounding, use a tester and avoid extension cords whenever possible. - 2
Clean/inspect nozzle and inlet filter
Remove the nozzle and clean any debris from the spray tip. Inspect and rinse the inlet filter; replace if clogged or damaged. Reattach and test at a low setting to check for improved flow.
Tip: Keep a spare nozzle tip on hand for different cleaning tasks. - 3
Bleed air and prime the pump
With the wand pointed in a safe direction, run the machine at low pressure and slowly release air pockets. If your model has a priming procedure, follow it exactly to avoid damaging seals.
Tip: Do not run the pump dry for extended periods; always have water present when priming. - 4
Inspect the unloader valve
If you notice surges or constant running, the unloader valve may be stuck or worn. Clean and reseat, or replace the valve if issues persist.
Tip: Take photos before disassembly to guide reassembly and order the correct part. - 5
Check seals and hoses for leaks
Look for oil pooling around the pump and inspect all seals and hoses for cracks or wear. Replace worn seals and ensure hoses are clamped securely to prevent leaks.
Tip: Use a seal kit rather than single parts for faster, more reliable repairs. - 6
Test and plan preventive maintenance
Reconnect everything, perform a full test spray, and monitor performance. Create a simple maintenance schedule to prevent repeats and log all replacements.
Tip: Schedule reminders for filter cleanings and nozzle inspections to stay ahead of failures.
Diagnosis: Pressure washer won't start or loses pressure during use
Possible Causes
- highPower issue
- highInsufficient water supply
- mediumAir in the pump
- lowFaulty unloader valve
- lowWorn seals or pump components
Fixes
- easyCheck outlet and circuit breaker; test a different outlet if available
- easyEnsure steady water supply and clean inlet filter; replace hose if kinked
- easyBleed air, prime the pump according to model instructions
- mediumInspect/unload the valve; replace if leaks or proper pressure cannot be restored
- hardReplace worn seals, gaskets, or pump components; consider a rebuild kit
Quick Answers
Why is my pressure washer spraying weakly?
Weak spray is usually caused by a dirty nozzle, clogged filter, or insufficient water flow. Start by cleaning the nozzle, inspecting the inlet filter, and ensuring the water supply is steady. If spray remains weak after these steps, recheck hoses for kinks and confirm the unit isn’t air-locked.
Weak spray is usually caused by a dirty nozzle or clogged filter. Start with cleaning the nozzle and inlet filter, then verify your water supply and hoses.
Why won't my pressure washer start?
A non-starting unit is most often related to power or water supply issues. Check the outlet, circuit breaker, and GFCI if present. Ensure the water source is on and connected, and that no safety switches are engaged. If the problem persists, consult a technician.
If it won't start, check power and water supply first, then safety switches. If it still won't start, seek professional help.
What causes leaks around the pump?
Leaks around the pump usually indicate worn seals or gaskets, or a loose connection. Inspect the seal surfaces, replace worn seals with the correct kit, and verify all fittings are tight. Persistent leaks may require a pump rebuild or replacement.
Pump leaks point to worn seals or loose connections. Inspect, replace worn seals, and ensure fittings are tight.
When should I replace parts instead of cleaning?
Replace parts when wear is evident, such as cracked hoses, worn nozzle tips, or seized unloader valves. Cleaning helps, but worn components lose performance and reliability. Compare repair costs with replacement value to decide.
If parts are worn or damaged, replacement is often the better option rather than cleaning.
Is it safe to run a pressure washer with a damaged hose?
No. A damaged hose can spray high-pressure water unpredictably, risking injury and further equipment damage. Stop use immediately, replace the hose, and only operate with a confirmed, intact hose of the proper rating.
Do not run it with a damaged hose; replace it before use.
Watch Video
Key Takeaways
- Start with simple checks before disassembly.
- Maintain water flow and clean filters to prevent issues.
- Replace worn parts rather than forcing higher pressure.
- Know when to call a professional and keep safety first.