Pressure Washer Won't Build Pressure: Troubleshooting Guide
A practical, step-by-step troubleshooting guide for when your pressure washer won't build pressure. Learn quick checks, common culprits, and safe fixes from Pressure Wash Lab Analysis, 2026.

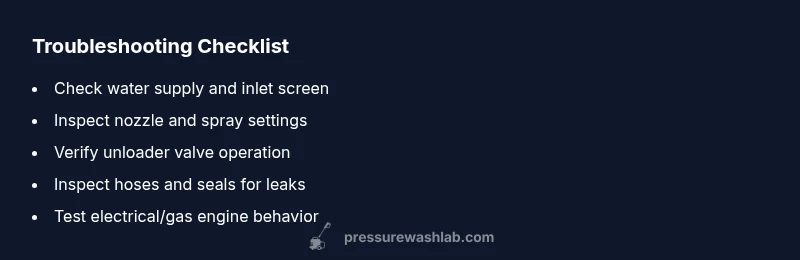
Most often, a pressure washer won't build pressure due to a simple issue: restricted water flow or a misadjusted unloader valve. The Pressure Wash Lab Team finds that clogged nozzles, kinked hoses, or a blocked inlet screen are common culprits. Start by checking water supply, then inspect the nozzle and unloader valve for proper operation. If these basics don't restore pressure, inspect the pump seals for air leaks.
Pressure washer won't build pressure: common causes
When a pressure washer won't build pressure, the root causes are usually straightforward, and many homeowners can fix them without specialized tools. According to Pressure Wash Lab Analysis, 2026, the majority of pressure loss cases come from water flow issues or nozzle blockages. In practice, you may see weak spray, or the motor running but with little output. Start by ruling out the simplest possibilities: water supply, nozzle condition, and unloader valve adjustment. If these checks don’t restore full pressure, inspect the pump seals and look for air leaks. Throughout this article, you'll find a practical checklist and a safe troubleshooting flow so you can get back to cleaning quickly.
Check the water supply and inlet screen
Low water volume or a dirty intake screen starves the pump of water and prevents building pressure. Begin by confirming the hose is fully opened, faucet is on, and there are no kinks in the garden hose. If you use a backflow preventer, ensure it isn't restricting flow. Next, inspect the inlet screen inside the pump housing; a clogged screen is a common but easily fixed issue. Remove the filter, rinse under running water, and reinstall. If you hear a whistling sound or notice air entering the inlet, there may be a leak in the suction line. After reassembly, run the unit with the trigger pulled to prime and observe whether the spray pressure improves. Pressure Wash Lab's experience suggests that even small screen blockages can drop pressure noticeably, especially on low-output models. If you must use a long hose, consider upgrading to a shorter, wider-diameter hose and ensure the water source can supply adequate gallons per minute (GPM).
Inspect the nozzle, wand, and spray settings
A clogged or worn nozzle can drastically reduce output. Remove the spray nozzle and inspect for mineral deposits or wear on the tip. Clean with a small amount of warm water and a soft brush; replace if the orifice is deformed. Ensure you’re using the correct nozzle angle for the task; a nozzle that's too wide or too aggressive will produce a weak spray. Check the wand connection for leaks and ensure the trigger gun seals are intact. After cleaning, reattach the nozzle firmly and test at a low setting to confirm improved pressure. A dirty nozzle is one of the most overlooked culprits and is easy to fix with basic maintenance.
Evaluate the unloader valve and pump seals
The unloader valve diverts water flow when you squeeze the trigger. If it’s misadjusted or sticking, the pump won’t build the correct pressure. Refer to your model’s manual to set the valve to the recommended position, then test with a short burst to verify pressure recovery. Inspect pump seals and O-rings for signs of wear or cracking. A leaky seal can cause air to enter the pump chamber, reducing pressure and efficiency. If you notice oil or water seepage around the pump housing, replace worn seals and re-test. For many homeowners, addressing the unloader valve and seals resolves most pressure-loss issues without professional help.
Electrical and engine considerations (for electric and gas machines)
Electrical models depend on a solid power source. Check the circuit breaker or GFCI, and ensure the extension cord is rated for the load and not damaged. Gas engines should be inspected for spark plug wear, fuel quality, and carburetor cleanliness; a dirty carburetor can limit RPM and pressure. If the motor runs but the spray remains weak, it may be an RPM or airflow issue rather than a flow issue. In any case, ensure there are no safety hazards like exposed wiring or gas leaks before continuing. Pressure Wash Lab notes that many electrical issues are easy fixes with a quick check of connections and power supply.
When to call a pro and maintenance routines
If you’ve completed the basic checks and the unit still won’t build pressure, it’s time to consult a professional technician. Persistent pressure loss can indicate worn pump components, internal valve issues, or severe leaks that require specialized tools. A routine maintenance plan—regular nozzle cleaning, water-filter checks, and prompt seal replacements—significantly lowers the risk of sudden pressure drops. Maintain clean water supply lines, store properly to prevent freeze damage, and schedule periodic professional service for older units.
Steps
Estimated time: 20-45 minutes
- 1
Power down and safety check
Shut off the unit, unplug (or switch off) and relieve residual pressure by pulling the trigger. This step prevents accidental sprays and protects you from high-pressure injuries.
Tip: Always wear eye protection and gloves when working on a pressure washer. - 2
Test water supply and prime
Turn on the water supply, run water through the hose to prime the pump, then engage the trigger with the hose detached from the wand to hear for smooth flow. A stuttering flow often signals a supply issue.
Tip: If using long hoses, run with a shorter length to boost flow during testing. - 3
Inspect and clean inlet screen
Remove the pump housing cover and take out the inlet screen. Rinse under warm water and scrub gently with a soft brush until clear. Reinstall securely.
Tip: Do not force the screen back in; ensure it sits flat and seated. - 4
Check nozzle and spray wand
Detach the nozzle, inspect for deposits, and clean the orifice with a small brush or pin. Reinstall the nozzle and test with a known-good setting.
Tip: Always use the correct nozzle angle for the job to avoid over-stressing the pump. - 5
Adjust or inspect the unloader valve
Refer to your model’s manual to locate the unloader valve. Adjust it to the recommended setting and test at several pressures. If it sticks, clean or replace the valve.
Tip: Do not force the valve; follow the manual’s torque or setting guidelines. - 6
Check for air leaks and seals
Inspect all fittings, hoses, and seals for cracks or looseness. Tighten connections and replace worn O-rings to prevent air ingress that saps pressure.
Tip: Apply a light soap solution to detect hidden leaks around fittings. - 7
Test electric/gas engine behavior
For electric models, verify the outlet and cord rating; for gas models, check the spark plug and fuel quality. A weak engine can masquerade as low pressure.
Tip: Never operate a damaged cord or fuel line; replace before testing again. - 8
Final test and maintenance plan
Run the washer at multiple settings after all checks. If pressure remains low, schedule professional service. Create a simple maintenance checklist to prevent future issues.
Tip: Document any replacements and settings for easy future reference.
Diagnosis: Pressure washer won't build pressure
Possible Causes
- highLow water flow or blocked inlet screen
- highClogged or worn nozzle causing restricted spray
- highUnloader valve misadjusted or failing
- mediumAir leaks in intake line or pump seals
Fixes
- easyVerify water supply is adequate and inlet screen is clean; replace or clean as needed
- easyClean or replace nozzle; inspect and test different nozzle angles
- easyAdjust unloader valve according to the manual and retest; replace valve if sticking
- mediumInspect intake hose for leaks and pump seals for wear; replace damaged parts
- hardIf unresolved, contact a certified technician for a pump or engine diagnosis
Quick Answers
Why won't my pressure washer build pressure?
Common causes include restricted water supply, clogged nozzle, and a misadjusted unloader valve.
Common causes are restricted water supply, a clogged nozzle, or an incorrectly adjusted unloader valve.
How do I check the water supply?
Ensure the faucet is fully open, hoses are clear of kinks, and there is adequate GPM from the source. Prime the pump by running water through the hose before triggering.
Make sure the faucet is open, no hose kinks, and the water source can supply enough water. Prime the pump before testing.
What is the unloader valve and why is it important?
The unloader valve redirects flow when the trigger is released. If misadjusted or stuck, pressure drops. Adjust per the manual or replace if necessary.
The unloader valve controls pressure by redirecting flow. If it's off or stuck, pressure drops; adjust or replace as directed.
Can air leaks cause low pressure?
Yes. Air leaks in the intake hose or pump seals allow air to enter the system, reducing effective pressure. Inspect and replace as needed.
Air leaks in hoses or seals can reduce pressure; inspect and fix leaks.
When should I replace nozzle tips?
If nozzles are worn or deformed, replace them. Worn tips reduce spray efficiency and perceived pressure.
Nozzle wear reduces spray efficiency; replace worn tips for best results.
Is maintenance enough to prevent future issues?
Regular cleaning of filters, checking hoses, and replacing worn seals can prevent many pressure-loss problems. Schedule periodic professional checks for older units.
Regular maintenance prevents many pressure issues; schedule professional checks for older machines.
Watch Video
Key Takeaways
- Test water supply first and ensure inlet flow is clear
- Clean or replace the nozzle before replacing parts
- Adjust the unloader valve and inspect seals for wear
- Check for air leaks and confirm safe electrical/gas operation
- If unresolved, seek professional service promptly