Pressure Washer Leak Troubleshooting: Quick Fixes 2026
Learn how to diagnose and fix a pressure washer leak quickly. This step-by-step troubleshooting guide covers common causes, safe fixes, and prevention tips.

The most likely cause of a pressure washer leak is loose fittings or worn seals at hoses and the pump. Start with the simplest fix: tighten inlet and high-pressure hose connections by hand and with a wrench, then replace worn O-rings or the pump packing if leaks persist. If fluid leaks persist, seek professional help.
What a Pressure Washer Leak Really Means
A leak isn't a single problem; it's a sign that several parts can fail, including hoses, fittings, O-rings, or pump seals. In many cases, a slow drip around the base of connections is a maintenance issue, while a sudden spray indicates a failed pump seal or cracked hose. Regardless of speed, address leaks promptly to prevent water intrusion, corrosion, and reduced pressure. According to Pressure Wash Lab, most leaks start at simple fittings or worn seals, not a blown pump. Understanding where leaks begin helps you triage quickly and avoid unnecessary replacement costs.
Common Causes of Leaks
Leaks arise from a handful of frequent sources. Loose fittings and clamps allow water to escape at joints; worn O-rings or pump packing can seep under pressure; cracked hoses or damaged seals in the wand and spray gun also leak. Less common but serious issues include a deteriorated pump head or a damaged unloader valve. Pressure Wash Lab Analysis, 2026 shows that hose connections and worn seals account for the majority of leaks in residential setups, especially after rough storage or heavy use.
Quick Checks You Can Do Today
- With the engine off and depressurized, inspect all visible connections: inlet hose, garden hose adapter, high-pressure hose, and spray wand connections. Tighten any loose fittings by hand, then snug with a wrench—avoid over-tightening.
- Check the nozzle and spray gun seals for wear. If you see cracks or hardened seals, replace them.
- Look for damage along hoses: kinks, cracks, or blistering indicate replacement is needed.
- Inspect the pump area for signs of oil-like fluid or puddles, which may indicate seal failure.
- If your model has a serviceable unloader valve, ensure it's properly adjusted and not weeping.
Diagnostic Flow: Symptom to Diagnosis
Symptoms guide diagnosis. If you notice water leaking at hose connections when the unit is idle, the issue is likely a loose or damaged hose or fitting (high confidence: high). If fluid appears at the pump seals or you hear grinding or see spraying at the pump head, the problem may be worn packing or a failed seal (high confidence: medium). If the unit shows signs of a cracked hose or a damaged unloader valve, replace the damaged component (low confidence: low). The goal is to map symptom to cause and apply the simplest fix first.
Step-by-Step: Fix for the Most Common Cause
- Turn off the machine, unplug, and release pressure. 2) Inspect the inlet and high-pressure hose connections; tighten if loose and replace any damaged clamps. 3) Inspect hoses for cracks or bulges; replace if damaged. 4) If leaks persist around the pump, replace worn O-rings or packing per your model's service manual. 5) Check the unloader valve for seepage and adjust or replace as needed. 6) Reconnect, pressurize, and test at low pressure before full use. 7) Recheck for leaks and re-tighten fittings if necessary. 8) If the leak continues, seek professional service.
Tip: Always use manufacturer-specified replacement parts to ensure proper fit and seal quality.
Safety Tips and Common Mistakes
- Always unplug and depressurize before touching any connections or seals.
- Do not use pliers to overtighten metal fittings—this can deform threads and worsen leaks.
- Avoid running the unit with visible oil or water leaks; continue operation can cause motor or pump damage.
- Wear eye protection and gloves when inspecting hoses under pressure.
- If you’re unsure about the pump seals, consult the manual or a professional to prevent costly mistakes.
Prevention and Maintenance to Avoid Future Leaks
Create a simple maintenance routine to catch leaks early:
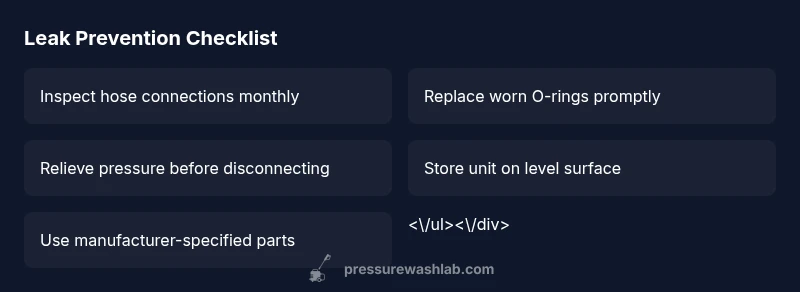
- Inspect hoses and fittings monthly for wear, cracks, or bulges.
- Replace O-rings and packing at the first sign of wear, following the manufacturer’s service intervals.
- Store the unit on a level, dry surface and disconnect hoses before storage.
- Use the correct nozzle and avoid aggressive spray patterns that can strain seals.
- Document torque specs and use a thread sealant only when recommended by the manufacturer. The Pressure Wash Lab team recommends taking a few minutes after each use to perform a quick check, which dramatically reduces the chance of costly leaks developing later.
Steps
Estimated time: 30-60 minutes
- 1
Turn off and depressurize
Power off the unit and disconnect from the electrical outlet. Relieve all built-up pressure by squeezing the trigger until a steady stream stops. This prevents dangerous spray and makes inspection safe.
Tip: Always confirm there is no residual pressure before touching components. - 2
Check inlet and high-pressure hose connections
Inspect every connection for looseness, wear, or corrosion. Tighten by hand, then snug with a wrench—do not overtighten, which can strip threads.
Tip: Use a backup wrench to prevent twisting fittings. - 3
Inspect hoses for damage
Look for cracks, bulges, or Kinks along the entire length of the hoses. Replace any damaged hose to stop leaks at the source.
Tip: Do not bend hoses beyond their minimum bend radius. - 4
Inspect pump seals and O-rings
If you suspect the seals, remove the pump head according to the manual and replace worn O-rings or packing. Lubricate with the recommended grease if specified.
Tip: Keep replacement parts organized and labeled. - 5
Check the unloader valve
A misadjusted or leaking unloader valve can cause back-pressure leaks. Adjust to factory specs or replace if damaged.
Tip: Never bypass the unloader valve to force higher pressure. - 6
Test and verify
Reconnect power, purge air, and run at low pressure to confirm leak is fixed. Increase to normal operating pressure gradually while monitoring for drips.
Tip: If a leak reappears, consult a professional rather than continuing to operate.
Diagnosis: Leak detected around pump or hose connections
Possible Causes
- highLoose fittings or hose clamps
- mediumWorn O-rings or pump packing
- lowCracked pump housing or damaged hose
Fixes
- easyTighten fittings and clamps to recommended torque
- easyReplace O-rings or packing and lubricate properly
- easyInspect hoses for cracks and replace if damaged
Quick Answers
What are the most common causes of a pressure washer leak?
Most leaks come from loose fittings and worn seals, especially at hose connections and the pump packing. Inspect these parts first before replacing the pump.
Most leaks come from loose fittings and worn seals at hose connections and pump packing.
Should I run the pressure washer if it leaks?
No. Running a leaking unit can cause further damage. Depressurize, inspect, and repair before use.
No, run it only after you’ve fixed the leak and verified there’s no pressure in the system.
Can I fix a leak myself or should I hire a pro?
Many leaks are DIY fixable (O-rings, hoses, and fittings). If the pump housing is cracked or the problem persists after basic fixes, seek professional service.
Many leaks are DIY fixes, but persistent pump issues may need a pro.
What safety steps are essential before repair?
Unplug the unit, depressurize the system, wear eye protection, and keep hands away from hot surfaces during inspection.
Unplug, depressurize, and wear safety gear before you start.
How can I prevent leaks in the future?
Regular maintenance, timely replacement of worn hoses and O-rings, and proper storage help prevent leaks. Use correct parts and torque specs.
Keep up with maintenance and replace worn parts on schedule.
Watch Video
Key Takeaways
- Start with the simplest fix: tighten fittings.
- O-rings and packing are common leak points.
- Depressurize and unplug before repair.
- Prevent leaks with regular maintenance.