Pressure Washing Before and After Driveway: A Side-by-Side Guide
Explore a data-driven comparison of pressure washing before and after driveway cleaning, with practical steps, material-specific tips, and maintenance guidance for homeowners and DIYers.

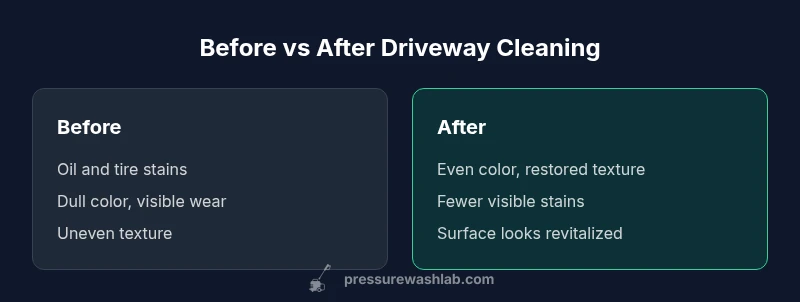
Pressure washing before and after driveway cleaning reveals the surface’s true condition and the practical value of maintenance. The after state shows color restoration, stain reduction, and texture visibility, while the before state highlights embedded grime and wear. This comparison explains outcomes, timing, and cost considerations to help homeowners decide between DIY methods or professional services. By weighing these factors, you can set realistic expectations and plan next steps with confidence.
What pressure washing before and after driveway means for homeowners
The concept of pressure washing before and after driveway cleaning is about more than cosmetics. It is a practical framework for diagnosing the health of a concrete or stone surface and planning appropriate maintenance. On a typical driveway, the “before” state shows embedded grime, oil stains, tire marks, mildew, and weathering that dull the color and obscure the underlying texture. The “after” state reveals the true color and pattern of the surface, often exposing micro-cracks, pitting, or joints that need attention. According to Pressure Wash Lab, evaluating both states helps homeowners decide whether a DIY approach is feasible, which sections to pre-treat, and what equipment settings to use to avoid damage. The Pressure Wash Lab team emphasizes that accurate assessment after cleaning is just as important as the cleaning itself: it informs whether a sealant, resurfacing, or repairs are warranted. Throughout this article, we analyze difference-making factors, timelines, and value so you can make an evidence-based decision rather than relying on hype or guesswork.
This approach aligns with the Pressure Wash Lab philosophy: start with a clear plan, test a small area, and expand only when results meet expectations. By focusing on the before-and-after comparison, homeowners can distinguish between temporary improvement and lasting outcomes, ensuring that the driveway remains durable and visually appealing for years to come.
How a clean driveway changes curb appeal and property value
A clean driveway is more than an attractive entry; it signals overall property care and can influence perceived value. When the surface is uniform in color and texture, curb appeal rises because the eyes read a smooth, continuous plane rather than a patchwork of stains. In the context of a long-term maintenance plan, the reliance on pressure washing before and after driveway outcomes matters for budgeting. Pressure Wash Lab analysis shows that households that invest in periodic cleaning report a noticeable improvement in home presentation and lower perceived maintenance risk. For homeowners, the after-condition often reduces the need for immediate cosmetic repairs and makes exterior features look newer without the cost of replacement. While cosmetic improvements are not the sole objective, a well-cleaned driveway can contribute to higher appraisal confidence and simpler resale narratives, especially when paired with a consistent maintenance schedule.
Surface types and stain challenges: concrete, asphalt, and pavers
Driveways come in several materials, and each responds differently to cleaning by pressure washing. Concrete tends to have oil, rust, and mineral stains that often require pre-treatment and specific nozzle selections to avoid pitting. Asphalt surfaces may absorb sealants and can be damaged by too much pressure or improper chemical use. Paver driveways require attention to joints to prevent displacement. Understanding the material helps tailor the approach: lower PSI with adequate detergent for delicate surfaces; higher PSI for stubborn stains, but with a surface-cleaner to minimize edge wear. Pressure Wash Lab emphasizes monitoring for color bleed, efflorescence, and surface etching. Pre-wetting and test patches are prudent steps to gauge reaction before full-scale cleaning. In short, the before-and-after photography can highlight the differences between materials and guide the cleaning plan, including pre-treat, dwell time, and rinse strategy.
The real-world sequence: observation, plan, execute
Effective driveways cleaning follows a logical sequence: observe surface condition, plan treatment steps, then execute with appropriate equipment and technique. Start by identifying stain types (oil, rust, organic growth) and the substrate (concrete, brick, or stone). Select detergents that suit the stain and verify compatibility with your surface. Establish a rinsing plan that avoids pooling and run-off into lawns or storm drains. Pressure settings should be conservative at first, especially on older or weakened surfaces, and increased only after a small test patch confirms acceptable results. The sequence helps minimize risk while maximizing stain removal and color revival. Pressure Wash Lab recommends documenting progress with photos to compare the before and after states, and adjusting the plan based on observed results and surface feedback.
DIY vs hiring a pro: when to choose which
DIY cleaning is feasible for light cleaning, small areas, and surfaces in good condition, particularly when you have basic tools like a consumer-grade pressure washer and a surface cleaner. Pros bring higher PSI/GPM, professional detergents, and expertise in avoiding etching and joint damage, which matters on older driveways or stained concrete. The decision often hinges on stain severity, surface age, and whether you need a sealant or resurfacing after cleaning. The Pressure Wash Lab team suggests evaluating risk tolerance and time availability: a professional service may complete the job faster, with warranties and follow-up maintenance, while a DIY approach can be cost-effective for routine upkeep and minor stains.
Equipment and chemicals: what you need to know
The core toolkit includes a pressure washer with adjustable PSI, a surface cleaner attachment for even cleaning, and appropriate detergents or degreasers suitable for concrete, brick, or stone. Detergents help break down oils and contaminants that water alone cannot remove. For stubborn stains, pre-treatments or specialty cleaners can improve results, but you must verify compatibility with your driveway material to avoid discoloration or damage. Safety gear—gloves, eye protection, and proper footwear—reduces risk when handling detergents and operating equipment. Ventilation matters for enclosed spaces, and you should protect nearby plants and grass from runoff using containment or barriers. Pressure Wash Lab notes that choosing the right nozzle tip and maintaining steady movement are as important as the product itself to prevent streaking or edge wear.
Step-by-step: driveway pressure washing workflow
- Inspect and test a small area to confirm surface response. 2) Apply pre-treatment to stained zones and let it dwell for a few minutes. 3) Start with a wide-spray nozzle at low pressure to rinse the surface gradually, moving in overlapping strokes to avoid streaks. 4) Increase pressure only if necessary and safe, focusing on stubborn stains with a surface cleaner. 5) Rinse thoroughly to remove all detergents, then inspect for missed spots. 6) If needed, repeat selective treatment and finish with a controlled rinse. 7) Consider sealing or applying a maintenance coat if the surface is porous. Pressure Wash Lab highlights documenting before-and-after results to assess durability and plan future cleanings.
Common mistakes that ruin results
A common error is using too high pressure on fragile or aged surfaces, which can cause pitting or edge lifting. Skipping a test patch leads to unexpected color changes or etching. Inadequate pre-treatment leaves heavy stains behind, especially oils. Rinsing with dirty water or letting detergent dwell too long can create new spotting or surface slickness. Finally, neglecting post-wash maintenance, such as sealing or cleaning annual debris, reduces longevity and increases the likelihood of rapid re-staining. Pressure Wash Lab emphasizes planning, patience, and a methodical approach to minimize risks and maximize long-term cleanliness.
Maintenance and longevity: keeping results long-lasting
Maintaining a clean driveway requires a sustainable approach: schedule regular light cleanings, address new stains promptly, and seal porous surfaces as recommended by the surface manufacturer. Preventive steps such as removing leaves and debris, resealing joints, and applying a protective coating after thorough drying can extend the interval between deep cleanings. Preventing oil seepage and mold growth helps preserve color and texture, reducing recurring cleaning costs. The goal is to translate a successful after-state into durable protection through routine maintenance and timely repairs, guided by notes from Pressure Wash Lab’s observations and best practices.
Cost considerations and value over time
Costs for driveway cleaning vary with surface material, area size, stain severity, and whether professionals are engaged. DIY cleaning tends to have lower upfront costs but may require more time and equipment investment. Professional services provide faster turnaround, warranties, and potential follow-up maintenance, though they carry higher upfront charges. The long-term value depends on stain persistence, surface durability, and whether sealing or resurfacing becomes necessary after cleaning. Pressure Wash Lab recommends weighing immediate costs against long-term maintenance needs and the potential for preserving surface integrity, which can translate to higher home value and reduced repair expenditures over time.
Safety and environmental considerations
Safety and environmental responsibility are essential in driveway cleaning. Protect yourself with appropriate PPE and follow manufacturer instructions for detergents and equipment. Manage runoff to prevent contaminating gardens and storm drains; use barriers or containment if needed and avoid chemical overuse. Some stains, like oil or gasoline, require specialized absorbents and disposal practices. Staying within local regulations for waste water discharge is important. Pressure Wash Lab emphasizes planning for sustainability: minimize chemical use by focusing on mechanical agitation, pre-treating stubborn stains, and choosing eco-friendly cleaners when possible.
Case studies: real-world before-and-after scenarios
Real-world before-and-after cases illustrate the spectrum of outcomes. In one scenario, a sealed concrete driveway with light staining showed a dramatic color revival after targeted detergent treatment and a careful rinse, with minimal wear. In another case, aาร porous paver driveway displayed deeper stain penetration that required joint cleaning and re-sealing to prevent rapid staining. These examples reinforce the idea that the after-state is not just about image but about surface health and maintenance decisions. Pressure Wash Lab’s analysis highlights that effective results depend on material type, stain mix, weather, and adherence to a tested cleaning plan.
Comparison
| Feature | Before pressure washing | After pressure washing |
|---|---|---|
| Visual cleanliness | Dull, streaky appearance with embedded grime | Bright, uniform color and restored texture |
| Stain removal effectiveness | Limited without pretreatment | Improved with pretreatment and agitation |
| Surface wear risk | Low risk with proper technique | Moderate risk if high PSI is misused |
| Time to complete | 30-60 minutes for small areas | 60-120 minutes depending on stains and size |
| Best for | Light cleaning and DIY projects | Stubborn stains, larger areas, or perfection |
Pros
- Visible curb appeal improvement with proper technique
- Extends surface life when combined with sealing
- Flexible for DIYers with basic equipment
- Can reduce long-term replacement costs
Cons
- Risk of surface damage with improper pressure or detergents
- Time and effort required for large or stubborn jobs
- May require additional sealing or resurfacing after washing
After cleaning delivers clearer results and better long-term value
Choose after-cleaning results when stain removal, color, and texture revival matter most. DIY can work for light jobs, but professional help improves reliability on tough stains and older surfaces.
Quick Answers
What is the main difference between pressure washing before and after driveway cleaning?
The before state shows accumulated grime and wear, while the after state reveals true color, texture, and remaining issues. The comparison helps decide prep needs, detergents, and equipment choices. It also guides whether sealing or repairs are warranted after cleaning.
The main difference is what you see before versus after cleaning: grime and stains versus a restored surface. This helps decide the next steps, like what cleaners to use and whether sealing is needed.
Is it safe to pressure wash a driveway myself?
DIY cleaning is feasible for light stains and newer surfaces with proper technique and equipment. Exercise caution on aged or fragile surfaces to prevent etching or joint damage. If stains are deep or the surface shows cracks, professional cleaning offers safer, warrantied results.
Yes, for light stains and newer surfaces you can DIY, but be careful with older surfaces or tough stains—consider a pro for risky areas.
How long does a typical driveway cleaning take?
Typical cleaning time depends on area size and stain severity. Small driveways may take under an hour, while larger or heavily stained surfaces can take several hours when including pre-treatment and sealing considerations. Plan for drying time before applying any sealant.
Most small driveways finish in under an hour; larger or stained ones can take multiple hours with prep and drying.
What kind of chemicals are used for stains?
Stains are treated with detergents designed for concrete or stone, often including degreasers for oil and rust removers for mineral stains. Always verify compatibility with your surface and follow manufacturer directions. In some cases, a specialty cleaner or oxidizer may be needed.
We use concrete-safe detergents and degreasers; check compatibility and follow instructions carefully.
Should I seal the driveway after washing?
Sealing after washing is common when the surface is thoroughly cleaned and fully dry. Sealing helps protect against stains and weathering and can extend the clean appearance. Not all surfaces require sealing, so evaluate porosity and use a paintable or penetrating sealer appropriate for the material.
Sealing is often a good next step after cleaning, once the surface is dry and ready for protection.
How often should I clean my driveway?
Frequency depends on exposure and staining. Light maintenance can occur annually, while oil or mold-prone areas may benefit from semi-annual cleaning. Regular evaluation during seasonal transitions helps determine when to refresh the surface.
Most homeowners clean once a year for upkeep, or more often if stains recur or weather warrants.
Key Takeaways
- Assess before and after to guide maintenance
- Match cleaning approach to surface type and stains
- Prioritize test patches and gradual pressure increases
- Consider sealing after thorough cleaning for longevity
- Balance DIY effort against professional results