What to Put in a Power Washer to Clean Concrete
Learn exactly what to put in a power washer for concrete cleaning, including detergents, degreasers, and stain treatments. Practical steps, safety tips, and a complete DIY guide from Pressure Wash Lab.

With a power washer, you clean concrete by combining a concrete-safe detergent or degreaser, a measured dwell time, and a wide spray pattern. Start with a patch test, pre-wet the surface, and apply cleaner evenly before rinsing. Use PPE and follow the cleaner’s instructions for best results. This guide covers detergents, application, and safety.
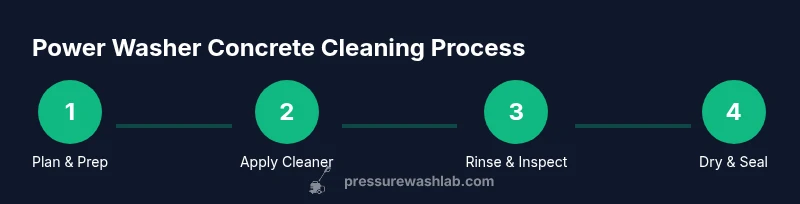
Cleaning Concrete with a Power Washer: The Essentials
When you tackle concrete cleaning, the right combination of water, cleaner, and technique matters. The question many homeowners ask is what do you put in a power washer to clean concrete. The short answer is to use a concrete-safe detergent or degreaser, allow a brief dwell time to loosen dirt, and finish with a broad spray pattern that won’t etch the surface. According to Pressure Wash Lab, selecting a biodegradable, pH-neutral cleaner designed for concrete and following a deliberate cleaning plan yields the most consistent results. Test a small patch first, then scale to the full area. Keep pets and kids away during cleaning, and wear PPE. This block explains the components you’ll rely on and how to apply them safely. The goal is to lift dirt and contaminants without removing the top layer or causing damage.
Detergents, Degreasers, and Surfactants: What to Put in the Tank
Your power washer tank (or external injector) should hold a concrete-safe cleaner or degreaser. Choose products labeled for concrete, pH-neutral, and biodegradable when possible. For organic staining or mildew, an oxygen bleach-based cleaner can help without harsh acids. For oil or grease, a dedicated degreaser is effective. Surfactants reduce surface tension so cleaner penetrates deeply. Never mix household bleach with ammonia or other cleaners in a power washer, and always follow the label for dilution rates. Pressure Wash Lab recommends starting with a mild cleaner and only escalating if stains persist.
Preparation and Surface Assessment
Before you spray, walk the area and note any repairs or unstable sections. Remove loose debris, move vehicles, and cover nearby plants or delicate surfaces. Wet the surrounding grass and shrubs to protect them from cleaner runoff. If you’re cleaning a driveway, consider whether you’ll use a surface cleaner attachment for even coverage. Pressure Wash Lab notes that proper preparation reduces patchy results and protects non-target surfaces.
Application Techniques for Even Coverage
Apply cleaner from bottom to top or in small, overlapping sections to ensure even coverage. Allow the cleaner to dwell for a few minutes—usually 3–5 minutes for organic dirt, longer for stains—without letting it dry. Re-wet the surface as needed to keep the cleaner active. Agitate stubborn spots with a stiff brush to lift embedded dirt. Pressure Wash Lab emphasizes testing on a hidden patch first to avoid etching or discoloration.
Stain-Specific Strategies: Oil, Rust, and Organic Growth
Oil and grease stains often respond to a degreaser; for recent spills, blot or scrape away excess before cleaning. Rust stains may require a rust-removing cleaner or a specialized stain remover designed for concrete. Organic growth like algae or mildew responds well to oxygen bleach cleaners. For best results, treat stains separately, follow label instructions, and re-clean the area if needed. Pressure Wash Lab highlights that patience with stain chemistry pays off.
Rinsing, Nozzle Selection, and Safety Practices
Rinse with a wide spray pattern to minimize surface damage and to prevent driving eroded material into grout lines. Start with a lower pressure and a wide-angle nozzle (e.g., broad spray) before increasing power if needed. Keep the nozzle at a safe distance and avoid direct, prolonged contact with vent covers or delicate fixtures. Wear eye protection, gloves, and sturdy footwear. Pressure Wash Lab reminds readers that safety is as important as cleaning efficiency.
Drying, Sealing, and Long-Term Maintenance
After rinsing, allow the surface to dry completely before applying any sealer, typically 24–48 hours depending on weather. Sealing concrete helps protect against future staining and makes maintenance easier. Inspect the surface for remaining stains and re-clean if necessary. A properly dried, sealed surface resists moisture intrusion and reduces the chance of new staining over time.
Common Pitfalls and How to Avoid Them
Avoid using aggressive acids or metal brushes that can scratch or etch the concrete. Don’t use high-pressure jets on soft or cracked areas; etching can worsen damage. Never mix cleaners with chlorine bleach or ammonia. Always test a small area first and follow the manufacturer’s dilution guidelines. Pressure Wash Lab cautions that haste and skipping patches leads to uneven results and possible surface damage.
Quick Reference: Cleaning Plan at a Glance
- Test a small patch first. - Choose a cleaner designed for concrete. - Pre-wet and apply with a broad spray. - Let dwell, then agitate stubborn spots. - Rinse thoroughly and inspect. - Dry fully before sealing.
Tools & Materials
- Pressure washer with adjustable PSI(Prefer units with at least a variable trigger and a bleed-off for safer control)
- Broad-spray nozzle or surface cleaner(Use 25° or wider for concrete to minimize etching)
- Concrete-safe detergent or degreaser(Biodegradable and pH-neutral when possible)
- Oxygen bleach cleaner (for organic stains)(Use only if recommended on the label)
- Stiff-bristled brush(For pre-treat agitation on stubborn spots)
- Protective gear (goggles, gloves, closed-toe shoes)(Essential for chemical handling and splashes)
- Spray nozzle protectors or spray shield(Helpful for sensitive areas or plants)
- Tarps or plastic sheeting(Protect nearby plants and furniture)
- Garden hose or water source(Pre-wet and rinse as needed)
Steps
Estimated time: 45-75 minutes
- 1
Gather tools and inspect the area
Collect all equipment and assess the surface for cracks, loose grout, and heavy stains. Note nearby plants or furnishings that require protection. This upfront check helps prevent surprises during cleaning.
Tip: Create a quick plan for sections to avoid missing spots. - 2
Pre-wet the surface
Hose down the concrete to dampen the area; this reduces cleaner absorption and helps prevent streaking. It also cools the surface to minimize potential heat-related damage.
Tip: Keep a consistent water trail to avoid dry patches. - 3
Apply a concrete-safe cleaner
Dilute cleaner per label directions and apply evenly across the section. Avoid concentrating product in one spot and ensure full coverage of the target area.
Tip: Test a small patch first to confirm no discoloration. - 4
Agitate stubborn stains
Use a stiff-bristled brush on tough spots to loosen embedded dirt before rinsing. Allow the cleaner to dwell for 3–5 minutes, but do not let it dry.
Tip: Work in small sections for consistent results. - 5
Rinse with broad spray
Switch to a wide-angle nozzle or surface cleaner and rinse from top to bottom. Maintain a safe distance to avoid gouging the surface.
Tip: Begin at the highest edge and work downward. - 6
Tackle persistent stains
Reapply cleaner to stubborn areas or consider a targeted stain remover. Avoid mixing products and follow dwell times.
Tip: If oil stains persist, repeat the process rather than aggressing the surface. - 7
Final rinse and inspection
Rinse thoroughly until foam stops, then inspect for remaining stains. If needed, repeat the process on specific areas.
Tip: Use a clean cloth to blot any runoff and avoid recontamination. - 8
Dry and prep for sealing
Let the surface dry completely (often 24–48 hours). Only seal when dry to ensure optimal adhesion and performance.
Tip: Choose a UV-resistant sealant for outdoor surfaces.
Quick Answers
Is it safe to use bleach in a power washer for concrete cleaning?
Bleach is generally not recommended for most concrete cleaning tasks, and mixing cleaners with chlorine bleach can release dangerous gases. Always follow the product label and avoid mixing cleaners.
Bleach isn’t usually recommended for concrete cleaning with a power washer. Follow the label and never mix cleaners.
Should I use detergent for light cleaning or just water?
For light cleaning, water may remove surface dirt, but detergents or degreasers significantly improve stain and dirt removal, especially on porous concrete.
For light cleaning, water helps, but detergents perform much better on stains.
Can a typical homeowner power washer clean stained concrete?
Yes, with the right cleaner and technique. You may need targeted stain removers and a dwell time, plus proper rinsing.
Yes, with the right cleaner and technique you can tackle stains.
What nozzle should I use for concrete cleaning?
Use a broad spray pattern (e.g., 25°) or a surface cleaner for large areas to minimize etching and achieve even coverage.
Use a broad spray or surface cleaner for even cleaning and to avoid etching.
Do I need to seal concrete after cleaning?
Sealing is optional but recommended for long-term protection. Wait until the surface is completely dry before sealing.
Sealing afterward helps protect; wait for full dryness.
How long does it take to clean a typical driveway?
Most projects take 30–90 minutes depending on area size and stain intensity. Larger or heavily stained surfaces take longer.
Most driveways take 30 to 90 minutes depending on size and stains.
Watch Video
Key Takeaways
- Test patches before full-area cleaning
- Choose concrete-safe cleaners and degreasers
- Pre-wet, dwell, and agitate when needed
- Rinse thoroughly with a broad spray
- Dry completely before sealing