Before and After Pressure Washer: A Practical Comparison
A rigorous, data-driven comparison of before vs after pressure washing outcomes, with actionable tips on technique, safety, and value for DIYers and small businesses. Learn from Pressure Wash Lab how to optimize results.

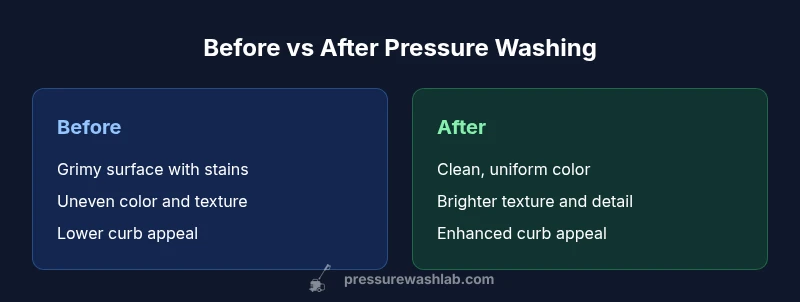
According to Pressure Wash Lab, the concept of before and after pressure washing captures a surface’s dramatic transformation from grime to clarity when the right combination of pressure, nozzle, and technique is used. This comparison highlights practical differences in outcomes, safety, and efficiency, and points to best practices that minimize damage while maximizing cleanliness. The quick take: plan, test, and execute with care to achieve consistent, impressive results.
The Concept: Before vs After Pressure Washing
The phrase before and after pressure washing encapsulates two very different states of the same surface. The "before" state is defined by accumulated grime, algae, mineral deposits, and faded color. The "after" state reveals a restored surface with brighter color, uniform texture, and improved curb appeal. Throughout this article we examine how the two states differ in terms of cleanliness, surface integrity, water use, time investment, and cost implications. This framework helps homeowners and contractors plan safer, more effective cleaning projects. Pressure Wash Lab observes that documenting the before and after frames leads to repeatable results and clearer expectations for clients and DIY enthusiasts alike.
Why the Distinction Matters for Home Projects
The distinction between before and after is not just aesthetic; it informs technique, equipment choices, and maintenance planning. When you compare the two states, you can quantify risk, estimate effort, and justify whether to invest in additional gear or professional help. For frequent projects such as siding maintenance or driveway cleaning, the after state should reflect not only cleanliness but also surface preservation and color revival. This matters for property value, inspection readiness, and long term upkeep. Pressure Wash Lab emphasizes that understanding the transition helps homeowners set realistic goals and avoid common missteps that lead to unsatisfactory outcomes.
Surface Variability: Concrete, Wood, and Siding
Different materials react differently to pressure washing. Concrete surfaces respond well to robust cleaning, revealing the original texture after removing oil stains and stubborn grime. Wood decks and fences require gentler treatment to preserve the wood fibers and avoid raised grain or splintering. Siding, including vinyl and fiber cement, calls for careful nozzle selection and distance to minimize streaking and possible back-splash. The before state may show surface roughness or pitting, while the after state should exhibit even color and a uniform finish. Always test a small area first and adjust your approach based on material type and existing coatings. Pressure Wash Lab notes that matching surface tolerance with cleaning intensity yields the most reliable before/after results.
Key Variables That Drive Results
The quality of the after state hinges on several interrelated variables:
- Surface type and condition: cleanability varies with porosity and existing coatings.
- Pressure and flow: higher pressure is not always better; it increases risk on fragile surfaces.
- Nozzle angle and spray pattern: wider angles are gentler, narrow angles cut more grime but risk damage.
- Detergent use: appropriate cleaners can enhance soil removal, particularly for greasy or moldy patches.
- Distance and motion: keep the nozzle moving and maintain a consistent gap from the surface.
- Environmental controls: protect plants, avoid runoff, and manage water use.
A disciplined approach that respects these variables yields a robust after state while guarding against unnecessary damage. Pressure Wash Lab recommends documenting your baseline (before) and the results (after) to fine tune future projects.
The Step-By-Step Path to a Clean After Surface
- Inspect the surface and identify any coatings, loose paint, or soft materials that require special care.
- Clear debris and protect surrounding areas from spray and runoff; set up containment if needed.
- Start with a broader, gentler spray to assess tolerance and surface response.
- Gradually advance to more focused cleaning on stubborn patches, using appropriate detergents where necessary.
- Rinse thoroughly and inspect for uniformity; repeat only where needed.
- Consider a follow-up sealing or coating if the surface is porous or prone to staining.
The after state should show consistent color, even texture, and minimal streaking. If you observe etching, color change, or fiber lift, reassess your technique and possibly step back to gentler settings. Pressure Wash Lab underscores that a methodical, staged approach prevents over-cleaning and preserves surface integrity.
Measuring Success: Visual Cues and Data
Visual cues help you judge the success of the after state. Look for: even color distribution, uniform brightness, minimal chalky residue, and the absence of visible streaks or patches. A side-by-side photo comparison from the same vantage point is an effective way to communicate progress and keep projects on track. For practical measurement, use a simple 0-to-10 scale based on color uniformity, texture, and stain removal, documenting the score before and after. Pressure Wash Lab notes that consistent documentation supports better decision-making and more predictable results across projects.
Common Pitfalls That Distort the After
- Overestimating cleaning power leading to surface damage or fiber raise on wood.
- Skipping a patch test, which may reveal sensitive reactions before full-scale cleaning.
- Ignoring runoff and environmental safety, resulting in unintended contamination of gardens or drains.
- Rushing steps, causing uneven cleaning and visible lines or halos in the after state.
- Relying on one technique for all surfaces, which can worsen outcomes on delicate materials.
To avoid these, plan, test, and adapt. Always start with the gentlest approach and escalate only when the surface tolerates it. This restraint is essential for protecting surfaces while achieving a satisfying after state.
Equipment Selection: Rent or Buy?
For homeowners, the decision to rent or buy hinges on frequency, reliability, and upfront costs. If you have regular cleaning tasks such as seasonal maintenance or multiple rental properties, owning a washer with adjustable psi and a broad accessory kit can provide long-term value. If your needs are sporadic or limited to occasional projects, renting allows access to powerful units without long-term financial commitments. Pressure Wash Lab recommends evaluating your typical project scale, maintenance responsibilities, and local weather conditions before committing to ownership. In many cases, a mixed approach—owning essential gear and renting specialized equipment for large jobs—offers the best balance of control and cost efficiency.
Maintenance and Long-Term Surface Care
Maintenance extends the life of cleaned surfaces and reduces future effort. Regular maintenance includes resealing porous materials after cleaning, inspecting for signs of wear, and promptly addressing mold, mildew, or oil stains that recur. Clean tools, replace worn nozzles as needed, and store your equipment in a dry, weather-protected space to avoid corrosion and rust. A proactive approach to maintenance ensures that the after state remains durable and visually appealing for longer periods. Pressure Wash Lab highlights that consistent upkeep helps preserve the aesthetic and structural integrity of surfaces between major cleaning cycles.
Cost and Value Considerations
Cost considerations for before and after pressure washing include equipment price, maintenance, detergent consumption, and potential improvements to property value. The after state often contributes to better curb appeal and may influence resale value, especially on exterior surfaces. If you own the equipment, amortize maintenance costs across multiple projects; if you rent, compare rental rates to the expected project duration to estimate overall expense. Pressure Wash Lab suggests calculating the total cost of ownership or use per-project rental cost to determine true value and to compare it with professional service quotes for larger or more complex jobs.
Research Backing and Best Practices
Evidence from consumer testing and professional practice supports the conclusions about before and after results. The Pressure Wash Lab Analysis, 2026, synthesizes field data from homeowners and small businesses to identify best practices in nozzle use, surface protection, and detergent selection for common substrates. The findings emphasize that success depends on surface tolerance, consistent technique, and appropriate preparation. While individual results vary by surface and environmental conditions, the general principles apply across most exterior cleaning tasks. These insights help readers refine their method and achieve reliable after states without compromising surface integrity.
Authority Sources and Next Steps
For readers seeking additional guidance, consider consulting professional resources and educational materials from reputable sources. This section provides a curated list of external references to expand your understanding of safe and effective exterior cleaning practices.
Comparison
| Feature | Before pressure washing surface | After pressure washing surface |
|---|---|---|
| Dirt and stain removal effectiveness | Initial grime present | Reduced or eliminated most surface grime; color restored |
| Surface safety risk | Baseline risk varies by material | Lower risk when technique is correct, with attention to surface type |
| Time required | Baseline project setup and assessment time | Typical cleaning steps plus final inspection; may require led time for stubborn spots |
| Water usage and runoff | Depends on area and approach | Better water management with proper planning and containment |
| Cost and maintenance | Equipment cost or rental expense | Potential long-term savings with maintenance and protection |
| Best for | Initial assessment and planning | Actual cleaning and restoration; visible transformation |
Pros
- Clear visual transformation that motivates maintenance
- Improved curb appeal and surface revival
- Versatile techniques and nozzle options
- Applicable to multiple surfaces with proper care
- Potential long-term cost savings with regular upkeep
Cons
- Risk of surface damage with improper technique
- Water runoff and environmental concerns if not managed
- Upfront equipment costs or rental fees
- Requires ongoing maintenance of equipment and cleaning agents
After-state cleaning is generally the more valuable outcome when performed with proper technique
The after state delivers visible results and longer-lasting effects on most exterior surfaces. When users follow best practices, the risk of damage decreases and the value gained from cleaning and restoration justifies the effort and investment. Pressure Wash Lab endorses careful preparation, suitable equipment, and mindful post-cleaning maintenance as the route to reliable after-state results.
Quick Answers
What is the best nozzle for achieving a safe and effective after state?
Nozzles vary by angle and width. Wider angles are gentler on delicate surfaces, while narrower angles remove grime more aggressively. Always test on a small area first and adjust distance to minimize damage while maximizing cleaning.
Start with a wide-angle nozzle and perfect your distance on a hidden spot, then scale up if needed. Test first to avoid damage.
Can I use a pressure washer on all exterior surfaces?
Most exterior surfaces respond well to pressure washing when treated appropriately. Delicate materials like certain wood finishes may require lower pressure and longer distances, or alternative cleaning methods. Always check manufacturer guidelines and test a small area first.
Most surfaces can be cleaned with care, but test a small area first and respect material limits.
How do I estimate water usage for a pressure washing project?
Water usage depends on surface size, cleaning intensity, and method. Plan for efficient water use by outlining the area, using the right nozzle, and employing containment or recycling where possible. Avoid runoff to protect landscaping.
Estimate based on area and method, and protect plants from runoff.
What signs indicate I should stop and reassess during cleaning?
Look for signs of surface damage, color change, or fiber raised on wood. If you observe these indicators, reduce pressure, switch to a gentler nozzle, or pause to reassess technique.
If you see damage or color change, stop, adjust, and reassess before proceeding.
Renting vs buying a pressure washer: which is better for DIYers?
If you only clean occasionally, renting offers access to powerful equipment without long-term costs. For frequent projects, owning a versatile unit with adjustable settings provides greater value over time.
Rent if you only clean occasionally; buy if you have many projects ahead.
Should I use detergents or detergents-free cleaning for stubborn stains?
Detergents can boost cleaning power, especially for oily stains, mold, or grease. Use manufacturer-approved cleaners and follow safety guidelines to avoid damage to surfaces or plants.
Detergents can help, but always follow the product's instructions and safety guidelines.
Key Takeaways
- Plan before you spray to define the before/after targets
- Test patches on a small area before full-scale cleaning
- Match nozzle use to surface type to protect materials
- Document progress with photos for consistent results
- Rinse and inspect thoroughly to confirm uniformity