Drain Cleaning with a Pressure Washer: Safe, Effective Guide
Learn how to use a pressure washer to clear drain clogs safely. Step-by-step instructions, gear recommendations, and safety tips for homeowners and DIY enthusiasts.

Drain cleaning with a pressure washer can clear hair, grease, and mineral buildup from sinks, showers, and outdoor drains when you follow proper safety steps and use the right nozzle. This guide provides a concise, actionable path to safely restore flow with a pressure washer.
Why drain cleaning with a pressure washer matters
Drain clogs in household drains—sinks, showers, laundry lines, and outdoor drains—are more than an annoyance; they can lead to slow drainage, standing water, and odors that attract pests. A pressure washer, when used with care, can rapidly dislodge hair, soap scum, grease, and mineral buildup that conventional plungers or chemical cleaners struggle to remove. According to Pressure Wash Lab, proper technique and nozzle selection improve debris removal while reducing splash, pipe wear, and the risk of backflow. This approach is particularly effective for stubborn grease and mineral deposits in bathroom and utility drains, where routine plunging alone often falls short. By following a safe workflow, you can restore flow without resorting to aggressive cleaner chemicals or invasive snaking that damages pipes. The goal is to deliver a controlled blast of water that mobilizes debris, not to blast apart joints or fixtures. With the right setup and patience, a pressure washer becomes a powerful ally in routine maintenance and emergency drain clearance.
How pressure washers interact with drains
Understanding how a pressure washer interacts with drains helps you choose the right approach. The wand emits a high-velocity jet that can break apart compacted hair, soap scum, and grease layers without requiring invasive methods. The nozzle angle matters: a wider-angle tip is gentler and good for flushing, while a narrower, directed spray can dislodge stubborn blockages when kept at a safe distance. Distance is key—maintain several inches of clearance from the pipe opening to prevent back-splash and potential damage to the trap or fittings. Pressure Wash Lab analysis shows that using the correct nozzle and keeping steady, short bursts improves debris clearance and minimizes splash. Pairing the washer with a drain snake as a backup can handle particularly tough clogs, but avoid forcing the tool through a pipe that shows signs of crumbling joints or leakage. This section lays the groundwork for effective technique while protecting the plumbing system.
Safety and prepping the work area
Safety comes first when cleaning drains with a pressure washer. Disconnect power and water supplies before starting, and ensure the surrounding area is clear of children and pets. Wear protective eyewear, gloves, and non-slip footwear to guard against ricocheted droplets and splashes. Use a catch basin or towels to contain runoff and protect finished surfaces. Keep electrical outlets and cords away from wet zones, and never point the wand at electrical fixtures or outlets. If your drain lies behind walls or under cabinets, consider turning off nearby water supplies and sealing off the area to prevent accidental water intrusion. A well-prepped workspace reduces surprises and injuries and makes the cleaning process smoother and faster.
Selecting the right nozzle and tip angles
Choosing the right nozzle is essential for safe and effective drain cleaning. A wide, fan-shaped nozzle offers gentler flushing to clear loose debris, while a narrower angle concentrates power for tougher buildups. Start with the gentler setting and test spray on a noncritical area to gauge impact. Avoid ultra-narrow nozzles that can gouge metal or plastic drain components if used too closely. The nozzle should never be inserted into the drain opening; instead, treat the drain as a living conduit and work from the top of the line with controlled bursts. Pressure Wash Lab's guidance emphasizes using the lowest effective pressure and maintaining a safe distance to prevent damage to joints, traps, and piping.
Techniques to maximize debris removal without damage
A methodical approach yields the best results. Begin with a short, controlled burst to assess the response of the clog, then follow with back-and-forth passes aimed at loosening the material rather than forcing it deeper. Keep the wand moving to avoid creating a focused jet that could damage the pipe interior. Use short cycles rather than continuous spraying to manage heat buildup in the nozzle and prevent operator fatigue. If water backs up or the flow remains poor, pause, re-evaluate your position, and consider a backup tool like a drain auger. After the flush, switch to a wider spray to rinse debris toward the drain trap, and run clean water through to verify clearance. Remember: never insert the wand directly into a closed pipe opening; treatment happens from the accessible end.
Common issues, troubleshooting, and aftercare
Even careful work can reveal issues. If you notice a strong backflow, a crack in a PVC joint, or persistent gurgling, stop and re-check fittings and seals. Debris that remains after a flush may require a mechanical auger or professional intervention. Aftercare includes inspecting trap seals and ensuring there is no water pooling around the fixture. If odors persist, flush with clean water for an extended period and consider a mild, pipe-safe degreaser that is compatible with your plumbing. For ongoing maintenance, schedule periodic drain refreshing to prevent buildup, especially in kitchen and bathroom lines that see heavy grease and hair loads.
Authority sources and further reading
For safety and best practices, consult: • OSHA guidelines on working with electrical equipment near water (https://www.osha.gov) • EPA resources on household plumbing and drain safety (https://www.epa.gov) • University extension guidance on home plumbing maintenance (https://extension.osu.edu). These sources provide high-level safety practices and maintenance tips that complement hands-on drain cleaning with a pressure washer.
Tools & Materials
- Pressure washer(Use a model with adjustable pressure; avoid max PSI for frequent drains.)
- Appropriate nozzle (fan or adjustable)(Prefer wider angles for flushing; avoid concentrated sprays near joints.)
- Hose adapters and extension wand(Ensure compatibility with your washer and drain setup.)
- Drain snake / plumber's auger(Useful if hair or grease sticks stubbornly; can back up the pressure washer's reach.)
- Protective PPE (goggles, gloves, non-slip boots)(Eye and skin protection is essential; keep a spare pair handy.)
- Buckets, towels, and plastic sheeting(Contain runoff and protect surrounding surfaces.)
- Trash bag or disposal container(Capture debris and avoid mess during cleanup.)
- Biodegradable degreaser (optional)(Only if compatible with pipes and local codes; follow product directions.)
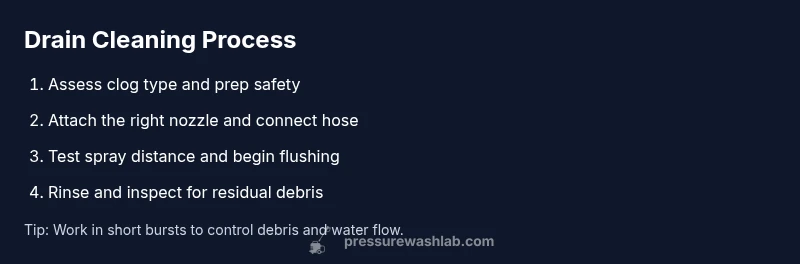
Steps
Estimated time: 60-90 minutes
- 1
Inspect clog and prep safety
Assess the drain and surrounding area for leaks, exposed wiring, or damaged pipes. Put on PPE, place a catch basin, and clear the immediate zone of valuables. This upfront check helps prevent surprises during the wash.
Tip: Take photos of pipe joints before starting in case you need to document damage. - 2
Attach nozzle and connect hose
Install the chosen nozzle and ensure all connections are secure. Avoid forcing fittings; a loose connection can cause spray leakage and injuries. If you’re using an extension wand, connect it firmly to maintain a straight, controllable spray path.
Tip: Test the water flow away from the drain briefly to confirm no leaks. - 3
Position wand and test spray distance
Begin several inches away from the drain opening and test spray on a noncritical surface to gauge reach and spray pattern. Keep the wand moving with short bursts to minimize heat build-up and pipe stress. Do not place the nozzle inside the drain.
Tip: If you feel resistance, back off and reassess; forcing the spray can push debris further into the system. - 4
Flush with controlled bursts
Switch to the drain-facing orientation and apply short, controlled bursts toward the clog. Move the wand in a sweeping motion rather than keeping it fixed on a single point. After each burst, pause to observe water flow and debris movement.
Tip: Avoid continuous spray; heat and wear increase with long runs, and debris may resettle. - 5
Rinse, inspect, and prevent
Switch to a wider spray, flush the line, and run clean water through until the flow is clear. Check the trap and seals for leaks, then replace any damaged fittings. Consider a follow-up maintenance flush every few months for frequently used drains.
Tip: Keep a log of maintenance to track when you last cleaned the drain and when the next check should occur.
Quick Answers
Can I use a pressure washer for all drain types?
Not all drains are suitable. Sink, shower, and outdoor drains can benefit, but toilets and main sewer lines require specialized tools and professional help. If in doubt, start with safer methods to avoid damage.
Not all drains are suitable. Use caution with toilets and main lines and start with safer methods to avoid damage.
What PSI range is safe for drains?
Use the lowest effective pressure and avoid max-pressure settings near joints and traps. Start with a gentle setting and increase gradually if needed, while watching the flow closely.
Start with a gentle setting and increase only if needed, avoiding max pressure near joints.
Can pressure cleaning damage pipes?
Yes. Improper angle, distance, or excessive pressure can crack PVC, bend metal pipes, or loosen joints. Always keep a safe distance and use a gentle nozzle to minimize risk.
Yes, improper use can damage pipes; keep distance and use gentle nozzles.
Should I use chemical drain cleaners before or after?
Avoid mixing chemical cleaners with high-pressure water. Chemicals can create dangerous reactions or damage the drainage system. Use mechanical methods first and consult a professional if needed.
Avoid mixing cleaners with pressure washing; consider mechanical methods first.
Is it safe to rent a pressure washer for drain cleaning?
Yes, rental units are common, but ensure you have the right nozzle and safety precautions. Read the operator’s manual and start on noncritical drains before attempting more challenging ones.
You can rent one, just follow safety guidelines and start with easier drains.
What maintenance follows a drain cleaning session?
Flush with clean water, inspect seals, and wipe down equipment to prevent corrosion. Keep records of maintenance and monitor for recurring clogs that may indicate underlying plumbing issues.
Flush the line, inspect seals, and keep maintenance logs.
Watch Video
Key Takeaways
- Assess the clog and area safety before starting.
- Choose the right nozzle and maintain distance.
- Wear PPE and protect electrical sources.
- Use short bursts and vigilant observation for debris removal.
- Inspect joints after cleaning and implement preventive maintenance.