How to Pressure Wash a Machine: A Comprehensive Step-by-Step Guide
Learn to safely pressure wash a machine’s exterior with our practical, step-by-step guide. Prep, protect sensitive parts, apply detergents, rinse, and dry for a clean, damage-free result.

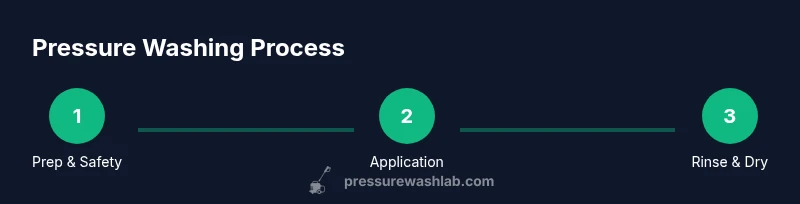
In this guide, you will learn how to safely pressure wash a machine’s exterior and common components, select the right PSI and nozzle, protect sensitive parts, and perform maintenance afterward. You’ll avoid damage by using low pressure near electricals, applying detergents correctly, and drying thoroughly. This article covers exterior cleaning, safety precautions, gear selection, step-by-step actions, and troubleshooting tips.
Safe Setup and Prep for Pressure Washing a Machine Exterior
According to Pressure Wash Lab, the safest approach to cleaning a machine is to treat it as a delicate surface, protect electrical components, and work methodically. Start by turning off the machine, unplugging it from the power source, and removing any hoses or detachable parts that could trap water or block spray. Move the unit to a well-lit, uncluttered area with a dry floor. Have a plan for where the water will drain and where you’ll place towels or mats to catch runoff. Wear eye protection and gloves, and keep a firm, stable stance so you don’t slip on wet surfaces. This prep phase reduces the risk of water intrusion, electrical shock, or accidental damage to seals and gaskets. A quick safety checklist on the job site—no power, no plugged outlets, protected controls—sets the tone for a successful cleaning session.
What You Can and Can't Clean on Exterior Surfaces
Not every machine surface is equal. Hard plastics and painted metal respond well to gentle cleaning, while rubber gaskets, control panels, displays, and vents require extra care. Avoid spraying directly into air intakes, exhausts, or electrical gaps. If water can reach electronics, corrosion or short circuits may occur. When in doubt, test a small area first and consult the owner's manual. The exterior can accumulate dust, grime, and mineral deposits over time, especially in damp environments. A routine exterior wash not only improves appearance but can help extend the life of seals and finishes by removing corrosive salts and grime. Remember, the goal is to refresh the surface without forcing moisture into hidden crevices.
Tools, Detergents, and Settings for Safe Results
Choose a pressure washer with adjustable PSI and a wide-angle nozzle (25-40 degrees) to maximize surface coverage while minimizing risk. Use a mild, pH-neutral detergent designed for outdoor equipment; never mix chlorine bleach with detergents in a spray bottle. Have a soft brush and microfiber towels on hand for gentle scrubbing and drying. For settings, start at the lowest effective pressure and step up only if the area remains dirty after a first pass. Keep the nozzle at a safe distance from the surface—usually several inches away—and spray in a consistent, sweeping pattern. If your unit has electrical controls or a display, shield them with a plastic cover or painter's tape when possible.
Protecting Sensitive Components During Cleaning
Before you begin spraying, identify all vulnerable parts: control panels, power cords, outlets, and seals. Cover these with painter's tape or plastic film to prevent water intrusion. Remove or secure hoses and attachments that could be damaged by spray. Use a rinse pass to clear away detergent from vents and corners, then dry them with a clean cloth. If you must spray near seals or moving parts, use shorter bursts and pause to check for moisture buildup. A methodical approach reduces the chance of electrical faults while preserving the finish.
Applying Detergent and Letting It Dwell
Apply detergent in a light, even coat from top to bottom. Let the solution sit for a few minutes to break down grime, but do not allow it to dry on the surface. Re-wet as needed to keep the area damp and ensure even contact. For stubborn spots—like mineral deposits or ground-in grime—use a soft brush to lift buildup without abrading the surface. Detergent dwell time is a balancing act: too long and you risk residue that attracts more dirt; too short and the cleaning will be incomplete. Pressure Wash Lab recommends a gentle, patient approach for best results.
Rinsing and Drying for Best Results
After the dwell time, switch to a low-pressure, wide-spray rinse, moving from top to bottom to flush away loosened grime. Avoid blasting the same spot repeatedly; this can damage finishes or loosen gaskets. Dry the exterior with microfiber towels or a chamois to remove remaining moisture, then allow vents and connectors to air-dry fully. Inspect the surface for streaks or moisture pockets and re-clean if necessary. A thorough dry stage helps prevent water spots and corrosion.
Common Mistakes and How to Avoid Them
Avoid high-pressure bursts on seals or electronics. Do not spray directly at gaskets or bearings. Never use hot water on plastic components that could warp. Do not mix detergents with bleach or ammonia. Don’t skip drying; moisture can lead to mold and corrosion. If you encounter rust spots, address them with appropriate cleaner after the wash. Keeping a steady rhythm and checking for leaks prevents costly mistakes.
Maintenance After Cleaning
Check hoses and fittings for looseness after cleaning; tighten if needed. Clean and inspect spray tips, replacing any worn nozzles. Lubricate moving parts per manufacturer instructions if applicable. Store the equipment in a dry space away from freezing temperatures. A quick post-clean check can catch early indicators of wear or damage that might be hidden under dirt. This habit prolongs the life of your machine and reduces the chance of future failures.
Troubleshooting and Next Steps
If you notice moisture inside control panels or unusual noises after cleaning, power off immediately and dry the area thoroughly. If leaks persist, consult a professional or the manufacturer manual. Use this guide as a starting point and adjust procedures for your specific model. Routine cleaning with caution reduces buildup that compromises performance and longevity.
Tools & Materials
- Pressure washer with adjustable PSI(Choose a model with a wide-angle nozzle (25-40 degrees) to minimize surface damage.)
- Wide-angle nozzle (25-40 degrees)(Use to maximize coverage and reduce streaking.)
- Mild detergent suitable for outdoor equipment(Avoid chlorine bleach; follow label directions.)
- Soft brush(Gentle scrubbing for stubborn grime without scratching.)
- Microfiber towels(For drying and buffing to prevent water spots.)
- Plastic sheeting or painter's tape(Protect outlets, cords, and controls from spray.)
- Protective gloves and eye protection(Safety first when handling cleaners and spray.)
- Extension wand or adjustable wand (optional)(Adds reach for hard-to-access areas.)
- Garden hose or water source(Ensure stable water supply for rinsing.)
Steps
Estimated time: 30-45 minutes
- 1
Unplug and Prep the Area
Power off and unplug the machine, then remove hoses and accessories that could trap water. Clear the workspace and place towels to catch runoff. This first step reduces the risk of electrical shock and keeps your cleaning smooth.
Tip: Keep a dry exit path and stand with feet shoulder-width apart to avoid slips. - 2
Protect Electrical Components
Cover outlets, displays, and control panels with plastic wrap or painter's tape. This helps prevent water intrusion during the wash while still allowing you to spray nearby areas.
Tip: Do not spray directly at protected components; use a gentle sweeping motion near them. - 3
Choose Nozzle and Detergent
Attach a wide-angle nozzle and mix or apply a mild detergent suitable for outdoor equipment. Detergent helps break down grime and mineral buildup before rinsing.
Tip: Test a small patch first to ensure no discoloration. - 4
Apply Detergent Top-to-Bottom
Spray lightly from top to bottom, covering all surfaces. Let it dwell 2–5 minutes, but do not allow it to dry completely.
Tip: Re-wet areas if they begin to dry to maintain cleaning efficiency. - 5
Rinse with Low-Pressure
Switch to a low-pressure, wide spray and rinse from top to bottom. Keep the nozzle moving to avoid concentrating spray on a single spot.
Tip: Avoid re-spraying the same spot repeatedly to prevent finish damage. - 6
Dry Thoroughly
Wipe surfaces with microfiber towels and allow vents and connectors to air-dry completely. Thorough drying reduces water spots and corrosion risk.
Tip: Use a blower if available to speed up drying in tight areas. - 7
Inspect and Reassemble
Check for moisture pockets, re-tighten fittings, and ensure covers are secure before reattaching hoses.
Tip: Look for discoloration or swelling on hoses as a sign of damage. - 8
Post-Clean Maintenance
Store tools properly, check tips for wear, and perform a quick belt or seal inspection if applicable. Document any issues for future maintenance.
Tip: Create a simple maintenance log to track wear and replacements.
Quick Answers
Is it safe to pressure wash a washing machine exterior?
Yes, with precautions: unplug the unit, cover or avoid exposing electrical components, use low pressure, and ensure complete drying.
Yes, as long as you unplug first, cover sensitive parts, use low pressure, and dry thoroughly.
What nozzle should I use for machine exteriors?
A wide-angle nozzle (such as 25-40 degrees) provides better coverage with less risk of damage.
Use a wide-angle nozzle for safer, more even cleaning.
Can I use bleach or harsh chemicals with a pressure washer?
Avoid bleach and ammonia; opt for mild, manufacturer-approved detergents designed for outdoor use.
No bleach—stick to mild detergents approved for outdoor cleaning.
How long should detergent dwell on exterior surfaces?
Let the detergent sit for 2–5 minutes, but do not let it dry completely.
Let it sit a few minutes but keep it from drying.
What surfaces are safe to clean on a machine?
Hard plastics and painted metal are generally safe; avoid delicate displays and exposed electronics.
Most exterior plastics and metal are fine, but avoid sensitive displays and controls.
What if moisture gets into controls after washing?
Power off immediately, dry thoroughly, and consult the manual or a professional if concerns persist.
Turn off power, dry well, and seek help if you’re unsure.
Watch Video
Key Takeaways
- Protect electrical components before washing.
- Use a wide-angle nozzle and low pressure.
- Dry thoroughly and inspect for moisture.
- Follow the step-by-step plan for best results.