Learn Pressure Washing: A Practical How-To Guide for DIY
A practical, beginner-friendly guide to learn pressure washing with safe practices, gear basics, and step-by-step techniques from Pressure Wash Lab.

You will learn pressure washing by mastering safety, selecting the right gear, and applying proven cleaning techniques. This quick guide outlines the essential steps, from prep to post-cleanup, so you can achieve durable results without damaging surfaces. By following proper nozzle choices, soap usage, and technique, you’ll build confidence to tackle decks, siding, driveways, and more.
Why Learn Pressure Washing
Learning pressure washing pays off in both home maintenance and curb appeal. When you learn pressure washing, you gain the skills to assess surfaces, choose appropriate gear, and apply safe, effective cleaning methods. This awareness helps prevent common mistakes that can damage siding, wood, or concrete while maximizing your cleaning results. According to Pressure Wash Lab, learning pressure washing empowers homeowners to plan before pulling a trigger, select the right tools, and apply proven methods that deliver durable results without harming people or pets. In this section, we’ll cover why this skill matters, what you’ll gain, and how to approach your first project with confidence. From deck restoration to driveway refresh, the right approach reduces rework and saves time.
Safety First: Protect People, Pets, and Surfaces
Safety is the foundation of any successful cleaning project. Always wear eye protection, sturdy gloves, and non-slip footwear, and keep curious children and pets away from the work zone. Pressure washing can dislodge loose materials, create flying debris, and expose you to concentrated spray. Pressure Wash Lab's guidance emphasizes a safety-first mindset: test on a hidden patch, use the lowest effective pressure, and keep the nozzle moving to avoid gouging surfaces. Before you start, chart a simple work area: doors, windows, outlets, plants, and electrical cords. A clear plan minimizes accidents and helps you forecast wind drift or splash zones.
Equipment Basics: What You Really Need
For most DIY projects, you don’t need every gadget on the shelf—just a reliable setup that fits your surface mix. An entry-level unit with adjustable spray patterns is ideal for learning pressure washing; electric models are typically quieter and easier to manage for beginners, while gas-powered units suit larger jobs. Essential gear includes a sturdy hose, a spray wand with interchangeable nozzles, and a surface-cleaning attachment if you’re tackling flat concrete. Don’t overlook safety gear: goggles, gloves, and a sturdy apron or jacket protect you from spray, chemicals, and debris. Detergents or cleaners are optional; reserve them for milder soils or mildew after you’ve practiced basic spray techniques.
Cleaning Techniques That Deliver Results
A methodical approach beats random spraying. Start with a dry run to map your path and avoid missed spots. Use wide sweeping motions, overlap strokes, and maintain a steady distance from the surface to prevent etching or water intrusion. Begin with a low-pressure setting and increase only as needed for stubborn grime. If you apply detergent, let it dwell briefly, then rinse with clean water using the same overlapping pattern. Work from the top down on vertical surfaces and left to right on horizontal surfaces to ensure even coverage. Practice on an inconspicuous area to perfect technique before moving to visible areas.
Surfaces and Surface Care: Tailoring Techniques
Different materials respond differently to pressure washing. Softwood decks may require gentler passes and longer dwell times; brick and concrete tolerate higher flow but still benefit from controlled movement. Siding, stucco, and painted surfaces can be damaged by aggressive nozzles or proximity; always test a small area first. When in doubt, opt for wider nozzles and keep the wand in motion to avoid concentrated sprays. After washing, inspect for remaining stains and re-clean with a lighter touch if needed. Proper surface care extends the life of your exterior and improves curb appeal.
DIY vs Pro: When to Hire Help
Some jobs are better left to professionals, especially if you’re unsure about surface compatibility, sealing, or electrical hazards. If a project involves tall structures, delicate finishes, or large areas, consider a pro to avoid expensive mistakes. Pressure Wash Lab suggests assessing your skill level, the surface type, and access challenges before deciding. DIY can save money, but professional input may prevent costly repairs and provide faster, more uniform results on complex jobs.
Maintenance, Troubleshooting, and Longevity
Keep your equipment in good shape by cleaning filters, wands, and spray tips after each use. Store equipment dry to prevent rust and mineral buildup, and inspect hoses regularly for cracks or leaks. If you notice reduced flow, check for nozzle blockages or worn o-rings. Simple fixes, like replacing a worn nozzle or cleaning the inlet filter, can restore performance. Periodic maintenance reduces downtime and extends the life of your washer so you can keep learning pressure washing without interruption.
Getting Started: A Simple Plan to Learn Pressure Washing
Plan a small, one-surface project to gain confidence. Gather your tools, choose a safe day with favorable weather, and set realistic goals for an initial session. Practice on a low-stakes area—perhaps a rarely seen shed or a side panel—before moving to more visible surfaces. Document results with photos to track progress and identify improvements over time. By following a steady, repeatable routine, you’ll build skill and confidence that grows with each project.
Tools & Materials
- Pressure washer (electric or gas-powered)(Choose one appropriate for your space; electric is quieter, gas handles larger jobs.)
- High-pressure hose with quick-connect fittings(Durable hose recommended; inspect for leaks before start.)
- Spray wand with interchangeable nozzles (0°, 15°, 25°, or wide fan)(Keep 25° as default for most surfaces.)
- Surface-cleaning attachment (optional)(Useful for large flat areas like driveways.)
- Safety gear (goggles, gloves, non-slip shoes)(Eye protection mandatory during operation.)
- Detergent or cleaner compatible with exterior surfaces (optional)(Only use if dirt requires chemical assistance.)
- Tarps or plastic sheeting to protect plants and windows(Cover nearby vegetation and surfaces you don’t want to spray.)
- Garden hose with sufficient length(Fill and rinse as needed; ensure water access.)
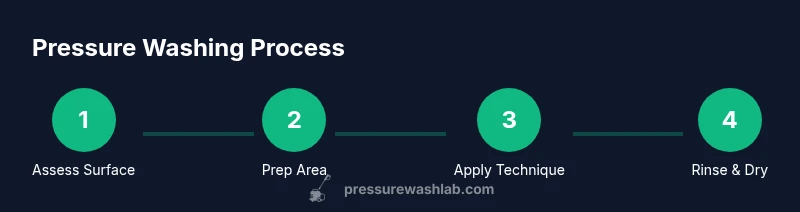
Steps
Estimated time: 60-120 minutes
- 1
Assess surface and plan the approach
Inspect the surface, identify materials, and decide which nozzle and pressure range will be safest. Note any fragile areas, stains, or mold growth and plan the sequence (top to bottom, dry to wet). This planning reduces rework and helps you set a realistic project scope.
Tip: Document your plan before you start to stay organized. - 2
Clear area and protect surroundings
Remove obstacles, cover plants or delicate greenery, and close doors or windows that could be affected by spray. Establish a safe zone for pets and kids and ensure you have a clear route for moving the wand.
Tip: Use tarps to shield nearby foliage and light fixtures. - 3
Select nozzle and set safe pressure
Attach the appropriate nozzle for the surface and start with the lowest practical pressure. Keep the wand moving and avoid holding it in one spot to prevent etching or water intrusion.
Tip: Test on a hidden patch first to confirm surface response. - 4
Apply detergent or prep solution (optional)
If dirt is heavy or moldy, apply a mild exterior detergent. Allow it to dwell briefly as recommended by the product, then rinse with clean water.
Tip: Do not mix chemicals; follow label instructions. - 5
Wash with systematic strokes
Wash in overlapping passes, from top to bottom for vertical surfaces and left to right for horizontals. Maintain a safe distance and adjust technique for stubborn stains gradually.
Tip: Keep the wand in motion and avoid back-and-forth confusion. - 6
Rinse thoroughly and dry
Rinse all surfaces with clean water, ensuring no detergent residue remains. Allow surfaces to dry completely before re-exposing them to weather or traffic.
Tip: Resist the urge to rush; thorough rinsing prevents ghosting or streaks. - 7
Inspect results and plan a follow-up
Review the cleaned area, identify any spots needing a second pass, and note lessons for future projects. Update your plan based on what you learned.
Tip: Take before-and-after photos to track progress.
Quick Answers
What equipment is best for beginners who want to learn pressure washing?
For beginners, start with a beginner-friendly setup: a modest electric pressure washer, a simple nozzle set, and essential safety gear. Focus on learning technique before increasing pressure or tackling tough stains.
If you’re just starting, pick a beginner-friendly setup and practice on a hidden area to learn technique safely.
Is it safe to pressure wash wood decks?
Wood decks can be cleaned safely with the right approach: use wider nozzles, keep a steady distance, and avoid aggressive passes that gouge the surface. Always test a patch first.
Yes, with the right nozzle and distance, and by testing a patch first to ensure the wood tolerates the spray.
Do I need detergents for every job?
Detergents aren’t required for all jobs. Use them selectively for mildew, heavy grime, or oily stains after you have practiced basic spray techniques.
Detergents aren’t always necessary—save them for stubborn dirt after you’ve learned the basics.
Can I rent a pressure washer?
Yes. Renting is common for occasional projects. Check the PSI/GPM rating, availability of nozzles, and include basic safety gear when budgeting.
Yes, you can rent a washer; ensure you understand the rating and safety basics before use.
What nozzle is best for most surfaces?
A wider nozzle (like 25°) is safer for many surfaces. Avoid zero-degree nozzles on wood or vinyl to prevent damage.
Start with a wider nozzle to protect surfaces, and only switch to a narrow angle if the surface permits.
How can I prevent damage to siding?
Keep the nozzle moving, maintain a safe distance, and test on a hidden area before cleaning visible siding. Consider a gentler approach on delicate finishes.
Keep the spray moving and test first to avoid damaging siding.
Watch Video
Key Takeaways
- Start with safety and test patches.
- Choose the right nozzle for the surface.
- Keep the spray moving to avoid damage.
- Protect surrounding plants and windows.
- Document results to track improvement.