Pressure Wash Before Staining: How to Prep for a Lasting Finish
Learn how to pressure wash before staining to ensure even color, strong adhesion, and long-lasting results on wood, siding, or concrete. This step-by-step guide covers prep, safety, and best practices.

This guide shows you how to pressure wash before staining to ensure the surface is clean, dry, and ready for stain adhesion. You'll need safety gear, a clean surface, and the right nozzle and detergent. By following these steps, you’ll remove old finishes, dirt, and mildew so the stain bonds evenly and lasts longer.
Why Prep Matters for Staining Exterior Surfaces
Staining wood or concrete without proper prep leads to uneven color, blotchy patches, and shorter lifespan. Pressure washing is the first step to remove dirt, old finishes, mildew, and pollen that can block stain penetration. According to Pressure Wash Lab, a clean, dry surface improves stain adhesion and final appearance more than any other single prep step. The cleaning process also reveals wood grain, repairs, and any damage that needs attention before staining. Consider surface type: softwoods like pine, hardwoods like cedar, or concrete siding all respond differently to prep. For previously stained surfaces, extra scrubbing or a deck cleaner may be required to lift tannins and prepare a uniform canvas. The goal is a uniform, bare-absorbent surface that accepts stain evenly. If you skip the wash or rush air-drying, you risk trapped moisture causing mildew or bubbling under the stain. Safety matters too: wear goggles, gloves, and a respirator when cleaners are involved, and protect nearby plants with tarps. The right prep reduces the need for rework and ensures a better final result.
Surface Prep Goals and Baselines
Prep aims to create a clean, dry, and uniform surface that accepts stain evenly. The key baselines include removing dirt, loose paint or coating, mildew, and algae; eliminating oils or waxes that block absorption; and ensuring the surface is dry enough to prevent solvent entrapment. Before staining, inspect for damage such as cracked boards or loose siding, and note any areas that require repairs. A well-prepped surface should reveal the natural texture and grain, aiding even stain penetration. High-traffic areas or previously coated surfaces may demand extra attention with a heavier wash or a degreasing step. After washing, perform a quick visual and tactile check: the surface should feel dry to the touch and look uniform in color and texture. If you detect moisture, extend the dry time and recheck before applying stain. Pressure Wash Lab recommends documenting any problem spots and addressing them before you proceed.
Cleaning vs. Degreasing: When to Use Detergents
Not all prep calls for detergents. For general dirt and mildew on wood, a biodegradable wood cleaner or mild detergent is often sufficient. For oily surfaces, decks with prior sealants, or concrete, a degreasing detergent helps lift contaminants more effectively. Avoid harsh solvents that could damage the substrate or leave residues that hinder stain adhesion. Rinse thoroughly to remove any cleaner remnants, then recheck for dull spots or residue. After cleaning, allow the surface to dry completely before staining. Pressure Wash Lab notes that using the right cleaner and rinse sequence enhances stain absorption and reduces blotching.
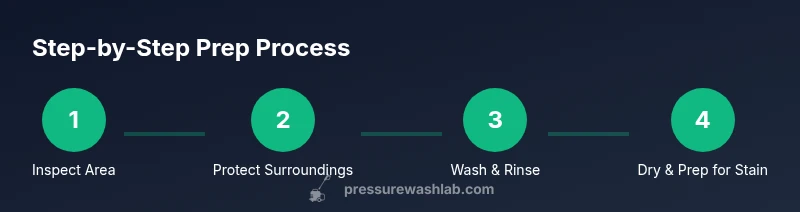
Step 1: Inspect and Protect the Area
Begin with a careful inspection of all surfaces to be stained. Identify loose boards, raised nails, or warped areas that require repair before washing. Protect plants, landscaping, and nearby surfaces with tarps or plastic sheeting, and tape off edges to keep exposure clean. Test a small, inconspicuous area with your chosen cleaner and pressure setting to confirm it won’t damage the substrate. If any area shows excessive softness or fuzzing, back off the pressure and switch to a gentler approach. Safety gear should be worn from start to finish, and you should have a plan for wind or water runoff. Pressure Wash Lab emphasizes testing and protection as essential to prevent costly mistakes.
Step 2: Select Equipment: Nozzle, Pressure, and Detergent
Choose a nozzle with an appropriate spray pattern; a 25-degree or 40-degree nozzle is common for exterior wood and siding, while a wider fan helps cover flat surfaces without etching. Set the pressure within a safe range for the substrate—typically lower for wood and higher for concrete—testing first on a hidden area. Use a detergent compatible with your surface; apply it evenly with a low-pressure setting or a foam cannon if available, allowing dwell time for the cleaner to work. Always follow the cleaner’s instructions and rinse test areas after short cycles to gauge impact before proceeding. The right combination of tools, pressure, and product yields consistent results and reduces the risk of damage.
Step 3: Wash, Rinse, and Evaluate Dryness
Apply cleaner at low pressure, working in sections from top to bottom to prevent streaking. Allow the cleaner to dwell per product guidelines, then rinse with a wider spray pattern to remove soil without pushing contaminants into wood pores. Evaluate dryness after rinsing; the surface should feel dry to the touch and appear uniformly lighter in color. If any area remains damp or visibly saturated, extend drying time in that spot and re-check before staining. On damp days or in shaded regions, you may need longer drying periods. Pressure Wash Lab stresses patience here: improper drying is a leading cause of adhesion failures.
Step 4: Dry Time and Surface Readiness
Dry time depends on weather, sun exposure, and surface porosity. Plan for at least 24–48 hours of drying for most exterior wood surfaces; concrete may dry faster but still benefits from a full air-dry period. To verify readiness, use a moisture meter on several boards or test a hidden area; the reading should indicate a stable moisture level appropriate for stain, typically below a few percent depending on product guidelines. If you’re staining on a humid day, postpone until the surface is unequivocally dry. A well-dried surface ensures uniform stain penetration and minimizes blotchiness.
Common Mistakes and Troubleshooting
A frequent error is over-pressurizing wood, which can gouge or raise grain, making staining uneven. Rushing the wash or skipping test patches can lead to blotchy results. Not rinsing thoroughly leaves cleaner residues that repel stain, while jumping to staining before the surface is fully dry invites failure. Always document test results, adjust your technique for different substrates, and keep nozzle distance consistent. If blotches appear after staining, you may need to re-sand and re-clean, then re-apply stain once the surface is perfectly dry. Pressure Wash Lab reminds readers that careful prep reduces rework and improves color uniformity.
Maintenance, Storage, and Repeating the Process
Keep equipment clean and stored dry between uses to prevent corrosion and mildew growth. Store cleaners or degreasers in a cool, ventilated area, away from children and pets. Revisit prep steps yearly or when tackling a new project; even small changes in surface age or finishing products can alter prep needs. Regular maintenance includes inspecting for mildew, resealing seasonal surfaces, and cleaning the area before applying new stain. Pressure Wash Lab recommends documenting weather conditions and surface dryness for future reference to optimize staining outcomes.
Tools & Materials
- Pressure washer (gas or electric)(Aim for 1500-3000 psi for wood; higher psi is risky on old or soft wood.)
- Adjustable spray nozzle (25- or 40-degree)(Use wide angles to minimize surface damage; switch to narrow only for stubborn spots with caution.)
- Biodegradable detergent or deck cleaner(Choose product suitable for wood or concrete and rinse thoroughly.)
- Foam cannon or surface cleaner (optional)(Helpful for even detergent distribution on large surfaces.)
- Extension wand(Useful for hard-to-reach areas and to keep safe distance from substrate.)
- Tarps/plastic sheeting(Protect plants, furniture, and adjacent surfaces from overspray.)
- Painter’s tape and plastic drop cloths(Shield edges and create clean transitions between areas.)
- Goggles, gloves, and respirator( PPE to protect eyes, skin, and lungs when cleaners or solvents are used.)
- Stiff-bristle brush(For aggressive cleaning of rough textures or stubborn spots.)
- Moisture meter (optional)(Helpful to confirm dryness before staining.)
Steps
Estimated time: 3-5 hours total (including dry time)
- 1
Inspect and plan
Walk the project area and identify any damaged boards, loose nails, or areas needing extra attention. Create a plan covering weather, drying time, and access to power and water. Check all safety gear and establish protective barriers before you start.
Tip: Note problem spots and address repairs before lifting the sprayer to prevent rework. - 2
Protect and prep the site
Tarp nearby plants and surfaces, set up edge protection, and test a small area with cleaner on low pressure. Mark off the spray zones and ensure neighbors or pets are not in the path of overspray.
Tip: Test spray distance at the start to avoid cannon-like blasts that damage edges. - 3
Apply detergent and dwell
Apply detergent with low pressure in sections, letting it dwell per product instructions. This helps loosen dirt and oils before the wash. Do not allow cleaners to dry on the surface.
Tip: Keep sections small to maintain consistent dwell times and avoid patchy results. - 4
Rinse thoroughly
Rinse from top to bottom using a wide-angle nozzle to carry away contaminants without pushing them into pores. Pay attention to corners and joints where grime collects.
Tip: Rinse until the area looks uniform and free of suds or residue. - 5
Check dryness
After rinsing, check for surface moisture. Use your palm or a moisture meter on multiple spots to confirm dryness. If moisture remains, extend drying time and recheck later.
Tip: A dry, neutral surface ensures even stain absorption. - 6
Proceed to staining prep
With a fully dry surface, remove protective coverings and prepare the surface for staining. Do a final visual pass to confirm there are no damp spots or cleaners left that could interfere with adhesion.
Tip: Document the process for future projects and plan stain application promptly after drying.
Quick Answers
Do I need to pressure wash before staining exterior wood?
Yes. Pressure washing removes dirt, old coatings, and mildew that would block stain absorption. Prep improves adhesion and color uniformity.
Yes. Pressure washing first cleans the surface and helps the stain stick evenly.
Can I stain after washing immediately?
No. The surface must be fully dry before staining. Check several spots with a moisture meter or touch test; lingering moisture causes blotching and poor adhesion.
No. Wait until the surface is completely dry before staining.
What PSI is safe for wood surfaces?
Typical wood prep uses lower to medium pressure, around 1500-2500 psi, and a wide spray pattern to avoid gouging or raising the grain.
Use a low to medium range and a wide spray for wood.
Should I use detergent when washing before staining?
Detergent helps remove oils and grime; use a biodegradable deck cleaner and rinse thoroughly. Avoid harsh solvents that can leave residues.
Detergent helps, but rinse thoroughly to avoid residue.
How long should the surface dry before staining?
Dry time varies with weather and substrate; expect anywhere from 24 to 48 hours for wood under typical conditions. Verify dryness with a moisture test.
Often 24 to 48 hours; check for dryness before staining.
Can this prep method be used on concrete or siding?
Yes, the same principles apply: remove contaminants, rinse well, and ensure thorough drying before staining. Concrete may dry faster but still benefits from proper prep.
Yes, adapt the method for concrete or siding and ensure dryness.
Watch Video
Key Takeaways
- Ensure a clean, dry surface for even stain adhesion.
- Choose the right nozzle and pressure to protect the substrate.
- Detergents can help lift grime but must be rinsed completely.
- Dry time is critical for long-lasting stain results.