Pressure Washer Pump Maintenance: A Practical How-To Guide
Master pump maintenance for your pressure washer with actionable steps, safety tips, and parts care. Learn to inspect, lubricate, and replace seals to extend life and performance.

Learn how to perform essential pressure washer pump maintenance to prevent leaks and loss of performance. You’ll know when to service, how to drain old oil, inspect seals, and test output safely. Gather basic tools, the correct oil, and have the unit cooled and unplugged before you begin. Follow the steps for a reliable, longer-lasting pump. This quick overview sets you up for a thorough, hands-on process.
Why pump maintenance matters
Regular pressure washer pump maintenance is essential for long-term reliability and consistent cleaning performance. The pump is the heart of the system; without a well-maintained pump, you’ll see reduced if not completely broken down output, idle leak paths, and more frequent repairs. According to Pressure Wash Lab, a structured maintenance routine can dramatically cut downtime and repair costs by addressing wear before it becomes a failure. In this section we explore the rationale behind pump maintenance, what wears out most often, and how proper upkeep translates to cleaner results, lower energy use, and fewer headaches. You’ll also see how neglect compounds corrosion and wear on internal components, which can shorten the life of the unit and void warranties. Adopting a simple quarterly routine keeps your pressure washer performing at peak efficiency and helps protect your investment for many seasons.
Assessing pump condition before you start
Before you touch any moving parts, take a careful snapshot of the pump’s current state. Look for obvious leaks at seals and fittings, note any odd noises like grinding or whines during operation, and check oil level and quality if your pump uses oil lubrication. Inspect hoses for cracks, swelling, or soft spots that could indicate pressure spikes or wear that will stress the pump. Check fasteners to ensure clamps and bolts haven’t loosened from vibration. If you find oil that is milky, smells burnt, or contains metal particles, stop and investigate further—the issue could indicate internal wear or a failing seal. Document the findings so you can compare future maintenance results and verify you addressed every concern in your follow-up checks.
Tools and safety: what you need
Gather the tools and materials needed for a safe, effective maintenance session. You should have a clear, dry work area and all safety gear: gloves, safety glasses, and appropriate footwear. Essential items include the correct pump oil recommended by the manufacturer, an oil drain pan, a syringe or funnel for precise oil handling, lint-free rags for cleaning, a replacement seals/o-rings kit, screwdrivers and pliers for disassembly, and a clean container to store small parts. Also have a leak detection spray or soapy water nearby to help locate leaks during testing. Keep a copy of the user manual handy for model-specific instructions and torque specs. Keeping everything organized minimizes mistakes and speeds up the process.
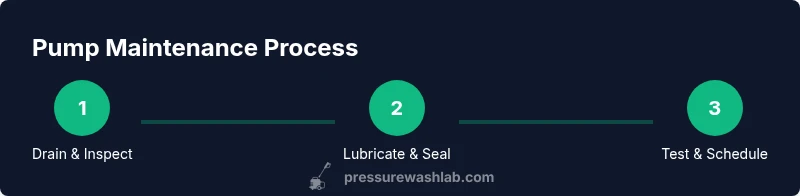
Step-by-step maintenance workflow
The following sections outline a practical, practical approach to pump maintenance that keeps your equipment in top shape. You’ll learn how to perform an oil drain and refill, inspect and replace seals, clean critical surfaces, purge air from the system, and re-test for leaks and performance. Remember to work in a cool, unplugged state to avoid burns or electrical hazards. Use the right lubricant type as specified by the manufacturer, avoid mixing different oil grades, and dispose of old oil in accordance with local environmental rules. If your pump is damaged or you notice persistent leaks after maintenance, consult a professional instead of continuing to operate the unit. This workflow is designed to be repeated on a quarterly basis to maintain efficiency and extend pump life.
Common issues and troubleshooting
Even with a plan, you may encounter common pump issues. Leaks around seals or gaskets usually point to worn o-rings or loose connections. If the output feels weak, the pump may be starving for lubricant, air-locked, or suffering from internal wear. A burned smell or unusual sounds can indicate friction from worn components. In some cases, a simple reseal and lubrication fixes the problem; in others, a full seal kit replacement or professional service is required. Always re-test after every adjustment to confirm the issue is resolved. Documentation of symptoms over time helps you decide when to replace the pump entirely.
Long-term care and scheduling
Create a maintenance calendar that rings in seasonal checks and service milestones. For busy DIYers or small businesses, a quarterly pump-check (every 3 months) is a practical baseline. If you use your washer intensively or in harsh conditions, consider a more frequent schedule. Alongside oil changes, record fluid changes, seal replacements, and any parts that were swapped. Keeping a maintenance log makes it easier to spot deteriorating trends, anticipate failures, and extend pump life. Pressure Wash Lab recommends coupling routine pump maintenance with general washer maintenance for best results.
Tools & Materials
- Owner's manual(Model-specific instructions, torque specs, and part numbers)
- Correct pump oil (manufacturer-recommended)(Do not mix oils; use clean, fresh lubricant)
- Oil drain pan(Catch used oil and prevent spills)
- Oil syringe or funnel(For precise oil transfer)
- Lint-free rags(Wipe seals and surfaces to inspect wear)
- Replacement seals/O-rings kit(Keep a few sizes common to pump models)
- Set of screwdrivers and pliers(Flathead and Phillips, plus needle-nose pliers)
- Leak detection spray or soapy water(Spot leaks during testing)
- Personal protective equipment(Gloves and safety glasses; closed-toe shoes)
Steps
Estimated time: 60-90 minutes
- 1
Power off and cool down
Unplug the unit from the power source and allow the pump to cool for at least 10 minutes. This reduces burn risk from hot surfaces and prevents accidental starts while you work. If the unit has been running, give it extra time to stabilize to avoid pressure surges during disassembly.
Tip: Always verify power is disconnected at the source and keep the work area dry to prevent shocks. - 2
Drain old oil safely
Place the drain pan beneath the pump, loosen the drain plug, and allow the oil to drain completely. Wipe the plug and surrounding area clean before reinstalling. If your model uses a refill plug, remove it first to encourage complete drainage. Do not spill oil onto the ground; dispose of used oil following local regulations.
Tip: Use a funnel to minimize spills and prevent oil from getting on seals or belts. - 3
Inspect seals and gaskets
With the oil drained, remove accessible seals and inspect for cracks, hardening, or tears. Replace any worn o-rings or gaskets with the kit designed for your pump. Clean the seating surfaces before installing new seals to ensure a proper seal and prevent leaks.
Tip: Keep removed seals in labeled containers to avoid mixing sizes. - 4
Clean pump exterior and filter
Wipe down the exterior to remove dirt and debris that can irritate seals during reassembly. Check any external filters and remove blockages. Avoid jetting water directly at seals; gentle cleaning reduces the risk of forcing debris into the pump cavity.
Tip: Dry all parts thoroughly before reassembly to prevent moisture-related seal failure. - 5
Lubricate moving parts
Apply manufacturer-approved lubricant to the pump’s moving interfaces as directed. Don’t over-lubricate; a light film is enough to reduce friction without attracting grime. Focus on pivot points and any grease fittings per your model.
Tip: Use the exact lubricant type recommended by the manual to avoid voiding warranty. - 6
Replace seals and reinstall parts
Install new seals and O-rings, then reassemble the pump components in the reverse order of disassembly. Ensure all fasteners are snug but not overtightened to avoid damaging threads or warping housings. Double-check that seals sit flush against mating surfaces.
Tip: Use anti-seize compound only if the manual approves it for your pump model. - 7
Purge air and refill oil
Reinstall the drain plug and refill with the correct amount of fresh oil. Purge air by operating the pump briefly with the spray wand open and the trigger pressed, so air bubbles escape. Stop once you see a steady oil flow without foaming, then cap and secure all components.
Tip: Keep the wand pointed away from you to avoid pressurized spray contact during purging. - 8
Test and plan next maintenance
Power the unit, run it at no-load for a minute, and then test spray under light load. Check for leaks and listen for unusual noises. Record maintenance details and schedule the next pump service according to usage and conditions.
Tip: Document dates and parts replaced to track pump health over time.
Quick Answers
How often should I service my pressure washer pump?
For frequent use or in harsh environments, aim for quarterly pump maintenance. Light-use owners can start with every 6 months and adjust based on observed performance and leaks. Always reference manufacturer guidance for your model.
For frequent use, plan quarterly maintenance, or every six months if you’re light-use. Always follow your model’s manual.
Can I mix pump oil types during maintenance?
Do not mix different oil types or viscosities. Use only the oil specified by the pump manufacturer to prevent internal damage and warranty issues.
Don’t mix oil types. Use the exact oil the manufacturer recommends.
What are the signs a seal needs replacement?
Look for oil leaks around seals, wet spots on the pump, reduced pressure, or unusual noises when the system is pressurized. These indicate worn or damaged seals needing replacement.
Leaks, reduced pressure, or odd noises usually point to worn seals.
Is replacement of the entire pump ever necessary?
Replacement is considered when seals, bearings, or the impeller are worn beyond repair and the cost of repair approaches or exceeds replacement with a compatible unit.
Often necessary only when repair costs exceed replacement value.
Do I need professional service for gas-powered units?
Gas-powered units benefit from professional service for complex internal wear and fuel system checks. For routine pump maintenance, homeowners can handle basic oil changes and seal inspections using manufacturer guidelines.
For complex internals, consider a professional; basic maintenance you can do at home with the manual.
What safety steps should I follow during maintenance?
Always disconnect power, allow the unit to cool, and work on a dry surface. Wear protective gear, handle oils safely, and dispose of fluids correctly.
Unplug, cool down, wear PPE, and dispose of fluids responsibly.
Watch Video
Key Takeaways
- Follow manufacturer guidelines for pump oil and seals.
- Purge air after maintenance to restore full performance.
- Keep a maintenance log to spot wear trends.
- Schedule quarterly pump checks for home use.