How to Clean a Pressure Washer Pump: A Practical Guide
Learn how to properly clean a pressure washer pump to extend its life, improve performance, and prevent downtime. This expert guide from Pressure Wash Lab walks homeowners through safe prep, flushing, oil checks, and maintenance routines.

In this guide you'll learn how to clean a pressure washer pump safely and effectively, including prep, flushing, filter maintenance, oil checks, and a final test. Regular cleaning helps prevent leaks, improves spray performance, and extends pump life. According to Pressure Wash Lab, a consistent cleaning routine reduces debris-related wear and keeps the system operating at peak efficiency.
Why a clean pressure washer pump matters
A clean pressure washer pump is essential for maintaining consistent pressure, preventing seal leaks, and extending the life of moving parts. Debris, mineral buildup, and residual detergents can clog seals and valve passages, leading to reduced flow and premature wear. Pressure Wash Lab analyses for 2026 show that routine pump cleaning, when paired with proper maintenance, correlates with fewer downtime events and longer service life. Homeowners and DIY enthusiasts benefit from a predictable workflow that minimizes surprise failures during busy cleaning seasons. By understanding how a pump operates and what contaminants tend to accumulate, you can set up a simple, repeatable routine that keeps your machine ready for everyday tasks—from driveway cleaning to car detailing.
Safety first: prep and precautions
Safety is non-negotiable when working on high-pressure equipment. Start by turning off the engine, disconnecting the power cord or battery, and relieving all pressure from the system. Wear eye protection and gloves, and work in a well-ventilated area with a stable surface. Keep children and pets away, and avoid placing hands near moving parts. If your unit is gas-powered, ensure you are outdoors or in a well-ventilated workshop. A clean, dry workspace helps prevent slips when handling hoses and fittings. Finally, consult the owner’s manual for model-specific cautions, as some pumps require special oil grades or disassembly procedures. Pro tip: never bypass the unloader valve or operate the pump without water flow, as that can cause instant damage.
Pump types and what this cleaning protects
Most home units use either an axial or a triplex plunger pump. While both generate high pressure, they have different wear patterns and lubrication needs. Cleaning routines protect the valve seats, seals, and internal chambers from abrasive debris and chemical residues. If you know your pump type, you can tailor your approach: oxidizing cleaners can harm certain elastomers, while mineral buildup may indicate hard-water impurities. Pressure Wash Lab’s guidance emphasizes matching cleaning agents to the pump materials and avoiding aggressive solvents that can degrade seals. Regardless of type, a surface clean and careful flushing help maintain correct flow paths and prevent contamination in future jobs.
What to consider before you start
Before diving in, confirm you have a water source with adequate flow and a safe drain for used fluids. Ensure you have the correct pump oils and replacement filters on hand, plus a basin to capture runoff. Establish a dedicated space where you can lay out tools and parts in order. A planned sequence helps you stay organized and reduces the risk of misplacing small components. If your unit uses chemical injectors, plan to flush out the chemical line with clean water after cleaning to avoid cross-contamination. Finally, check the unloader valve’s condition; if it’s stuck or leaking, you may need professional attention.
Step-by-step cleaning workflow (overview)
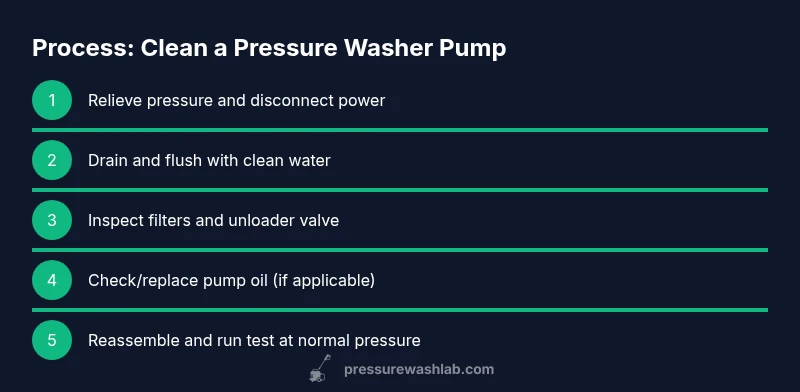
The cleaning workflow combines exterior cleaning, system flushing, filter and valve checks, oil service (when applicable), and a final test run. Start with the exterior to remove dust and grime, then flush water through the system to carry out debris. Inspect filters and the unloader valve for clogs or wear, and check pump oil if your model requires lubrication. Reassemble, test at a low pressure, and gradually increase to normal operating pressure while watching for leaks and unusual noises. This overview sets the stage for the detailed, step-by-step section that follows.
Step-by-step in detail (see dedicated section for exact actions)
For precise, numbered actions with timings, refer to the dedicated STEP-BY-STEP block below. The steps provide exact sequences, tool use, and safety tips so you can perform the cleaning with confidence. In short, you’ll relieve pressure, flush the system, service filters and oil, and re-test the pump. The goal is a clean, well-lubricated pump that performs reliably across typical cleaning tasks.
Maintenance plan to keep your pump in top shape
A proactive maintenance routine reduces the likelihood of unexpected downtime. Schedule a quarterly check of oil levels (if applicable), seals, and valve seats. Replace worn filters and inspect hoses for cracks or bulges. Keep the unloader valve clean and test its responsiveness. Mark your calendar to perform an annual professional inspection if you rely on your pressure washer for business or frequent high-load tasks. A simple log noting cleaning dates, oil changes, and filter replacements helps track wear patterns and plan replacements.
Troubleshooting common signs of contamination
If you notice decreased pressure, inconsistent spray, or unusual noises, contamination or internal wear may be the cause. Common culprits include clogged inlet filters, sediment in the water supply, or worn valve seats. A visual inspection can reveal loose fittings or leaks around seals. If leaks persist after flushing and cleaning, you may need to replace gaskets or seals. Remember, improper cleaning can cause more harm than good, so follow the manufacturer’s guidelines and avoid aggressive solvents that can degrade elastomers.
Tools & Materials
- Safety gear (gloves and eye protection)(Impact-resistant gloves and ANSI-approved eye protection)
- Owner’s manual(Model-specific guidance and oil type)
- Adjustable wrench(For hose connections and fittings)
- Screwdrivers (flat and Phillips)(Access covers and clamps)
- Drain pan(Catch any used oil or water)
- Rags and brushes(For wiping residue and cleaning nozzles)
- Clear water source or garden hose(Flushing the system and rinsing parts)
- Funnel and suitable container(For oil draining/refilling if applicable)
- Manufacturer-recommended pump oil(Oil grade specified in manual)
- Replacement inlet filters or screens(Optional, if worn or dirty)
Steps
Estimated time: 30-45 minutes
- 1
Relieve pressure and disconnect power
Ensure the unit is off, unplugged, and depressurized. Relieving pressure minimizes the chance of a spray valve releasing unexpectedly during disassembly. Remove the spray wand and ensure the unloader valve is in the open position to prevent pressure buildup as you work.
Tip: Keep a log of what you disconnect so you can reconnect in the correct order. - 2
Drain residual water and flush with clean water
Place a pan under the pump, open the drain and, if applicable, the bleed valve. Run clean water through the system to rinse out debris and soften residues. Do not run cleaners through the pump unless the manufacturer approves; flush only with water first to avoid chemical damage.
Tip: Flushing helps dislodge particulates that would otherwise settle inside the pump. - 3
Inspect and clean the water inlet filter and unloader valve
Remove the inlet filter and inspect for debris. Rinse or replace if clogged. Check the unloader valve for sticking or leakage; clean passages with a soft brush and ensure the seals are intact. Reassemble only after you confirm clearance and smooth operation.
Tip: If the unloader valve is gummy or stuck, do not force it; consult the manual or a technician. - 4
Check oil levels (oil-lubed pumps) and service as needed
If your pump is oil-lubed, drain and refill with manufacturer-specified pump oil. Check for milky or dark oil, which indicates contamination or wear. Refill to the recommended level and wipe away any drips from the exterior before testing.
Tip: Never mix different oils; fully drain old oil before refilling. - 5
Reassemble, test the system at low then normal pressure
Reconnect all components, prime the system with water, and perform a low-pressure test. Gradually increase to normal operating pressure while watching for leaks and listening for unusual noises. If any issues arise, depressurize and recheck seals and fittings.
Tip: Test on a safe surface and avoid aiming at people, animals, or fragile objects.
Quick Answers
Can I clean the pump without removing it from the pressure washer?
In many cases you can perform exterior cleaning and flush the system without full removal. However, some steps may require access panels or partial disassembly per the manual. Always follow the model-specific guidance to avoid damage.
You can often clean without removing the pump, but check your model’s manual for specific disassembly needs.
How often should I clean my pump?
For typical residential use, perform a light cleaning and flushing at the end of each cleaning season, with a full pump inspection annually or after heavy use. If you frequently use detergents or hard water, consider more frequent checks.
Clean and flush at least once per season, and inspect annually or after heavy use.
What are signs that the pump needs cleaning?
Look for reduced pressure, sputtering spray, unusual noises, or visible debris in the water line. Milky oil or oil contamination also signals the need for an oil change and a thorough flush.
Low pressure, sputtering spray, or odd noises can mean cleaning is needed.
Is it safe to use household cleaners on a pressure washer pump?
Most household cleaners are not designed for pump internals and can degrade gaskets and seals. Use cleaners only if the manufacturer approves and follow dilution and rinse instructions carefully.
Avoid household cleaners unless your manual approves them.
Do I need to replace pump oil when cleaning?
Oil changes are only required for oil-lubed pumps and should follow the manufacturer’s schedule. If the oil appears dirty or cloudy, drain and replace it with the recommended grade.
Replace pump oil only if your unit requires it and as recommended by the manual.
Watch Video
Key Takeaways
- Relieve pressure before any work.
- Flush cooling and debris from the system with water only unless advised otherwise.
- Inspect filters and the unloader valve to prevent contamination.
- Use manufacturer-recommended oil and parts for best results.