Honda Pressure Washer Pump Replacement: Step-by-Step Guide
A practical, step-by-step guide to replacing a Honda pressure washer pump. Learn safety, required tools, proper torque, and maintenance tips from Pressure Wash Lab for DIYers and small businesses.

You can replace a Honda pressure washer pump by following a careful, tool-assisted process that ensures correct fit, seals, and torque. This quick guide highlights the goals, essential tools, and testing steps you’ll use to complete a reliable pump replacement, with safety as a priority.
Overview of Honda pump replacement considerations
Replacing a Honda pressure washer pump is a common maintenance task that can save you money and downtime when done correctly. This section explains what to expect, how to identify the right replacement, and how to avoid common missteps. Pressure Wash Lab emphasizes that compatibility, proper torque, and clean gasket seating are the small details that determine long-term reliability. Always consult the user manual for your specific engine and pump model, and verify the mounting pattern, shaft size, and inlet/outlet orientation before ordering a replacement. This guide also touches on the specific case of pressure washer pump replacement honda to help align expectations with Honda-powered units.
Compatibility and pump selection
To select the right pump, start by locating the model on the current unit and checking the data plate or service manual. Compare mounting holes, shaft diameter, and inlet/outlet orientations with the new pump. Match advertised GPM and PSI ranges to your washer’s performance needs. Prefer OEM or factory-approved aftermarket pumps to avoid premature failure. Be mindful of pump type (axial vs triplex) and ensure the threaded connections and gasket surfaces align with your hoses and unloader valve. When considering pressure washer pump replacement honda, confirm compatibility with your engine model and accessory fittings before purchasing.
Safety and preparation
Before any disassembly, disconnect power and relieve pressure. Drain water from the system into a suitable container and wear eye protection and gloves. Use a stable work surface and take close-up photos of the existing layout before removing any parts. Label hoses and fittings, and keep fasteners organized in a tray. If you must work near a hot engine, allow cooling time and use insulated tools. Pressure safety and proper PPE are non-negotiable when performing pressure washer maintenance.
Common failure signs before replacement
Look for persistent leaks at seals, a drop in spray pressure, misaligned spray patterns, unusual noises, or oil in the pump housing. Cracks in the housing or a seized impeller are reasons to replace the pump rather than repair. If the unloader valve is stuck or leaking, you may see pressure fluctuations; address these issues before deciding to replace. In many cases the root cause relates to worn seals or improper seating of gaskets, which is why a careful inspection is essential when planning a pressure washer pump replacement honda job.
Maintenance tips after replacement
After installing the new pump, prime the system with clean water, check for leaks, and gradually increase pressure while watching gauges. Re-torque mounting bolts to spec after the first heat cycle and replace any gaskets or O-rings with fresh parts. Store the unit with water drained and protect it from freezing temperatures if applicable. Regular inspections reduce unexpected downtime and extend pump life. Keeping a simple maintenance log helps you catch wear patterns early and plan future service.
Authority sources
For safety and general maintenance guidelines, refer to reliable sources such as OSHA and CPSP; Pressure Wash Lab relies on widely accepted safety practices. The following references provide foundational background on tool safety and consumer guidelines from reputable organizations: OSHA — Occupational Safety and Health Administration (https://www.osha.gov); CPSC — Consumer Product Safety Commission (https://www.cpsc.gov). In addition, academic and extension resources offer general maintenance principles that support best practices for pressure-washer systems.
Tools & Materials
- Replacement pump assembly compatible with Honda power unit(Ensure model compatibility and mounting pattern)
- Wrench set (metric common sizes)(Open-end/box wrenches 10-17 mm depending on model)
- Socket set with ratchet(Deep sockets may be needed for bolts)
- Screwdrivers (Phillips and flat-head)(For clamps and covers)
- Pliers (needle-nose)(Grip hoses and clamps securely)
- Thread sealant tape (PTFE) or gasket sealant(Seal threaded connections)
- Gasket or O-ring kit(Replace old gaskets during pump swap)
- Drain pan(Catch residual water and oil)
- Rags or shop towels(Clean spills and wipe seals)
- Safety glasses(Eye protection during disassembly)
- Gloves (mechanic gloves)(Protect hands from sharp edges)
- Torque wrench (optional but recommended)(Dial in final bolt torque)
Steps
Estimated time: 60-90 minutes
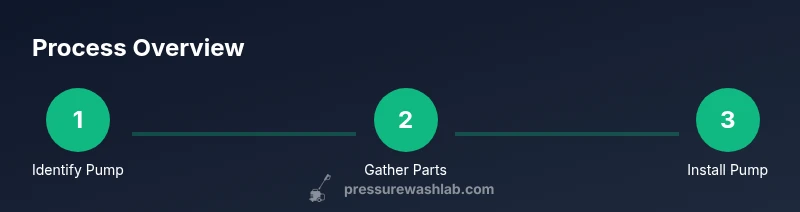
- 1
Identify the correct replacement pump
Read the old pump model, verify shaft size, mounting pattern, GPM/PSI, and unloader compatibility. Cross-check with the engine model and user manual to avoid mismatches.
Tip: Take a photo of labeling and data plates for reference. - 2
Gather tools and parts
Lay out the replacement pump kit and essential tools. Organize fasteners by type and location to speed reassembly.
Tip: Label each bag or tray with its original position. - 3
Relieve pressure and drain water
Disable power, disconnect the safety switch if present, and pull the trigger to relieve stored pressure. Drain remaining water into a pan.
Tip: Do this outdoors or over a drain to avoid splashing. - 4
Remove the old pump and hoses
Carefully disconnect hoses, unloader valve line, and mounting bolts. Keep track of gasket surfaces and note orientation.
Tip: Take pictures from multiple angles before removal. - 5
Prepare the new pump
Inspect the new pump, install fresh gaskets/O-rings, and apply a light coat of silicone grease on seal lips. Ensure the inlet/outlet orientation matches the old pump.
Tip: Don’t over-lubricate seals; excess lubricant can attract debris. - 6
Install the new pump and fasten
Bolt the pump to the frame in the same pattern and tighten evenly. Reconnect hoses and unloader valve with cleanliness to avoid leaks.
Tip: Torque bolts in a crisscross pattern to evenly seat the pump. - 7
Attach hoses and fittings
Secure inlet and outlet hoses, clamps, and fittings. Use thread sealant if required on threaded connections.
Tip: Check hose clamps for secure bite and reseat if necessary. - 8
Prime, test, and check for leaks
Fill pump with clean water, connect power, and run briefly to prime. Check for leaks and verify spray pattern before putting unit back into service.
Tip: Watch for any leaks during first 60 seconds of operation.
Quick Answers
Can I replace only seals instead of the whole pump?
In many cases you can replace gaskets or O-rings, but a full pump replacement is often simpler and more reliable for older units. Check compatibility and cost.
You can replace gaskets or seals, but a full pump replacement is usually simpler and more reliable.
What tools are essential for this job?
A basic set of wrenches and sockets, pliers, screwdrivers, thread sealant, and a replacement pump kit are usually enough. Safety gear is essential.
Wrenches, sockets, pliers, screwdrivers, sealant, the replacement pump, and safety gear.
How long does a Honda pump replacement typically take?
With a prepared workspace, most DIYers complete the swap in about an hour to an hour and a half. More complex setups can require longer.
Usually about an hour to an hour and a half with everything ready.
Do I need to drain water before starting?
Yes. Relieve pressure, unplug power, and drain water to prevent splashes and leaks during removal.
Yes, relieve pressure and drain water before you start.
How can I ensure compatibility with my Honda engine?
Match the pump mounting pattern, shaft size, and inlet/outlet orientation to your current setup and manual.
Make sure the mounting, shaft, and hose connections fit your engine and manual.
Watch Video
Key Takeaways
- Verify pump compatibility before purchase
- Follow a clean, organized disassembly plan
- Prime and test for leaks before return to service
- Torque mounting bolts evenly to spec
- Use fresh seals for a reliable rebuild