Replacement Pump Guide for Troy-Bilt Pressure Washers
Learn how to choose, install, and troubleshoot a replacement pump for Troy-Bilt pressure washers with a practical, safety-focused guide from Pressure Wash Lab. Includes compatibility checks, tools, step-by-step instructions, maintenance tips, and troubleshooting.

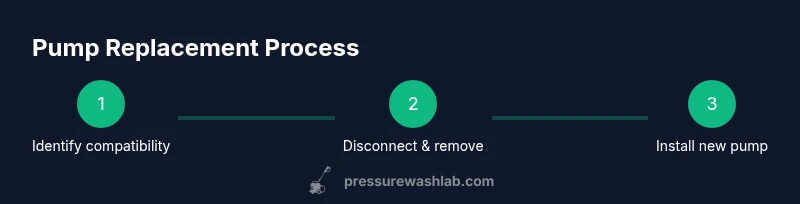
By following these steps, you can safely replace the pump on your Troy-Bilt pressure washer and restore peak performance. Ensure you match the pump to your model’s GPM, PSI, and mounting pattern, and gather basic tools before you start. This quick guide covers compatibility, removal, installation, and testing so you can get back to work quickly.
Replacement pump troy bilt pressure washer: Compatibility and Install
If your Troy-Bilt pressure washer is delivering weak spray, inconsistent pressure, or leaking around the pump, you may need a replacement pump. The key is compatibility: match the GPM (gallons per minute), PSI (pounds per square inch), shaft size, mounting pattern, and the inlet/outlet orientation with your unit. Pressure Wash Lab analysis shows that most failures stem from mismatched specifications or worn seals rather than a faulty motor alone. Start by checking your model number and consulting the manufacturer’s manual or a trusted aftermarket supplier that clearly lists compatible Troy-Bilt models. A well-matched replacement pump will restore flow, pressure, and reliability without requiring extensive plumbing changes.
Brand alignment and compatibility are essential. Your goal is to preserve the pump’s functional interface with hoses, valves, and the unloader valve, ensuring a safe, leak-free connection. When in doubt, prefer OEM pumps or aftermarket units explicitly labeled as compatible with your Troy-Bilt pressure washer. This minimizes the risk of improper threading, misaligned shafts, or incorrect seal sizes that can cause leaks or premature failure. Before purchasing, document model details, the current pump’s part number, and any relevant wear patterns to guide your selection.
How to choose the right replacement pump
Choosing the right replacement pump goes beyond simply matching the brand. A good replacement should align with three core specs: flow rate (GPM), operating pressure (PSI), and the pump’s mounting and connection geometry. Start by recording your unit’s GPM and PSI ratings from the label on the washer or the manual. Then compare those values to the replacement options, ensuring the inlet and outlet fittings align with your hoses and the unloader valve. Also verify shaft type and size, as well as mounting bolt pattern, to ensure the pump will bolt up without modification. Don’t overlook warranty terms and service support—OEM pumps typically carry better compatibility guarantees, while reputable aftermarket pumps should clearly state model compatibility and include appropriate seals and gaskets. Finally, consider whether you need a full kit (pump, seals, gaskets, and mounting hardware) to simplify installation and reduce leaks over time.
Safety considerations and prep before swapping
Before touching the pressure washer, prioritize safety and system depressurization. Turn off the engine, disconnect the spark plug wire (gas models), or unplug the unit if it’s electric. Relieve pressure by squeezing the trigger wand to exhaust stored pressure. Close the water supply to prevent accidental flooding when hoses are detached. Place a container or towels to catch residual fluid and wear eye protection and gloves. Clear your workspace to avoid tripping hazards, and have a clean, organized surface for reassembly. These precautions reduce the risk of unexpected spray, chemical exposure, or electrical faults during the pump replacement.
Removing the old pump (high-level overview)
With power off and the system depressurized, locate the pump mounting bolts and disconnect the hoses from the pump fittings. Keep track of which hose goes where by marking or photographing connections. Remove the mounting hardware and gently separate the pump from the engine or frame. If hoses are stubborn, apply a small amount of penetrating oil and allow it to soak briefly before attempting removal. Inspect the remaining fittings for wear and replace worn clamps or gaskets as needed. This stage sets the foundation for a successful installation of the new pump.
Installing the new pump (high-level overview)
Position the new pump in the mounting location, aligning bolt holes with the frame. Reattach the hoses to the correct inlet and outlet fittings, using thread sealant or Teflon tape where appropriate on threaded connections to prevent leaks. Tighten bolts evenly in a crisscross pattern to avoid warping the mounting flange. Recheck all connections for snugness, ensuring there are no kinks or twists in hoses. Prime the pump if required by your model, then reconnect the power source and run a brief test with the wand pointed into a safe drain area to confirm proper function and leak-free operation.
Testing and leak-checking after replacement
With the unit reassembled, turn on the water supply and power. Slowly engage the trigger to build pressure and observe for leaks around fittings and seals. If a leak appears, depressurize and tighten the appropriate connection. Listen for abnormal noises that could indicate misalignment or a loose coupling. If pressure is lower than expected, recheck the GPM/PSI compatibility and whether any gaskets or seals were installed correctly. After a successful test, perform a short extended run to ensure stable pressure under normal usage and monitor for heat buildup or unusual vibrations.
Common issues and troubleshooting
If the spray pattern is irregular or weak after replacement, verify that hoses are not kinked, the nozzle is correct for your desired spray, and the unloader valve is functioning as designed. Leaks near connections usually point to inadequately tightened fittings or damaged seals. A pump that runs hot or makes grinding noises may indicate misalignment or a defective drive coupling. For persistent problems, re-inspect all fittings, replace worn seals, and confirm you matched the model’s GPM and PSI exactly to the replacement pump. Pressure Wash Lab notes that many installation errors are caused by overlooking the unloader valve’s role in regulating pressure and by using incompatible gaskets.
Maintenance after pump replacement
After replacing the pump, perform routine maintenance to extend life: check and replace seals and O-rings during every major service, inspect inlet screens for debris, and use fresh lube on moving parts per manufacturer recommendations. Keep the water source clean and free of sediment to reduce wear. Store the unit in a dry, frost-free location during off-season and perform periodic pressure tests to ensure long-term reliability. Regular maintenance lowers the risk of premature pump failure and maintains peak performance of your pressure washer.
Tools & Materials
- Replacement pump for Troy-Bilt pressure washer(Ensure model compatibility with your unit and choose OEM or reputable aftermarket with included seals at minimum.)
- Wrenches (adjustable and fixed sizes)(Used to remove bolts securing the pump and clamps on hoses.)
- Screwdrivers (Phillips and flathead)(For hose clamps and small fittings.)
- Pliers (needle-nose and grooved)**(Helpful for gripping hoses and stubborn fittings.)
- Teflon tape or thread sealant(Seal threaded connections to prevent leaks.)
- Drain pan or pan for catching fluid(Place under unit during removal to catch oil or fuel spills.)
- Rags and degreaser(Clean work area; wipe spills and OEM surfaces.)
- O-ring kit and gasket set(Replace worn seals to prevent leaks.)
- Penetrating oil(Optional for freeing stubborn fittings.)
- Safety goggles and gloves(Personal protective equipment.)
Steps
Estimated time: 45-90 minutes
- 1
Power down and depressurize
Turn off the engine or unplug the unit, then relieve residual pressure by squeezing the spray trigger until the water stops. This prevents dangerous sprays and reduces the risk of hose rupture during disassembly.
Tip: Always verify depressurization with the wand pointed away from you before touching fittings. - 2
Disconnect water and power sources
Shut off the water supply and disconnect power to the unit. Detach the hoses from the pump carefully and place them out of the way to avoid tangling during installation.
Tip: Label hoses if you’re unsure which goes where for reassembly. - 3
Remove old pump mounting
Unbolt the pump from its mounting bracket using the appropriate wrench sizes. Keep hardware organized and note the orientation of the pump for correct alignment of the new unit.
Tip: Loosen bolts gradually in a crisscross pattern to avoid warping. - 4
Detach hoses and fittings
Carefully disconnect inlet/outlet hoses and remove any clamps. Inspect hose ends for wear and replace if necessary.
Tip: Keep track of gasket orientation to ensure proper sealing on reassembly. - 5
Install the new pump
Position the new pump and bolt it in place. Reattach inlet and outlet hoses to the correct fittings, applying thread sealant where needed.
Tip: Tighten bolts evenly to avoid bending the mounting flange. - 6
Reconnect power and water, then prime
Reconnect power and water supply, then prime the pump if required by your model. Open the water supply and bleed air by running the wand until a steady stream emerges.
Tip: If air remains trapped, loosen a small fitting briefly to allow air to escape. - 7
Test run and inspect
Run the unit in a safe area and inspect for leaks, unusual noises, and proper spray. Address any leaks or misalignment before normal use.
Tip: Perform a 1–2 minute test at low pressure before full operation.
Quick Answers
Can I use a non-OEM replacement pump in a Troy-Bilt pressure washer?
OEM pumps usually guarantee compatibility with Troy-Bilt units, while reputable aftermarket pumps can work if they match the unit’s GPM, PSI, and fittings. Always check warranty and manufacturer guidance.
OEM pumps are safest for compatibility, but a well-matched aftermarket option can work if specs align.
What signs indicate the pump needs replacement?
Look for reduced pressure, unusual noises, leaks at fittings, inconsistent spray, or overheating. These indicate potential pump failure or seal wear.
If you notice low pressure or leaks, start by inspecting seals and connections.
Do I need to replace hoses or gaskets at the same time as the pump?
Yes, inspect all hoses and gaskets for wear and replace worn items during pump replacement to prevent leaks and ensure a tight seal.
It's smart to replace worn gaskets now to avoid future leaks.
Will replacing the pump affect the unit’s warranty?
Replacing a pump can affect warranty depending on the brand policy. Check Troy-Bilt’s warranty terms and whether an OEM or approved service is required.
Warranty rules vary; verify with the manufacturer before proceeding.
How long does a typical pump replacement take for a DIYer?
Most DIYers complete the task in 1–2 hours, depending on model familiarity and tool access. Rushing can cause mistakes, so take your time.
Plan for about an hour or two, depending on your experience.
Watch Video
Key Takeaways
- Verify compatibility before buying a replacement pump
- Follow a clean, labeled process to avoid miswiring or leaks
- Test under controlled conditions before normal use
- Replace worn seals and gaskets to prevent future leaks
- Maintain the pump and plumbing to extend life