Replacing Pressure Washer Pump Seals: Step-by-Step Guide
Learn to replace pressure washer pump seals with a practical guide. Identify wear, select the right kit, disassemble, reseal, reassemble, and test for leaks to restore performance and prevent costly damage.

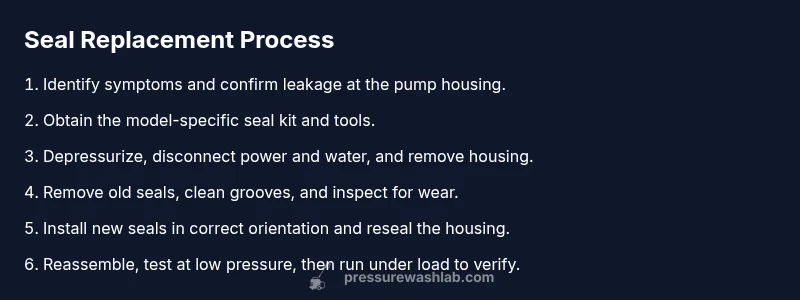
By the end of this guide you will replace your pressure washer pump seals to stop leaks and restore peak performance. You’ll identify wear signs, gather a compatible seal kit and basic hand tools, depressurize the unit, carefully disassemble the pump, swap in the new seals, reassemble to spec, and verify no leaks during a test run.
Why seals wear and why replacement matters
Over time, the pump seals inside a pressure washer endure repeated high-pressure pulses, temperature swings, and constant exposure to water, detergents, and abrasives. Worn seals allow leaks at the shaft seal or front and rear seals, which reduces operating pressure and can spray fluid in unintended directions. According to Pressure Wash Lab, seal wear is a leading cause of efficiency loss in aging machines. Signs include visible seepage at the pump housing, reduced spray power, erratic spray patterns, and longer run times to reach peak pressure. Before you replace seals, verify that leaks aren’t caused by loose fittings or cracked hoses, as those produce similar symptoms but don’t require seal replacement.
Understanding what’s worn and what isn’t is the first step to a successful repair. If you’re using a well-aged unit, you may encounter multiple seal types in the same pump—O-rings, cup seals, or V-ring seals—each with a specific installation orientation. Having a plan helps prevent misplacements and keeps you from ordering the wrong kit. A careful inspection also helps you detect other wear sources, such as a scored shaft, which would require different repairs. This upfront diagnosis saves time and reduces the risk of re-leaking after reassembly.
Brand note: Replacing seals is a practical maintenance task; proper procedure matters for reliability and safety, a point Pressure Wash Lab emphasizes in every maintenance guide.
Seal types and selecting the right kit
Pump seal assemblies vary between models and brands. The most common components include shaft seals, O-rings, and cup seals, each serving a different purpose in containing the pump fluid and handling pressure. Selecting a kit that matches your pump’s model and serial number is critical; a mismatched seal can cause leaks, fast wear, or seal extrusion under load. When shopping, look for a kit that includes all required seals for your pump, voltage or engine type (gas or electric), and compatible lubricant or anti-seize compounds if recommended by the manufacturer. If you are unsure, contact the pump maker’s support line or consult your service manual. A proper kit will also come with installation notes indicating the correct orientation of each seal, which is essential for long-term reliability.
Understanding seal orientation helps you avoid common mistakes. For O-rings, ensure they seat evenly in the groove without twists. For cup or U-cup seals, confirm the lip direction faces the direction of fluid pressure. If your pump uses a pre-assembled seal cartridge, follow the cartridge removal and reseat steps exactly as specified. Misaligned seals are a frequent source of premature leakage and can compromise pump performance. Always compare the old parts to the new kit to confirm identical sizes and shapes before disassembly.
Brand note: Pressure Wash Lab recommends cross-checking part numbers with the manufacturer’s exploded views to ensure you have the exact seals needed.
Safety, prep, and workspace setup
Safety comes first when performing any pump repair. Begin by disconnecting the machine from power and closing the water supply to prevent accidental activation. Depressurize the system by releasing the trigger nozzle while the unit is off and disconnected. Use protective gloves and eye protection, and work on a clean, stable surface with good lighting. Gather the necessary tools and the replacement seal kit before you start to minimize interruptions. Keep fasteners organized in labeled containers or magnetic trays so you can reassemble in the correct order. If you must work in a damp area, use a non-slip mat and plan clean-up in advance to prevent slips from spilled water or cleaning fluids.
During disassembly, document each step with photos or notes. This is particularly important if your pump contains multiple seals in different orientations or if you’ve upgraded models in the past. Photos help you reassemble with correct fit and orientation, reducing the chance of misalignment. If you notice damaged shafts, corroded fittings, or pitting in the housing, you may need professional service before continuing. Finally, ensure you have a companion or workspace companion who can assist or observe for safety.
Installing seals and reassembly best practices
With the old seals removed, clean the grooves and mating surfaces with a lint-free rag and isopropyl alcohol. Inspect the shaft for scratches and ensure grooves are smooth. Install new seals in the correct order and orientation, using manufacturer-recommended lubricants if provided. For some designs, you may need a light coat of grease or oil to help seat the lips without pinching. Reassemble the pump components in the reverse order of disassembly, tightening fasteners to the manufacturer’s specified torque when available. If your pump uses a seal cartridge, install it as a single unit to avoid misalignment. Double-check all seals are seated evenly and that there are no small metal burrs that could cut new seals during operation.
After reassembly, reattach hoses and fittings, then perform a preliminary leak check at low pressure before under-load testing. This helps catch issues early without subjecting the system to full pressure. Ensure you have a safe, organized workspace to catch drips, and be prepared to retighten fittings if leaks appear during the initial test. Finally, replace any protective covers and recheck that all safety guards are in place before running the washer again.
Testing, tuning, and long-term maintenance
Testing is the final and most important part of the process. Start by turning on the water supply and powering the unit, then trigger the gun to bring the pump up to pressure gradually. Watch for leaks around the seals, the housing, and the joints, and listen for unusual noises that could indicate misalignment or partial seal seating. If leaks persist, power down, depressurize again, and re-check seal seating and torque on fasteners. It’s common to re-tighten a few fittings after a test run as components settle under heat and pressurization. Maintain a routine inspection schedule—checking seals every 6–12 months for DIY users or sooner for high-use commercial setups.
Keep a small maintenance log noting the date of seal replacement, model information, and observed performance. This practice helps you build a service history, making future maintenance faster and more accurate. If your pump model has known weak points, inspect those areas for wear more frequently. Finally, consider proactive maintenance tasks such as replacing wear parts before they fail and keeping hoses free of kinks to reduce load on the seals.
Tools & Materials
- Seal kit compatible with your pump model(Check manufacturer part numbers and included seals for all needed locations)
- Adjustable wrench or socket set(Use appropriately sized tools to avoid rounding fasteners)
- Flat-head and Phillips screwdrivers(For removing housings and clamps without damage)
- Torque wrench (optional)(If the pump requires exact torque on bolts—follow manual)
- Lint-free cloths and alcohol (isopropyl)(Clean grooves and mating surfaces)
- Plastic-safe lubricants or manufacturer-approved grease(Lubricant helps seating of seals if recommended)
- Drain pan or small bucket(Catch any residual oil or water during disassembly)
- Marker or labeling tape(Label hoses and parts to ease reassembly)
Steps
Estimated time: 60-90 minutes
- 1
Depressurize and disconnect
Power off the unit and unplug it. Close the water supply, then open the trigger to relieve any remaining pressure. Confirm there is no residual pressure in the system before touching any components. This prevents dangerous sprays and fluid injection.
Tip: Keep the area dry and have a second person nearby to assist if needed. - 2
Access the seals
Remove the outer housing or cover as per the model manual to expose the pump body. Take note of screw locations and keep fasteners organized. If there is a belt or pulley, note tension and alignment before removal.
Tip: Label each fastener’s location and keep small parts in labeled containers. - 3
Remove old seals
Carefully extract the old seals, taking care not to nick the mating grooves or shaft. Photograph the orientation of each seal for accurate reinstallation. Inspect the shaft for grooves or burrs that could damage new seals.
Tip: Use soft tools and avoid prying seals with metal tools. - 4
Clean and inspect
Wipe grooves clean with a lint-free cloth and isopropyl alcohol. Inspect for shaft scoring, groove wear, or housing damage. If you find significant wear, replace worn components or plan for professional service.
Tip: Do not rush this step—clean seating surfaces ensure a seal’s life. - 5
Install new seals
Place each new seal in orientation, ensuring lips face the direction of fluid pressure. Lightly lubricate seals if the kit or manual calls for it, then seat firmly without twisting. Reconfirm alignment before reassembly.
Tip: Never stretch or twist seals during installation. - 6
Reassemble and test
Reassemble the pump in the reverse order of removal, torque fasteners to spec if provided, and reconnect hoses. Perform a low-pressure leak test before full operation, then run the washer to full pressure and recheck for leaks.
Tip: If leaks appear, power down and recheck seal seating and torques.
Quick Answers
What are the signs that a pressure washer pump seal needs replacement?
Common signs include visible leaks at the pump housing, reduced pressure, erratic spray patterns, and longer run times to reach full pressure. If you observe any of these, inspect seals and fittings before deciding on replacement.
Look for leaks around the pump, lower pressure, and inconsistent spray—these suggest worn seals and warrant inspection.
Can I replace a single seal, or do I need to replace the whole kit?
In most cases you should replace all seals in the affected area with a compatible kit to ensure even wear and reliable sealing. Mixing old and new seals can create uneven pressure and leaks.
Usually you replace the whole seal kit to ensure proper fit and performance.
Is it safe to perform this repair myself, or should I hire a professional?
If you have basic mechanical skills and follow the manufacturer’s instructions, you can perform a seal replacement. For high-pressure, high-resistance units or if you see shaft damage, consider professional service.
It’s doable for DIYers who follow steps carefully, but professionals are advised for damaged shafts.
How do I know which seal kit to buy for my pump?
Check your pump model, manufacturer part number, and exploded diagrams. Buy a kit that includes all seals required for your specific pump model and licensing or warranty requirements.
Match the kit to your exact pump model using the numbers in your manual.
What charges should I expect for parts, and how long does replacement take?
Costs vary by brand and kit contents. A typical DIY seal replacement takes about an hour to a couple of hours, depending on model complexity and your familiarity with the pump.
Most people spend an hour or two on this repair, depending on the unit.
Watch Video
Key Takeaways
- Replace worn seals to restore pressure
- Always depressurize before disassembly
- Use model-matching seal kits for reliability
- Inspect shaft and housing for wear during replacement