Wash Pressure Cleaning: A Complete How-To
Learn how to wash with pressure cleaning safely and effectively. This step-by-step guide covers prep, nozzle choices, detergents, and techniques for concrete, siding, and wood surfaces, with practical tips for homeowners.

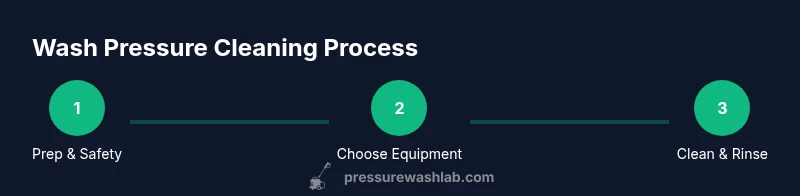
You will learn a safe, effective workflow to wash surfaces using a pressure washer: prep the area, select the right nozzle and pressure, apply cleaner when needed, and rinse thoroughly. Gather PPE, eye protection, and a reliable water supply, then follow the step-by-step instructions to protect your surfaces while achieving cleaner results.
What is wash pressure cleaning and why it matters
Wash pressure cleaning uses high-pressure water to remove dirt, mold, grime, and stains from exterior surfaces. It can dramatically improve curb appeal and surface longevity when done carefully. According to Pressure Wash Lab, proper prep and surface assessment are the foundation of a safe, effective wash pressure cleaning. The goal is to match technique to surface and avoid aggressive sprays on delicate materials. For homeowners, the right approach balances speed with protection to achieve cleaner results without damage. Understanding surface types, common contaminants, and expected outcomes helps you decide when pressure washing is the best tool for the job.
Surface preparation and safety checklist
Before you spray, clear the area of people and pets, cover plants, and secure outdoor outlets. Wear protective eyewear, gloves, and non-slip footwear. Check weather conditions and avoid direct sun on detergents. Inspect the surface for loose coating or loose material and plan a two-zone approach for large areas. A quick test on a small patch lets you gauge reaction and adjust pressure. Prioritizing safety reduces risk to people, pets, plants, and property while delivering consistent results.
Selecting equipment and settings
Your setup determines safety and results. A consumer-grade pressure washer with adjustable nozzle offers flexibility for different surfaces. Start with a broad spray to assess reaction and switch to narrower angles only on durable materials. Use a surface cleaner attachment for flat concrete to minimize streaks. Detergents can help lift grime on siding, but ensure chemical compatibility with the surface and washer. Always consult the equipment manual and follow manufacturer guidelines for best outcomes.
Understanding nozzle angles and spray patterns
Nozzle selection drives both effectiveness and surface safety. A wide spray angle reduces targeted impact on fragile materials, while steeper angles remove heavy grime from hard surfaces. For delicate surfaces like aged wood or vinyl, keep the spray moving and avoid held pressure in one spot. When dealing with tough stains on masonry or concrete, a narrower spray can help but may require more distance and longer passes to prevent damage. Practice on inconspicuous areas first.
Cleaning techniques for different surfaces
Concrete and brick tolerate higher pressures and longer passes, but it’s wise to keep the spray moving to avoid surface etching. For vinyl siding, use a broad spray and keep the wand at a safe distance to prevent water intrusion behind panels. Wood decks require a gentler touch; test in a hidden area and consider a lower-pressure setting with a wider spray pattern to avoid gouging or splintering. Metal surfaces respond well to medium pressure and a slightly angled spray. Always rinse from the bottom up to push debris away from the surface.
Cleaning sequence: from prep to rinse
Start with a light pass to loosen surface grime, then switch to a deeper pass on stubborn areas. Work in sections, moving steadily, and keep the nozzle at a consistent distance from the surface. Apply detergent only where needed, and rinse thoroughly after cleaning to prevent residue. Finish with a final rinse from the bottom up and inspect for missed spots. If you encounter stubborn stains, repeat the targeted pass rather than applying excessive pressure.
Common mistakes and how to avoid them
Avoid targeting electrical outlets or meters with water. Do not hold the nozzle too close to wood or siding, which can cause splintering or paint damage. Skipping detergent when grime has built up often requires more time and effort; test a small area first. Don’t forget to cover nearby plants and plants before spraying. Always test on an inconspicuous area before tackling visible surfaces.
Detergents, cleaners, and rinsing basics
Choose detergents designed for pressure washers and compatible with the surface you’re cleaning. Use the correct dilution and apply according to the product instructions. Rinse thoroughly to remove any cleaning residue, as leftover soap can attract dirt and cause streaks. For large areas, consider a two-pass approach: apply cleaner in one direction and rinse in the opposite direction to ensure complete coverage.
Maintenance and aftercare for your pressure washer
After finishing, flush the system with clean water to remove residual detergent. Clean filters and remove any debris from the nozzle and hose. Store the equipment in a dry, shaded area and inspect hoses for wear. Regular checks extend the life of your washer and keep performance consistent. Regular maintenance also reduces the likelihood of leaks and clogs over time.
Authority sources and further reading
For safety and best practices, consult reputable sources such as the U.S. Environmental Protection Agency (EPA) and university extension programs. Additional guidance from trade associations and equipment manufacturers provides surface-specific recommendations. This section consolidates helpful references to deepen your understanding and ensure responsible use of pressure washing.
Tools & Materials
- Pressure washer (electric or gas)(Choose one with adjustable pressure and adequate flow rate for your surfaces)
- Nozzle set (0°, 15°, 25°, 40°)(Use wider angles for delicate surfaces; switch to narrow for heavy grime only on durable surfaces)
- Surface cleaner attachment (optional)(Helps keep a flat, even cleaning on horizontal surfaces)
- Detergent/soap designed for pressure washers(Ensure compatibility with surface and washer; apply as directed)
- Garden hose and water source(Stable supply and correct adapters)
- Personal protective equipment (PPE)(Safety glasses, gloves, non-slip footwear, ear protection if needed)
- Plastic sheeting or cloth coverings(Protect plants, furniture, and outlets)
- Soft-bristle brush or deck brush(For stubborn spots or textured surfaces)
- Tarp or ground cover(Contain debris and protect landscaping)
Steps
Estimated time: 1-2 hours
- 1
Assess surface and plan strategy
Walk the area to identify surface types and stains. Decide which surfaces need gentle treatment and which can handle higher pressure. This planning reduces risk and saves time later.
Tip: Test a small, inconspicuous patch first to confirm surface tolerance. - 2
Prepare area and PPE
Clear the workspace, cover plants, and remove fragile items. Put on eye protection, gloves, and non-slip footwear. Ensure the water source and electrical outlets are protected from spray.
Tip: Keep pets inside and away from the work zone. - 3
Attach nozzle and test spray
Attach the widest angle nozzle for initial passes and test on a hidden area. Check spray pattern and distance on a mock surface. Make sure you have control over the wand at all times.
Tip: Stand with your feet shoulder-width apart to maintain balance. - 4
Apply cleaner when needed
Apply detergent as directed, focusing on heavy grime and mold. Allow sufficient dwell time for the cleaner to lift contaminants, then dampen the surface with clean water before rinsing.
Tip: Avoid letting detergent dry on surfaces; keep it moving with a light mist. - 5
Wash surface methodically
Work in sections, moving the spray in steady, overlapping passes. Maintain a safe distance and keep the wand moving to avoid etching or streaks. Use a surface cleaner for large flat areas when possible.
Tip: Never hold the nozzle in one spot for an extended period. - 6
Rinse thoroughly and inspect
Rinse from bottom to top to push grime away and avoid streaks. Inspect for missed spots and re-clean as needed. Ensure no detergent residue remains on surfaces.
Tip: Check for run-off that could affect landscaping. - 7
Shut down and clean up
Turn off the machine, relieve pressure, and store attachments properly. Rinse hoses and nozzles with clean water to prevent residue buildup.
Tip: Dry and store equipment in a dry, shaded area.
Quick Answers
Is pressure washing safe for vinyl siding?
Yes, when you use a broad spray pattern, maintain distance, and avoid high pressure directly on seams. Always test first on a hidden area and follow manufacturer guidelines.
Yes, vinyl siding is safe with broad spray and proper distance. Test first and follow the manufacturer guidelines.
Can pressure washing remove mold from wood decks?
Pressure can help remove surface mold on wood decks, but use lower pressure and a gentle spray. Consider applying a deck-safe cleaner and allow it to work before rinsing.
Pressure can help with mold on wood decks if you use gentler spray and a deck-safe cleaner.
Do I need detergent for every wash?
Detergents are beneficial for heavy grime, mold, or algae. For light dirt, water alone may suffice. Always follow product instructions and surface compatibility.
Detergent helps with heavy grime, but water alone can work for light dirt.
What safety gear should I wear?
Wear protective eyewear, gloves, non-slip footwear, and hearing protection if your washer is loud. Keep others away from the work area.
Protect your eyes and hands, wear non-slip shoes, and keep bystanders away.
How long does a typical wash take?
Time depends on area and surfaces. A small deck might take an hour or two; larger areas can take longer. Plan for breaks and do not rush.
It varies; plan for one to several hours depending on the size.
Can I rent a pressure washer for this job?
Yes, renting is a good option for occasional tasks. Ensure the rental unit provides adequate pressure and flow, and follow safety instructions.
Renting is fine for occasional jobs; make sure the unit is suitable and follow safety rules.
Key Takeaways
- Plan surface-specific approach before starting
- Use the right nozzle for the surface to avoid damage
- Protect plants and electrical components from spray
- Rinse thoroughly; avoid detergent residue
- Maintain equipment for long-term performance