How to Service a Pressure Washer: A Complete Guide
Learn to service a pressure washer safely with a practical, step-by-step guide from Pressure Wash Lab. Inspect, replace seals, clean components, and set a maintenance schedule to keep your equipment performing at its best.

You will learn how to service a pressure washer safely and effectively, extending its life and maintaining peak performance. This guide covers basic maintenance, common troubleshooting, required tools, and safety precautions. You’ll inspect seals, replace worn o-rings, clean the pump, check the unloader valve, and test spray patterns. Start with unplugging power, turning off fuel supply, and depressurizing the system.
What servicing a pressure washer involves
Regular service of a pressure washer is more than a quick wipe down. It is a scheduled routine that keeps the machine performing at its best and reduces downtime. According to Pressure Wash Lab, a well-executed service focuses on inspecting the pump seals, testing the unloader valve, cleaning the cooling vents, and replacing worn O-rings before they fail. This approach helps maintain consistent pressure, prevents leaks, and extends overall life of the unit. The service process begins with safety steps: unplug the power, shut off the fuel supply if you have a gas model, and relieve any stored pressure by depressing the trigger with the wand pointed in a safe direction. Next, you inspect hoses for cracks, examine the spray nozzle for wear, and confirm that the inlet filter is clear. The goal is to identify obvious wear and hidden corrosion before a minor fault becomes a costly repair.
Common issues and misdiagnoses
A lot can go wrong with a pressure washer, but most problems fall into a few patterns. Low or pulsating pressure often indicates nozzle wear, clogged filters, or a failing unloader valve. Leaks from hoses or seals point to aging connections, loose clamps, or cracked fittings. If the pump runs loudly or overheats, inspect cooling vents and oil level (for some gas models). By understanding these symptoms, you can triage quickly and avoid guessing.
Basic maintenance checklist you can perform monthly
A monthly check helps catch wear before it becomes a failure. Start by inspecting all hoses for cracks or bulges and replacing damaged sections. Check the unloader valve for leaks and ensure the spray wand nozzle is not worn. Clean the water inlet filter and flush the system with clean water to remove debris. Lubricate moving parts sparingly with a light spray and store the unit in a dry place.
Safety considerations and PPE
Always wear eye protection, gloves, and closed-toe shoes when handling a pressure washer. Relieve pressure before disconnecting hoses and never point the wand at people or delicate surfaces. If you smell fuel or see fuel leaks, work in a well-ventilated area and address fuel issues before operation. For electric models, unplug from the outlet and avoid water exposure to cords.
Authority Sources
- OSHA Safety and Cleaning Standards: https://www.osha.gov
- EPA Groundwater Protection: https://www.epa.gov
- Energy Star and related guidelines: https://www.energy.gov
Maintenance schedule and troubleshooting flow
Establish a simple routine: after each use, perform a quick visual inspection for leaks and wear; weekly, check hoses and nozzle condition; monthly, replace worn seals and clean filters; quarterly, service the pump seals and unloader valve if you notice reduced performance. When in doubt, follow a logical troubleshooting flow: confirm water supply, inspect for leaks, verify nozzle integrity, then test operation with the wand pointed away from people and surfaces.
Tools & Materials
- Power source (electric outlet or generator)(Unplug during service; ensure the outlet is properly grounded)
- Wrench set (adjustable)(Used to remove panels and fittings)
- Flathead and Phillips screwdrivers(For screws on housings and nozzles)
- Replacement O-rings and seals (assorted sizes)(Keep a basic kit on hand)
- Unloader valve kit or seals(Only if valve shows leaks)
- Lubricant (silicone spray)(Light lubrication on moving parts)
- Rags and catch bucket(For drips and post-work cleanup)
- Shop towels(Absorb spills)
- Safety goggles and gloves(Personal protective equipment)
- Water supply hose and nozzle(Ensure clean water flow during testing)
- Protective footwear(Closed-toe shoes; avoid slips)
- Fuel and stabilizer (gas models)(Only for gas powered units; store safely)
Steps
Estimated time: 60-90 minutes
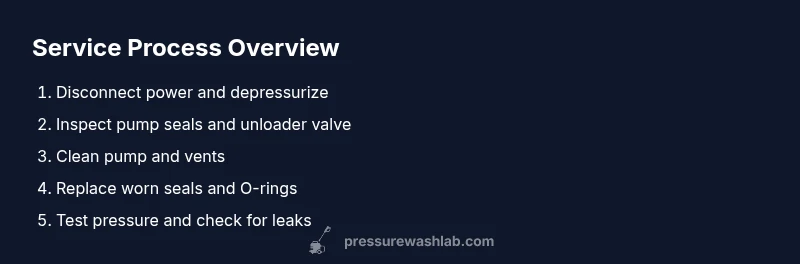
- 1
Disconnect power and depressurize
Unplug the unit from the power source and, if gas-powered, seal the fuel valve. Release residual pressure by holding the trigger with the wand pointed away from you until a steady stream of water is emitted. This reduces the risk of leaks and tool damage during disassembly.
Tip: Always wear eye protection when depressurizing; never point the wand at yourself. - 2
Inspect exterior hoses and connections
Visually examine all hoses for cracks, bulges, or signs of wear. Check clamps for tightness and look for any oil or water leaks at connections. Replace damaged sections or tighten fittings as needed to prevent future failures.
Tip: Replace damaged hoses in pairs if possible to maintain balanced flow. - 3
Open access panels and inspect internals
Remove access panels to inspect the pump seals, gaskets, and the unloader valve. Look for crusted debris or fluid buildup that indicates a leak. Wipe clean and prepare for possible replacement parts.
Tip: Take photos before disassembly to guide reassembly. - 4
Replace worn seals and O-rings
Install fresh seals and O-rings where signs of wear are present. Ensure correct orientation and seating to prevent leaks. Avoid over-tightening which can damage seal rings.
Tip: Lubricate O-rings with a light silicone lubricant to ease installation. - 5
Clean pump and cooling vents
Remove debris from cooling vents and wash away mineral deposits from the pump housing. If practical, flush the water inlet screen and clean filters to restore proper flow. Dry all parts thoroughly before reassembly.
Tip: Never use harsh chemicals that could degrade seals. - 6
Reassemble and test
Reinstall panels and reconnect power or fuel. Turn on the water supply and slowly operate the wand to test for leaks and proper pressure. Check for abnormal noises or vibrations, which may indicate misassembly.
Tip: Test at low pressure first, then gradually increase to normal operating levels. - 7
Document maintenance and set a schedule
Record the service actions taken, parts replaced, and any observations. Schedule the next service based on usage and environment. A simple log helps you catch wear early and plan replacements before failures occur.
Tip: Keep a digital or physical log accessible near the unit.
Quick Answers
How often should I service my pressure washer?
Regular servicing should be scheduled based on usage and environment; perform a full preventive check and parts inspection at logical intervals to prevent downtime.
Schedule regular preventive checks based on how you use the unit to prevent downtime.
DIY or professional service—what should I do?
Many routine maintenance tasks are safe to perform yourself if you follow safety steps. For major pump work or fuel system issues, consult a professional.
You can do many maintenance tasks yourself, but consider a pro for major pump repairs.
What parts wear fastest in a pressure washer?
Nozzles, O-rings, seals, and pump-related components tend to wear with use. Inspect these parts regularly and replace as needed.
Nozzles and seals wear fastest; inspect them regularly.
Is it safe to run a pressure washer without water?
No. Running without water can quickly damage seals and overheat the pump, risking severe damage.
Never run it dry; always have a water supply.
What should I do if I see oil leaks?
Shut down, locate the source of the leak, and replace seals or gaskets as needed. If gas models are involved, check the fuel system for contamination.
Shut down and inspect for leaks; replace seals as needed.
Do I need to drain fuel for storage?
For gas models, drain or stabilize fuel before storage and store away from heat sources. Follow local disposal guidelines for old fuel.
Drain or stabilize fuel before storage and dispose of old fuel properly.
Watch Video
Key Takeaways
- Inspect and replace worn seals to prevent leaks.
- Depressurize and unplug before any disassembly.
- Follow a consistent maintenance schedule for reliability.
- Keep a maintenance log to help plan future service.