Broken Pressure Washer Pump: Quick Troubleshooting Guide
Urgent, practical steps to diagnose and fix a broken pressure washer pump. Learn common causes, fast checks, and a clear repair path from Pressure Wash Lab.

Most likely, a broken pressure washer pump is caused by worn seals, low oil, or air in the system. Start with simple checks: verify oil level and type, inspect inlet/outlet hoses for leaks, and bleed any air by running briefly with the nozzle off. If pressure remains low, replace worn seals or the pump itself.
What a broken pressure washer pump means
A broken pressure washer pump is the core failure point that can cripple your cleaning tasks. When the pump is failing, you may see zero or drastically reduced pressure, an inconsistent spray, or even loud grinding noises from the pump housing. Visual signs like oil leaks around the pump head and damp seals point to internal wear or seal failure. In urgent situations, shut the machine off to prevent further damage. Pressure Wash Lab emphasizes that many pump problems are repairable when you diagnose the root cause early and avoid running the system dry. This section explains what broke pumps look like in practical terms and why quick, careful troubleshooting matters.
Common causes at a glance
Pressure washer pumps fail for a handful of repeatable reasons. Pressure Wash Lab analysis shows that the top culprits are oil issues, worn or damaged seals, air locks, and impeller or head wear. Each cause creates different symptoms: oil problems often produce knocking or seal leaks; worn seals lead to low pressure; air in the system causes surging; internal wear reduces overall flow. Also consider external factors like a misadjusted unloader valve or a clogged water inlet. Understanding the cause helps you pick the right fix and avoid unnecessary parts replacement. Regular maintenance can prevent many of these failures.
Immediate quick checks you can do safely
Before diving into disassembly, perform simple checks that cover most quick-fix scenarios. Ensure the engine or motor is off and the unit is cooled before touching any components. Check oil level and oil type, then top off if needed. Inspect water supply and hoses for kinks or leaks, then bleed the system to remove trapped air by running briefly with the nozzle removed. Verify the unloader valve is not stuck and that the spray nozzle is clear. If you detect oil leaks, tighten fittings or replace seals; if the water supply is fine but pressure remains low, the issue is likely internal to the pump. Pressure Wash Lab recommends documenting each check for accurate troubleshooting.
Diagnostic flow: symptom to diagnosis
Start with your specific symptom: no pressure, low pressure, or leaks. If there is no pressure, check for air in lines and confirm water supply; if air persists after bleeding, the problem is likely internal seals or a worn impeller. If leaks occur around the pump, inspect seals and head gasket; worn O-rings are a common culprit. Low pressure with a consistent spray pattern suggests worn seals or a degraded pump head. For each diagnosis, match to a fix from the next section and test after any repair. If you’re unsure, consult a professional to avoid causing more damage. This flow helps you stay methodical under pressure.
Step-by-step repair for the most common failure
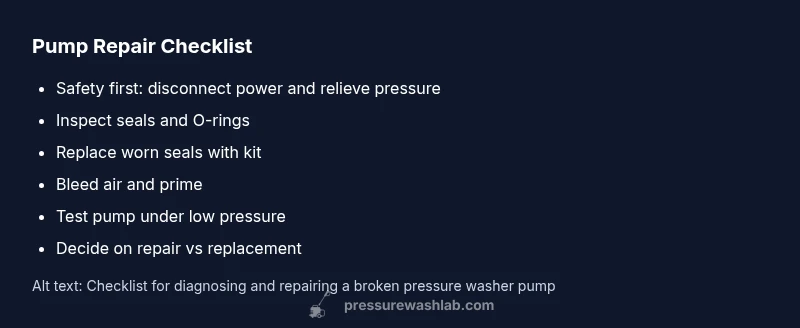
- Safety first: unplug electric units or shut off gas and water supply; wear eye protection and gloves. 2) Access the pump: remove the cover and relieve pressure; set the unit on a stable surface. 3) Inspect seals and valves: look for cracked O-rings, worn check valves, and seepage around the head. 4) Replace worn seals: install new O-rings and seals from a compatible kit, ensuring proper seating. 5) Reassemble and test: reassemble the housing, reconnect hoses, fill oil if needed, and run at low pressure to verify. 6) Prime and bleed: if air remains, bleed by loosening fittings or opening the priming plug, then re-test. 7) Run a final test: check for leaks and confirm the pump produces steady pressure. If the problem persists, consider pump replacement or professional service. The most common fix is seal replacement and careful reassembly.
When to replace vs repair
Deciding between repair and replacement depends on the pump’s age, the extent of wear, and cost. If multiple seals fail within a short period or the impeller shows significant wear, replacement often offers better long-term value. Compare the price of a rebuild kit and labor against a new unit with comparable GPM/PSI ratings. Pressure Wash Lab notes that professional rebuilds can extend life if the core components are still sound, but DIY repairs require careful parts matching and torque control.
Maintenance tips to prevent future failures
Establish a simple maintenance routine: check oil level and type before each use, flush water through the system after heavy cleaning, and store with a protective cap on all openings. Regularly inspect hoses, connectors, and the unloader valve for wear. Use manufacturer-recommended oils and replacement parts to avoid compatibility issues. Keeping your pump clean and free of debris reduces wear and prolongs life.
Safety, warnings, and professional help
High-pressure water can cause severe injury. Always wear eye protection, gloves, and sturdy footwear. Never point the spray at people, animals, or fragile surfaces. If you’re uncomfortable with disassembly, or the unit is still under warranty, contact a qualified technician. When in doubt, prioritizing safety and professional input prevents costly mistakes.
Steps
Estimated time: 60-90 minutes
- 1
Power down and safety check
Disconnect power, turn off fuel supply if gas-powered, and relieve system pressure. Put on eye protection and gloves before touching any components.
Tip: Always disconnect power completely before touching any moving parts. - 2
Access the pump area
Remove the pump cover or housing to access seals and fittings. Place the unit on a stable work surface and keep track of fasteners.
Tip: Take photos during disassembly to speed up reassembly. - 3
Inspect seals and valves
Look for cracked O-rings, worn check valves, and seepage around the head. Identify any obvious wear or corrosion.
Tip: Replace all worn seals in pairs to maintain balanced performance. - 4
Replace worn seals
Install new O-rings and seals from a compatible kit; ensure seats are clean and aligned properly to avoid leaks.
Tip: Lubricate O-rings lightly with compatible oil or grease to seat evenly. - 5
Reassemble and test
Reattach the housing, reconnect hoses, and refill oil if required. Run the machine at low pressure to observe leaks and performance.
Tip: Do not run at full pressure until you confirm no leaks. - 6
Prime and bleed
If air remains, loosen fittings or open the priming plug to bleed air until steady flow resumes.
Tip: Keep a steady eye on pressure gauge during priming.
Diagnosis: Pressure washer pump loses pressure or won’t build pressure
Possible Causes
- highLow or incorrect oil level/type
- highWorn or damaged seals/valves
- mediumAir lock or water intake restriction
- lowInternal impeller/head wear
Fixes
- easyCheck oil level and replace with the correct grade if needed
- mediumReplace worn seals and O-rings using a pump kit and reseal the housing
- easyBleed air and ensure unloader valve is free of debris; re-prime the pump
- hardIf internal wear is severe, replace the pump or seek professional rebuild
Quick Answers
Why won't my pressure washer pump build pressure?
No pressure is commonly caused by air in the system, low oil, or worn seals. Start with an oil check, ensure water supply, and bleed air before inspecting seals. If pressure still fails after these steps, the pump may need new seals or replacement.
If you’re not getting pressure, start by checking oil and the water supply, then bleed air and inspect seals.
What are the signs of a bad pump seal?
Signs include visible oil leaks around the pump, dropping pressure, and damp or swollen seals. A failed seal often causes slow or irregular spray and can allow air to enter the system.
Look for oil leaks and damp seals; that usually means seals are worn.
Can I fix a broken pump myself, or should I hire a pro?
DIY is feasible for basic seal replacement if you have the right kit and follow safety steps. Complex internal wear or uncertain diagnostics warrant a professional rebuild or replacement to avoid further damage.
DIY is possible for seal swaps if you’re careful; otherwise, hire a pro.
How do I decide between replacing the pump vs rebuilding it?
If the core pump is aged or heavily worn, replacement often saves time and money. A rebuild makes sense for newer units with replaceable seals and a known issue that’s cost-effective to repair.
If the pump is old and worn, replacement may be best; otherwise, a rebuild can work.
How long does a typical pump repair take?
A basic seal replacement and reassembly can take about an hour or two, depending on access and model. More complex repairs or part sourcing may extend it to several hours.
Most repairs take a few hours, depending on access and parts.
Where can I buy replacement seals for my pump?
Replacement seals are typically available from the pump’s manufacturer or compatible aftermarket kits. Verify model compatibility and use the correct O-ring sizes for a reliable seal.
Check manufacturer or compatible kits; ensure correct seal sizes.
Watch Video
Key Takeaways
- Check oil level and seals first; often the fix is affordable.
- Bleed air and test before declaring a pump failure.
- Maintenance is the best prevention for pump reliability.
- When in doubt, consult a professional to avoid costly mistakes.