Not Working Pressure Washer: Urgent Troubleshooting Guide
A practical, step-by-step guide to diagnose and fix a not working pressure washer. Learn quick tests, common causes, fixes, safety tips, and prevention from Pressure Wash Lab.

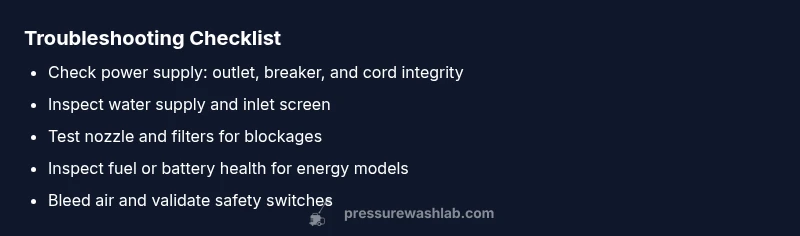
Not working pressure washer issues are most often caused by a simple electrical or fuel problem, or a blocked nozzle that prevents spray. Start by confirming the unit is powered and connected to a live outlet, then check fuel levels (for gas models) or the battery/charger (for electric models). If power and fuel are fine, inspect the nozzle, filter, and trigger gun for blockages. If unresolved, follow the diagnostic flow below.
Why a not working pressure washer happens
According to Pressure Wash Lab, the most common reasons a not working pressure washer won't start or pressurize fall into four buckets: electrical power, fuel or energy supply (gas units or battery chargers), water supply issues, and simple clogs or safety features. Even if the machine looks fine, a loose cord, tripped breaker, empty gas tank, low water inlet, or a dirty inlet filter can stop spray. Understanding these root causes helps you target fixes without guesswork. Pressure Wash Lab emphasizes that a methodical approach saves time and protects equipment from unnecessary wear. By recognizing patterns—power faults, fuel problems, water input restrictions, and obstructed flow—you can quickly rule out the obvious before diving deeper.
Quick checks you can do before digging deeper
Before tearing panels apart, run through fast, safe checks. Ensure the power cord is intact and plugged into a working outlet; reset any tripped breakers. For gas models, verify fuel level and that the choke is in the correct position. Check the water source: is the hose attached, pump primed, and inlet screen clear? Finally, inspect the nozzle and spray wand for visible blockages. A few minutes of careful inspection can save hours of troubleshooting later.
Symptom-specific guidance: no-start, no-spray, low pressure
No-start: power is present but the engine doesn’t turn over. Check the starter switch, safety switch, and ignition battery. No spray or weak spray: nozzle clogged or unloader valve stuck. Low pressure: check pump seals, unloader valve, and bypass leaks. Each symptom points to different systems; testing the correct component saves time. If you’re unsure, proceed with the diagnostic flow rather than random part replacement. Pressure Wash Lab recommends documenting symptoms to trace patterns across sessions.
Diagnostic flow at a glance
Symptom → quick test → probable cause → fix
- If the unit won’t power: test outlet, breaker, and cord integrity (high likelihood: power issue)
- If it powers on but no spray: check water supply and nozzle (medium likelihood)
- If it runs but has low pressure: inspect pump seals and unloader valve (medium)
- If gas model stalls after startup: inspect fuel lines and carburetor (medium) Use this flow to decide where to probe next and avoid replacing parts unnecessarily.
Step-by-step fixes for the most common causes
- Easy power fix: replace a blown fuse or reset the breaker, inspect the cord for visible damage. Tip: unplug the unit before any test.
- Water supply fix: ensure the hose is full of water, clean the inlet screen, and verify that the inlet valve isn’t closed.
- Nozzle and filter fix: remove nozzle, soak, and reinstall; clean filters with warm water. Tip: never run with a damaged nozzle.
- Fuel system fix (gas units): refill fuel, replace old fuel, and check the spark plug/ignition; ensure choke settings are correct. Tip: store gas safely.
- Unloader valve fix: if pressure remains low, adjust or replace the unloader valve; bleed air from the line. Tip: never force-valve adjustments.
Safety, maintenance, and prevention tips
Always unplug before any work; wear eye protection and gloves. Regularly inspect hoses for cracks and leaks; replace damaged components. Flush the system after heavy use and store in a dry place. Use manufacturer-recommended detergents and mist nozzles; do not mix incompatible chemicals. Pressure Wash Lab recommends keeping a simple maintenance log to catch issues early.
Common mistakes to avoid
Overlooking a loose outlet, ignoring a clogged filter, or using the wrong nozzle can cause poor performance or damage equipment. Rushing through diagnostics without verifying the simplest steps wastes time and may void warranties. Always verify power, water, and fuel before deeper checks.
When to call a professional
If you hear unusual noises, smell fuel, or see visible damage to the motor, pump, or cords, stop using the unit and contact a licensed technician. For gas engines, avoid running the unit until the carburetor and fuel system are checked. Pro technicians can test electrical integrity, pressure relief valves, and seals with proper tools.
How to maintain a healthy pressure washer long-term
Implement a routine: flush after use, drain fuel for storage, replace worn hoses, and clean filters monthly. Use protective covers to shield from dust and moisture. Schedule seasonal maintenance and keep spare parts on hand. Pressure Wash Lab’s approach to ongoing care reduces downtime and extends life.
Steps
Estimated time: 60-90 minutes
- 1
Verify power and electrical supply
Unplug, inspect plug and outlet, and test the circuit with a known-good device. If the outlet is switched or a GFCI is tripped, reset and re-test. Ensure the extension cord (if used) is rated for outdoor use and not damaged.
Tip: Keep the unit unplugged while inspecting cords. - 2
Check safety switches and trigger gun
Ensure the trigger mechanism operates freely and the safety lock engages correctly. If the trigger feels stiff, avoid forcing it and inspect for obstructions or worn components. Re-test after addressing any obstructions.
Tip: Do not pry or lubricate internal switches without the manual. - 3
Assess fuel or energy source
Gas unit: verify fuel level, replace old fuel, and check that the choke is in the correct position. Electric: confirm the battery is charged and the cord is intact. If you smell fuel, stop and address leaks first.
Tip: Use fresh fuel and proper outdoor-rated cords. - 4
Inspect water supply and inlet
Confirm the water source is on, the hose is free of kinks, and the inlet screen is clean. Check for leaks along the hose and tighten connectors as needed. Prime the pump if required by your model.
Tip: Avoid running dry; it can damage seals. - 5
Examine nozzle and spray wand
Remove the nozzle and inspect for mineral buildup or clogs. Soak in warm, soapy water if needed, using a soft brush. Reassemble correctly and ensure the nozzle matches your spray tip.
Tip: Never force a stuck nozzle. - 6
Check pump seals and unloader valve
Look for signs of wear or leaks at pump seals. If you hear whines or see leaking, tighten or replace seals. Adjust the unloader valve according to the manual to restore proper pressure.
Tip: Bleed the system after adjustments. - 7
Bleed air and test run
Bleed air from the line by running the unit with the spray gun open until a steady stream and pressure are established. Perform a brief test at low pressure to verify flow.
Tip: Wear eye protection during testing. - 8
Document and escalate if unresolved
If you still can’t get spray after these steps, collect model details, failure symptoms, and maintenance history before contacting support or a pro.
Tip: Have serial number handy.
Diagnosis: Machine won't start or spray, or you experience no or low pressure
Possible Causes
- highPower issue (outlet, breaker, or cord damage)
- mediumWater supply issue (kinked hose, air in line, empty inlet)
- mediumSafety switch or trigger misalignment
- mediumBlockages in nozzle, filters, or unloader valve
- lowFuel delivery issues (gas models) or battery charge (electric models)
Fixes
- easyTest outlet with a known-good device and reset the circuit breaker; inspect and replace damaged cords.
- easyPrime or tighten water supply; clean inlet screen and check hose for leaks.
- easyDismantle nozzle and filter, clean with warm water, reassemble; ensure proper nozzle size.
- mediumInspect unloader valve for leaks and recalibrate; bleed air from the line if needed.
- mediumFor gas models, refill fuel with fresh gasoline and check carburetor; for electric, charge or replace battery/charger
Quick Answers
Why won't my pressure washer start even though it is plugged in?
Check the outlet, breaker, and cord for power. If power is present, inspect the switch and safety circuit for faults. Re-test after addressing any issues.
First check the outlet and breaker, then inspect the switch.
Can a clogged nozzle cause no spray?
Yes, a blocked nozzle or filter can stop spray altogether. Remove the nozzle, clean or replace, and re-test.
Yes, a clogged nozzle can cause no spray.
What should I do if there is low pressure?
Inspect the unloader valve and pump seals for wear or leaks, and check the water supply. Replace or repair faulty parts as needed.
Low pressure usually means leaks or worn valves. Check the unloader valve.
Is it safe to run a pressure washer after cleaning the inlet screen?
Yes, once cleaned and reinstalled, run a short test with the nozzle aimed away from people. Ensure there are no leaks and that water flow is steady.
Yes, after cleaning, test with caution.
When should I call a professional?
If you hear unusual noises, smell fuel, or see visible damage to the motor, pump, or cords, stop using the unit and contact a licensed technician.
If you hear odd noises or see damage, call a pro.
Can maintenance help prevent future problems?
Regular maintenance reduces downtime. Flush after use, replace worn parts, and store properly to extend life.
Yes, routine maintenance helps prevent future issues.
Key Takeaways
- Start with power, water, and fuel checks.
- Clean or replace clogged nozzles and filters.
- Follow the diagnostic flow to identify the root cause.
- Call a professional if checks reveal pump or electrical damage.